With large complex software applications, builds can often be split into different steps and tasks creating a series of jobs for our build pipeline. On my current project we are utilizing Jenkins to implement Continuous Integration/Continuous Deliver (CI/CD) and between the jobs for compilation, smoke tests, acceptance tests and deployment across environments in several different VLANs, we had to have a way to orchestrate a series of jobs. We tried using a variety of plugins for these jobs including parameterized-builds, build pipeline, join and downstream-ext. However, using all of them pollutes the job configurations and creates a lot more maintenance overhead, that is very complex to maintain and far more difficult for a Jenkins novice, who may need to take over when I’m on vacation.
The Build Flow plugin enables us to define a high-level flow to orchestrate many jobs using a dedicated DSL (in this case, Groovy). Let’s take a look at how we’d set up and use the plugin.
Installation
Installation is fairly simple using Jenkin’s Plugin Manager.
- Login to Jenkins
- Click Manage Jenkins
- Click Manage Plugins
- Select the Available Tab
- Find the Build Flow Plugin and select the check box next to the plugin
- Click the Download now and install after restart button at the bottom of the screen
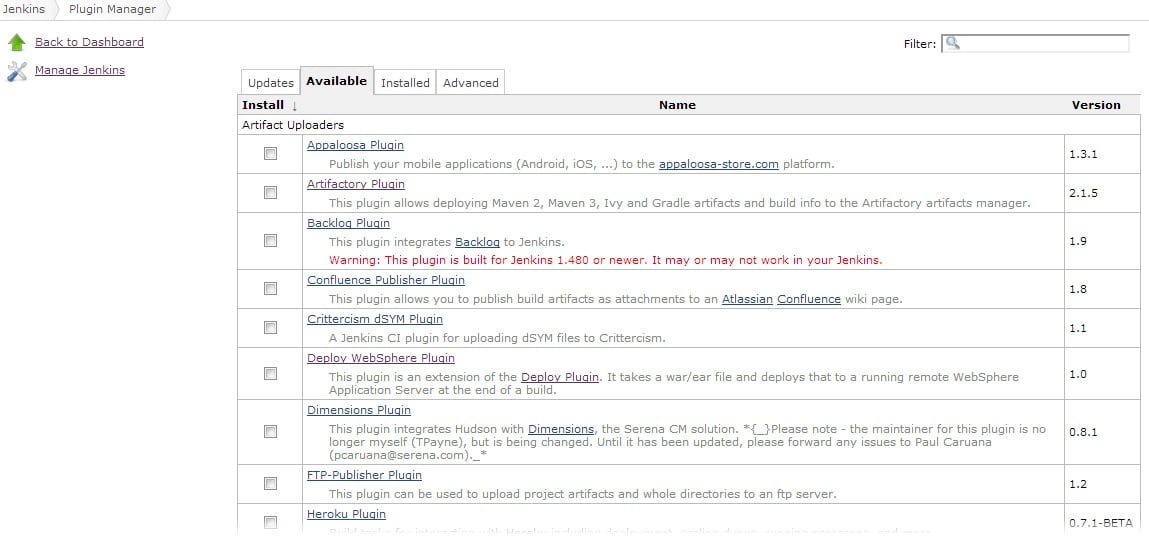
Jenkins Plugin Manager
After the application has restarted, you’re ready to use the application.
Creating Your First Build Flow
Making your own build flow is as simple as creating a new job. Click New Job and you will see a new kind of job called ‘Build Flow‘. Select the Build Flow option and now you only have to program the job using the flow DSL.
Under the Build Triggers section you will find a section to input the build flow DSL.
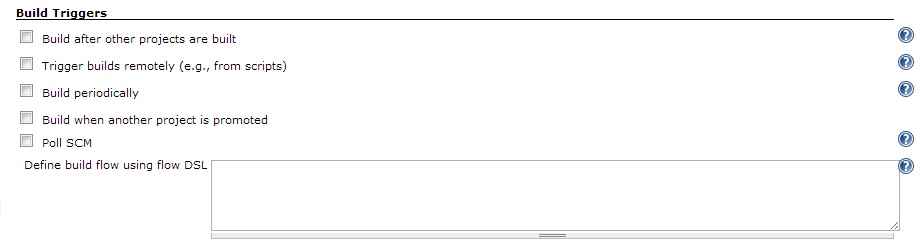
Build Flow DSL
For our first example, let’s assume we want to run two jobs in order. We want to compiling our code using a job named myProgram-compile and follow that by smoke testing our program using a job named myProgram-smokeTest. To configure the flow, we don’t have to create any upstream or down stream actions just two DSL instructions:
build("myProgram-compile")
build("myProgram-smokeTest")
Voila! Time to save and execute our build flow and the two jobs will be built in a sequential way.
Something More Complicated
So let’s suppose that our project also needs to run sonar (myProgram-sonar) on our code base after we compile. In order to save time and be as efficient as possible we would want to run our smoke tests at the same time. So in order to run these jobs in parallel we’d want to change our DSL script like so:
build("myProgram-compile")
parallel (
     {build("myProgram-smokeTest")},
     {build("myProgram-sonar")}
)
Now our script will compile our program and then proceed with running the smoke tests and sonar in parallel afterwards.
In addition the plugin also supports other operations like printing to the screen (out.println), retrying a job on failure (retry) and a function that works very similar to a try-catch block (guard-rescue).
Conclusion
The Build Flow plugin is pretty powerful at this early stage and still gets frequently maintained. In addition, it provides some interesting visuals to track progress and visualize the flow. Next, I’ll go over modularized jobs and parameters and how the build flow can help us orchestrate those jobs more efficiently.
