
Introduction
This is the first in a planned series of tutorials walking through the process of creating, deploying, and consuming a Node.js REST microservice.
In this post, I will demonstrate the initial setup and creation of the microservice and its routes. By leveraging just a few Node.js modules, you will quickly have a functional REST endpoint requiring minimal boilerplate or configuration.
Throughout this series, I will keep in consideration the tenants of a Twelve-Factor app. As appropriate, I will point out how the chosen design decisions conform to the various factors.
For now, the only requirement to have installed in order to follow along is Node.js 10.x or higher. This series of blog posts uses Node.js 10.x LTS, but any version above that should work equally well. Node.js is available for download at https://nodejs.org/
The code discussed in this post is available here: https://github.com/justin-coveros/node-ms-part-one/
Node Module Initialization
Begin by running npm init inside a clean directory in order to initialize your service. When prompted, fill out the options, or leave them as the default values. For example, the entry point defaults to index.js, but I set it to be server.js. This will generate the package.json file.
Here is an example of the generated package.json. You may manually modify this file as required.
{
  "name": "task-service",
  "version": "1.0.0",
  "description": "REST endpoint for Tasks",
  "main": "server.js",
  "scripts": {
    "test": "echo \"Error: no test specified\" && exit 1",
    "start": "node server.js"
  },
  "repository": {
    "type": "git",
    "url": "git+https://github.com/justin-coveros/node-ms-part-one.git"
  },
  "author": "Justin Hollingsworth",
  "license": "ISC",
  "bugs": {
    "url": "https://github.com/justin-coveros/node-ms-part-one/issues"
  },
  "homepage": "https://github.com/justin-coveros/node-ms-part-one#readme"
}
The entry point or main script filename is simply a matter of preference. In general, modules that will be imported by other modules should use index.js as the main script file, otherwise server.js or app.js should be used. The one advantage of using server.js over app.js is the ability to run npm start to start your application without any additional configuration. By default, npm start executes node server.js. To start your application with app.js as your entry point, simply configure the start script in package.json.
"scripts": {
  "start": "node app.js"
}
Dependencies
The initial set of functionality requires only three node modules:
koa – Koa is an HTTP middleware framework similar to Express. While not as popular as the more established Express, it does offer some advantages. These include asynchronous middleware functions, and stack-like middleware flow. This enables upstream and downstream functionality within the same middleware function, snaking from the top to the bottom, and then back up through to the top. The REST microservice will use Koa as the overall HTTP framework. The other two modules are plugins that enhance the functionality of Koa. (https://github.com/koajs/koa)
koa-body – This module adds a body parser to Koa, enabling POST and PUT routes to receive and consume request body data. (https://github.com/dlau/koa-body)
koa-better-router – This module enhances the routing capabilities of Koa, and provides a clean and simple way to organize the REST routes. (https://github.com/tunnckoCoreLabs/koa-better-router)
Install these three modules by running npm install koa koa-better-router koa-body. This will install the latest published version of each module. Because this is a new application, and these modules are designed to work together, it is unlikely that there will be any issue with installing the latest versions. However, it is important to always refer to the dependencies’ documentation to be aware of any potential issues.
The installed packages will automatically be added as dependencies to package.json. This explicit dependency declaration adheres to Factor II of the Twelve-Factor app. By keeping track of all the dependencies in package.json, anyone can easily download the code and install the required dependencies with npm install.
The generated semantic version specification (major.minor.patch) enables all dependency updates within its major release. For example, the version of koais specified as ^2.7.0, this encompasses all versions >=2.7.0 <3.0.0. The versions listed below were the latest dependency versions at the time this blog was written. These have been proven to work well together.
{
  "name": "task-service",
  "version": "1.0.0",
  "description": "REST endpoint for Tasks",
  "main": "server.js",
  "scripts": {
    "test": "echo \"Error: no test specified\" && exit 1",
    "start": "node server.js"
  },
  "repository": {
    "type": "git",
    "url": "git+https://github.com/justin-coveros/node-ms-part-one.git"
  },
  "author": "Justin Hollingsworth",
  "license": "ISC",
  "bugs": {
    "url": "https://github.com/justin-coveros/node-ms-part-one/issues"
  },
  "homepage": "https://github.com/justin-coveros/node-ms-part-one#readme",
  "dependencies": {
    "koa": "^2.7.0",
    "koa-better-router": "^2.1.1",
    "koa-body": "^4.1.0"
  }
}
Creating the Server
If following my example, the main script file is set as server.js. Let’s now create this script.
const Koa = require('koa');
const app = new Koa();

// Start the server
const server = app.listen(8080, () => {
  console.log(`Listening on 8080`);
});
With server.js defined, run npm start to start the application. The server is now listening on port 8080. Because no routes have been defined, or any other functionality configured, the server won’t do anything other than respond to requests with a 404 (Not Found) error. However, this demonstrates that the server is now listening for and responding to requests.

Adding Routes
The next step is to add the routes to which the service will respond. For organization of code, we will add these to a separate file for import into server.js. By using koa-better-router, we are easily able to define the routes separate from the koa app created in server.js.
Create a file lib/routes.js with the following content:
const koaBody = require('koa-body');
const Router = require('koa-better-router');

module.exports = () => {
  let router = Router({prefix: '/api'}).loadMethods();

  // Find one Task
  router.get('/task', async ctx => {
    console.log('Retrieving all tasks');
    ctx.body = [];
  });

  // Query Tasks
  router.get('/task/:id', async ctx => {
    const id = ctx.params.id;
    console.log(`Retrieving task ${id}`);
    ctx.body = {};
  });

  // Create Task
  router.post('/task', koaBody(), async ctx => {
    const values = ctx.request.body;
    console.log(`Creating new task with values ${JSON.stringify(values)}`);
    ctx.body = {};
  });

  // Update Task
  router.put('/task/:id', koaBody(), async ctx => {
    const id = ctx.params.id;
    const values = ctx.request.body;
    console.log(`Updating task ${id} with values ${JSON.stringify(values)}`);
    ctx.status = 200;
  });

  // Delete Task
  router.delete('/task/:id', async ctx => {
    const id = ctx.params.id;
    console.log(`deleting task ${id}`);
    ctx.status = 200;
  });

  return router.middleware();
};
Routes Overview
There are five routes created in lib/routes.js, corresponding to the typical CRUD REST routes. In the current form, these routes do not do much. Effectively, each route logs that a request was made and returns either an empty body or a status message of 200 (OK).
In the reference code above, /api is set as the route prefix, eliminating the need to specify /api for every route. Though the path for finding one task is defined as GET /task, because of the prefix, the endpoint is actually GET /api/task. By executing the function Router.loadMethods(), we are able to take advantage of the various method functions to specify the routes (e.g. post(…), get(…), put(…), delete(…)).
Each route takes an HTTP method (here defined as part of the chosen function), a path pattern (e.g. /task), and one or more middleware functions to execute. The query, update and delete routes demonstrate how to parameterize portions of the request url. The path /task/:id matches any path that begins with /task/ and is followed by any string. Koa makes available the value of this parameterized portion as a key on the ctx.params object.
Most of the routes execute a single function, but the create task (POST /task), and update task (PUT /task/:id) execute two functions. The first, koaBody(), from the module koa-body, parses the request, and adds the request body to the ctx object. This object contains all the request and response information and functionality and is passed between every executed middleware.
Adding the Routes to the Application
Now that the routes have been defined, it is time to add them to the server. Modify server.js to load these routes.
const Koa = require('koa');
const routes = require('./lib/routes');

const app = new Koa();

// Load the routes
app.use(routes());

// Start the server
const server = app.listen(8080, () => {
  console.log(`Listening on 8080`);
});
The routes are imported and then added to the application’s middleware stack with app.use(routes());.
Testing the Routes
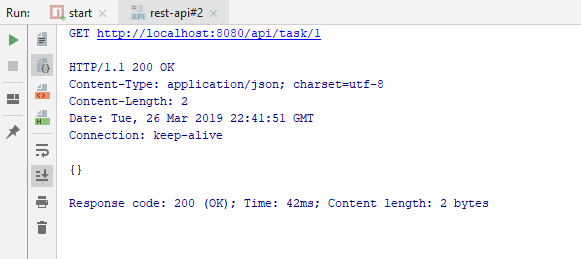
Restart the application; the routes are now ready to be tested. There are many ways you may choose to test your endpoints: Postman, browser developer tools, IDE, etc. Pick the one you prefer, and try out each route. Examine the server’s console output to verify the routes are properly configured.
Next Steps
In subsequent blog posts, I will demonstrate:
- Adding in testing to ensure correct and high quality code
- Connecting to a database for persistent data storage and fully functional routes
- Converting the application into a docker image
- Leveraging various security modules such are cors, csrf, and helmet
- Using websockets for push-based communication with the front-end UI
- Using ZeroMQ for simple message-based communication between microservices
- Creating a Node.js-based API gateway for simple proxying between layers
- Adding in RBAC checks to the routes
- Using dotenv for environment variable file configuration
- Converting to Typescript
- Using Jenkins for continuous integration
- And more


One thought to “Building a Node.js REST Microservice: Part One”
Pingback: Building a Node.js REST Microservice: Part Three - Coveros