
I have now twice spent multiple days trying to get a Gitblit server to communicate with a Jenkins server over SSH. This was done as part of ongoing work to update the Coveros SecureCI product with the goal of properly configuring both tools and a self-signed certificate to enable Gitblit’s post-commit jenkins hook to trigger builds. Given that this pain has now been self-inflicted twice I think it best to record it as a blog post.
Make sure to follow the SecureCI blog for updated releases. This work should find its way into the next release of the product. Hopefully saving you this pain. In the meantime, read on to learn how to configure all this for yourself.
First, the environment. Everything is installed on one machine. In fact, just getting the latest version of SecureCI will get you to the same base environment.
- Ubuntu 14.04 running on an AWS large instance
- Jenkins
- Gitblit
- Java 7
- Apache2 web server
You will also need to make sure that you have access to a user with sudo privileges on the machine. Again, setting up a SecureCI instance will get you such a user by default.
Finally, you will want both a Jenkins job and a git repository set up on the server in order to verify that everything is working.
Generating a Self-Signed Certificate
This server is behind a firewall with no publicly available IP so it just uses a self-signed certificate. When setting up a publicly-available server or at least one that might be required by different user communities it is recommended that an official CA-signed certificate be used.
Note that for clarity and for maintainability it is best to ensure that the server has a well-defined hostname. When using AWS, it is simple to use Route53 to define a publicly available (at least within your firewall) hostname but that is out of scope and not necessary for this tutorial. All that is needed is to add the hostname to /etc/hostname and map it to the server IP address in /etc/hosts. For the purposes of this tutorial we will call the server “ciserver”. Everywhere that you see the string “ciserver” in these instructions it is significant. That is one of the bigger issues I ran into. I found that sometimes I was using the hostname and other times the IP. Just use the hostname everywhere and save yourself a ton of headaches.
Follow these steps to ensure that your self-signed certificate is generated and configured properly:
- Edit /usr/lib/ssl/openssl.conf to add a Subject Alternative Name.
- At the bottom of the file add these lines
[alternate_names] DNS.1 = ciserver IP = [Private IP Address] - Find the [v3_ca] section and add this line:
subjectAltName = @alternate_names
- At the bottom of the file add these lines
- Generate the self-signed certificate using openssl (replace [State], [County], and [Organization] with something appropriate for your locale):
sudo openssl req -new -x509 -nodes -out /etc/apache2/ssl/ciserver.crt -keyout /etc/apache2/ssl/ciserver.key -subj '/C=US/ST=[State]/L=[County]/O=[Organization]/CN=ciserver'
- Configure the ca-certificate chain.
- Create the directory /usr/share/ca-certificates/ciserver
- Navigate to that directory and create a symlink to the certificate you just created above:
ln -s /etc/apache2/ssl/ciserver.crt
-
Modify /etc/ca-certificates.conf — add the following line to the bottom:
ciserver/ciserver.crt - Update the ca-certificates
sudo update-ca-certificates -f - Validate that the certificate was generated properly. You should see the Subject Alternative Names you entered in the section labeled “X509v3 extensions:”
sudo openssl x509 -in /etc/apache2/ssl/ciserver.crt -text -noout
- Import the certificate into the Java keystore. Note here that is is important to ensure that JAVA_HOME actually points to the same version of Java that is used by the java command. This may have been self-inflicted, but on my system I found that not to be the case. On ubuntu, check /etc/alternatives/java (it is a symbolic link) and see where it points and modify this command as necessary. This command will ask for a password for the keystore. The default is “changeit” if you haven’t already changed it.
sudo keytool -importcert -file /etc/apache2/ssl/ciserver.crt -alias ciserver -keystore $JAVA_HOME/jre/lib/security/cacerts
Configure Apache Usernames
Assuming you have set up authentication via Apache WebDav (this is the default on SecureCI) you will need to configure a dedicated user for both Gitblit and Jenkins to use when authenticating. This is done by using the htpasswd command. I will call this user “jenkins”. Enter the following command to give the jenkins user a password. The jenkins user does not need to be a system-level user. Note further that /var/lib/passwd/dav_svn.passwd is just the file I use on my system. Yours may differ. In that case use the name of your htpasswd file.
sudo htpasswd /var/lib/passwd/dav_svn.passwd jenkins
Configure Gitblit
Edit /var/lib/gitblit/data/gitblit.properties. Change the canonical web URL property:
web.canonicalUrl = https://ciserver/gitblit
Edit /var/lib/gitblit/data/groovy/jenkins.groovy. Replace all uncommented lines with the code below. This is needed to ensure that the hook can log in to the jenkins server properly. Providing a hash of the password in this file ensures that it is not in plain text in this file (though I readily admit that simply hashing a passcode is not particularly secure).
jenkinsUrl = gitblit.getString('groovy.jenkinsServer','https://ciserver/jenkins')

// define the trigger url
triggerUrl = jenkinsUrl + "/git/notifyCommit?url=${url}/r/${repository.name}"

authString = [Base64 hash of  the string "jenkins:[password]"]
conn = new URL(triggerUrl).openConnection()
conn.setRequestProperty("Authorization","Basic ${authString}")

// trigger the build
conn.getContent()
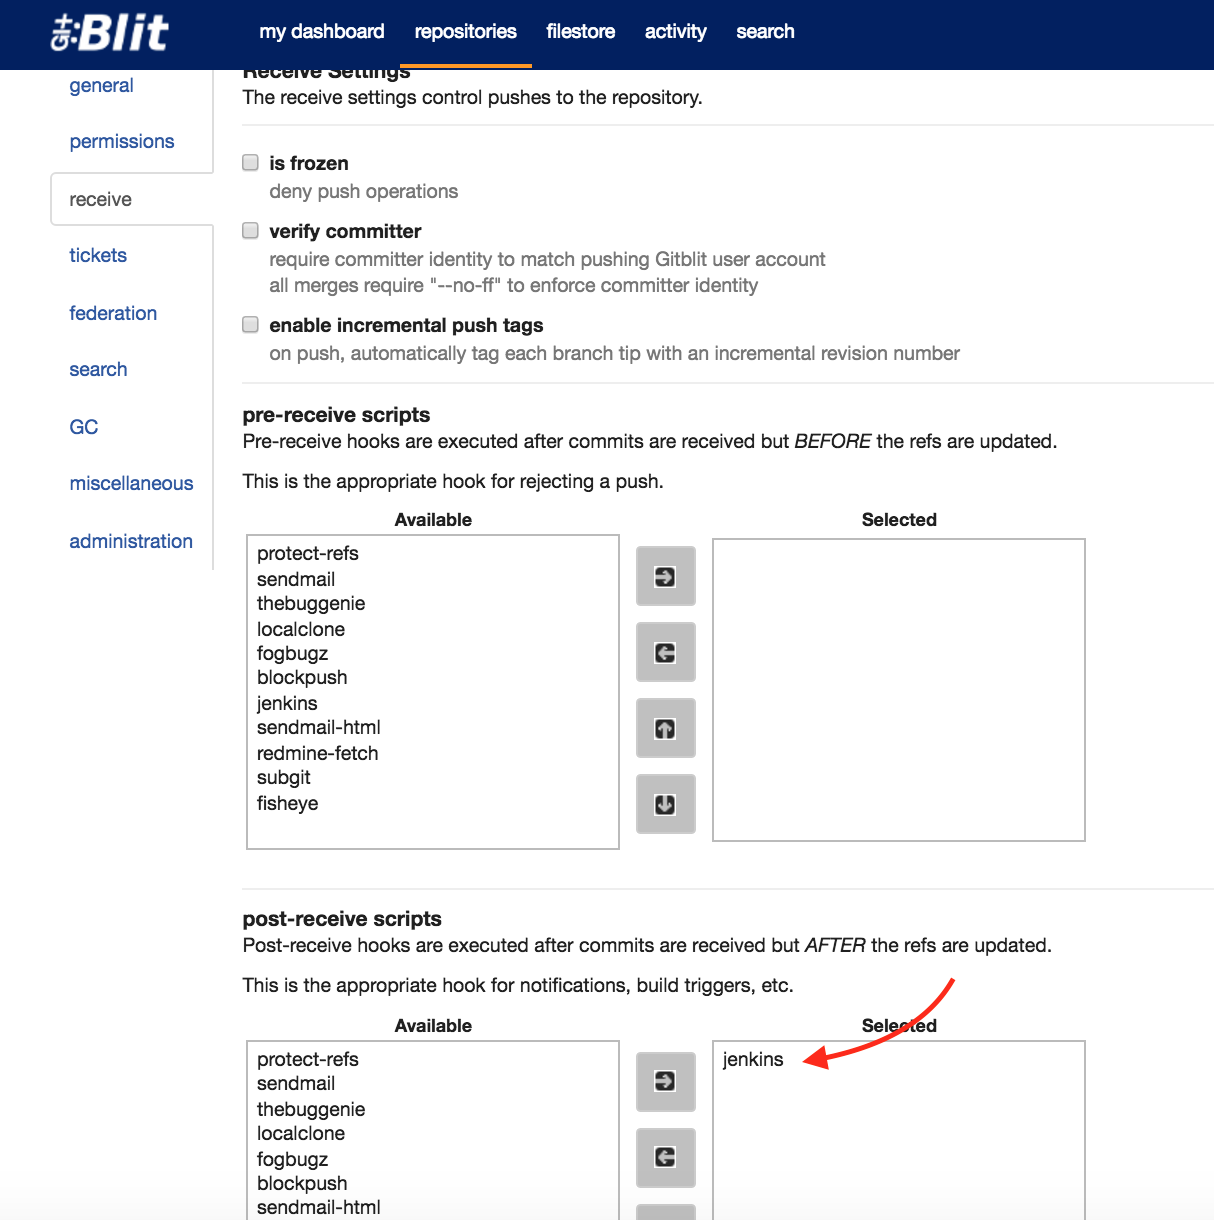
Also ensure that your git repository has the jenkins post-receive script configured. This can be done via the administration menu for your repository on the “receive” tab. Make sure it is the “post-receive” and not the “pre-receive”.
Configuring Jenkins
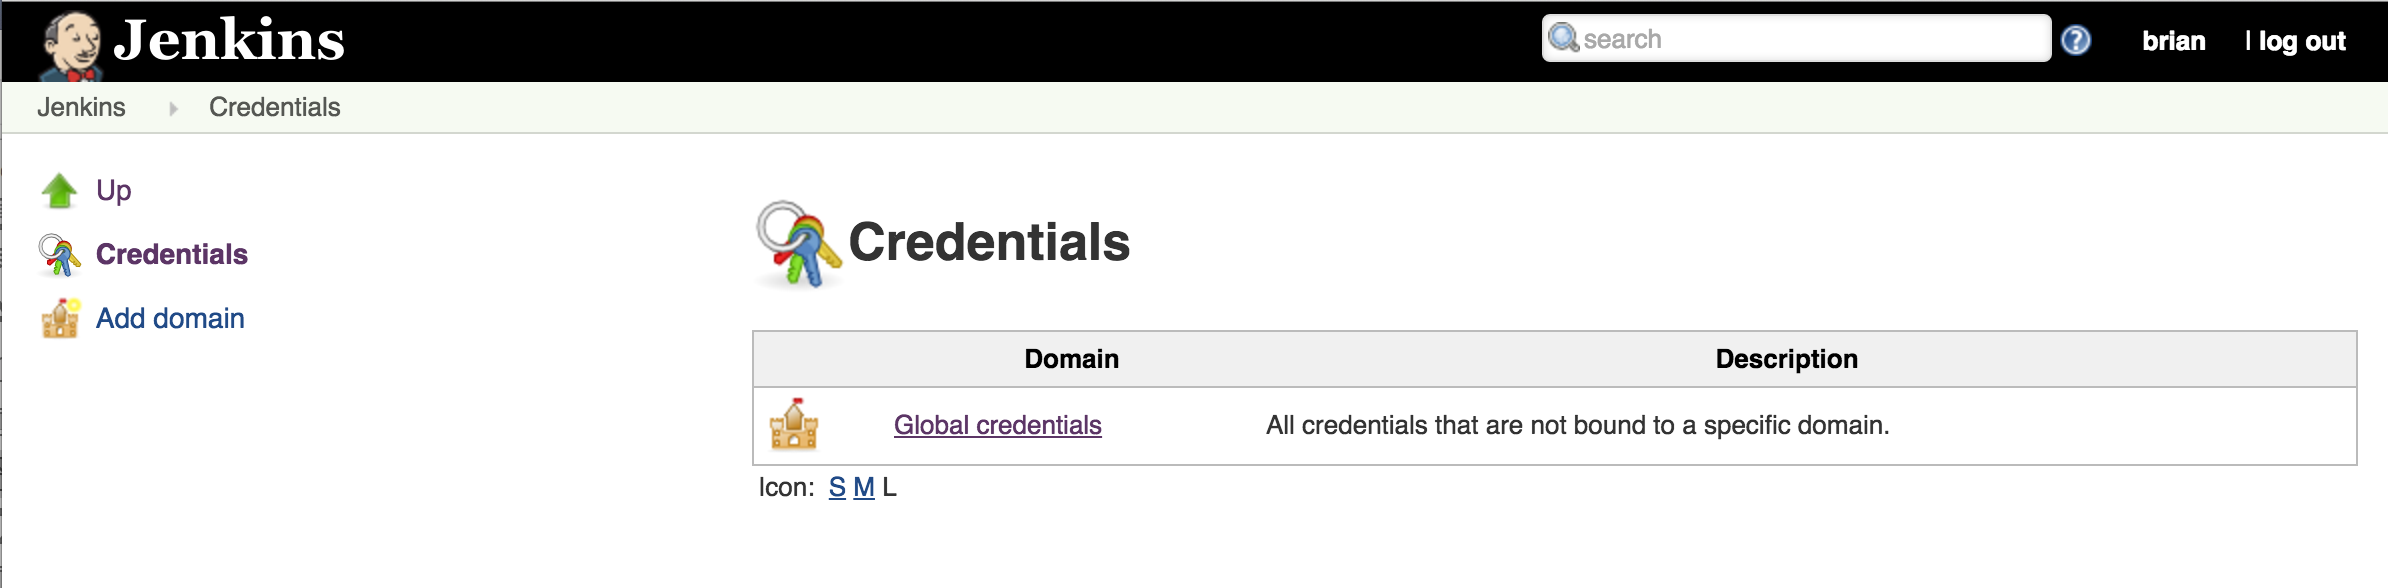
To configure Jenkins, simply add the jenkins username/password as a credential. This can be done from the Jenkins server home page via the “Credentials” link or directly from the project configuration when configuring the Git repository connection.
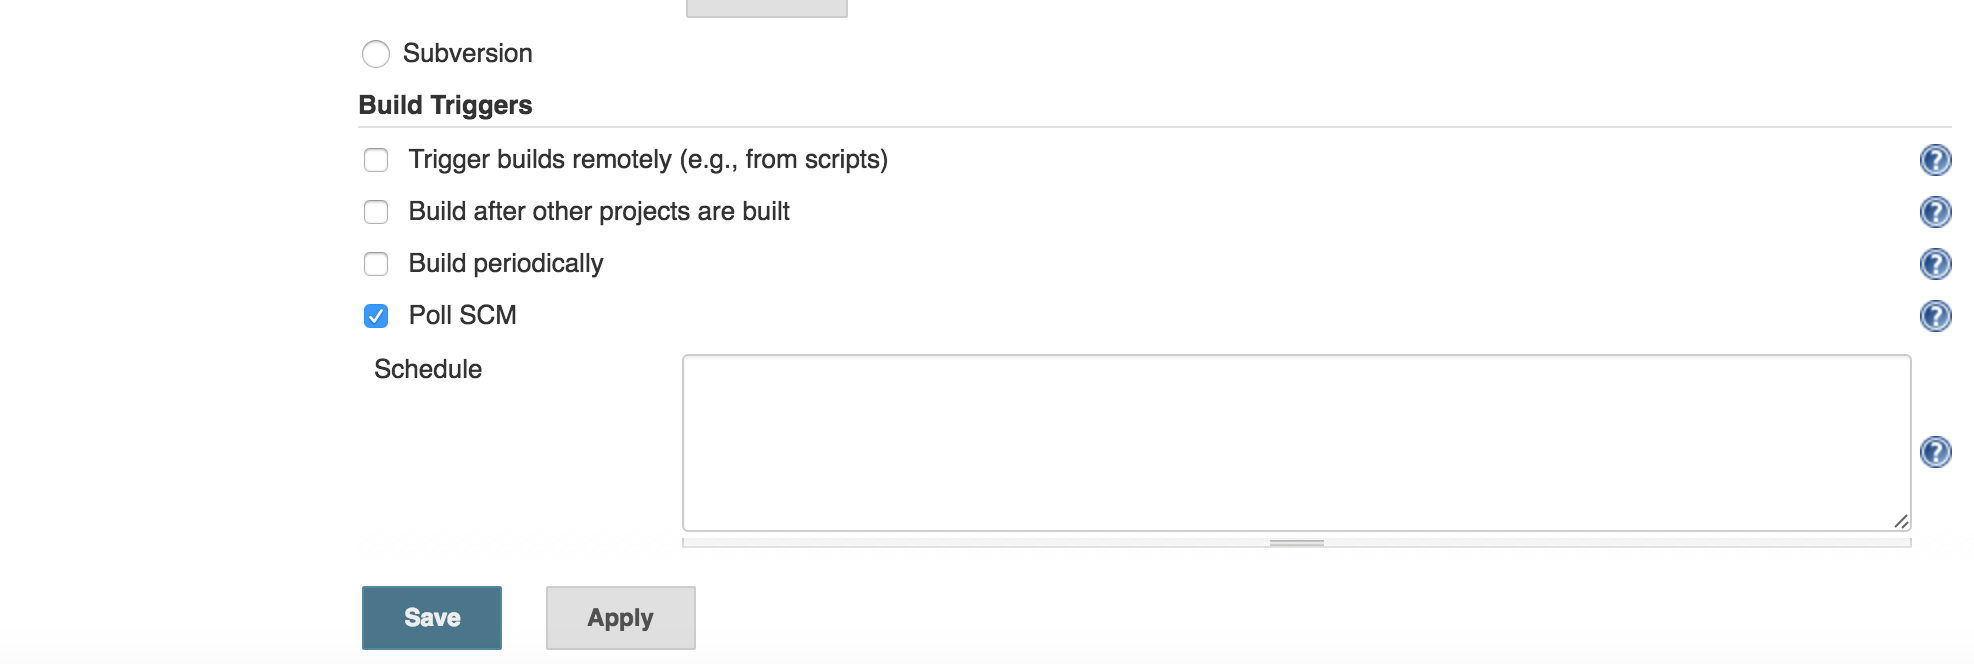
Also, the jenkins job should have the “Poll SCM” build trigger selected with no schedule specified.
Troubleshooting
If after following the above steps you still cannot get it to work, the following are items to try
- Ensure that the hostname is set properly in all files
- Self-signed certificate (look in /usr/lib/ssl/openssl.conf) or issue the command to validate the cert from above.
sudo openssl x509 -in /etc/apache2/ssl/ciserver.crt -text -noout - /etc/ca-certificates.conf
- /etc/hostname
- /etc/hosts
- /var/lib/gitblit/data/gitblit.properties
- /var/lib/gitblit/data/groovy/jenkins.groovy
- Self-signed certificate (look in /usr/lib/ssl/openssl.conf) or issue the command to validate the cert from above.
- Tail /var/lib/gitblit/log/gitblit.log and push a change to the server to look for errors
- PKIX exceptions indicate a problem with the certificate or the java keystore. Try running through the certificate generation process from the beginning. To do this successfully you will need to remove the cert from the java keystore (again, don’t forget to ensure the proper java path):
sudo keytool -delete -alias ciserver -keystore $JAVA_HOME/jre/lib/security/cacerts - A 401 error indicates an issue with the jenkins user. Either the password hash is incorrect in the jenkins.groovy file or you may need to add the user to the www-data group (the group that apache runs as)
sudo usermod -G www-data jenkins
- PKIX exceptions indicate a problem with the certificate or the java keystore. Try running through the certificate generation process from the beginning. To do this successfully you will need to remove the cert from the java keystore (again, don’t forget to ensure the proper java path):
- If there are no errors in Gitblit but the Jenkins job does not start, ensure that the job is configured properly
- Check that it points to the proper Git repo and that the credentials are specified properly
- Check that the build trigger is configured as above.
Hope that helps. Please comment if you have any problems.

