
An Open Source Test Automation Framework
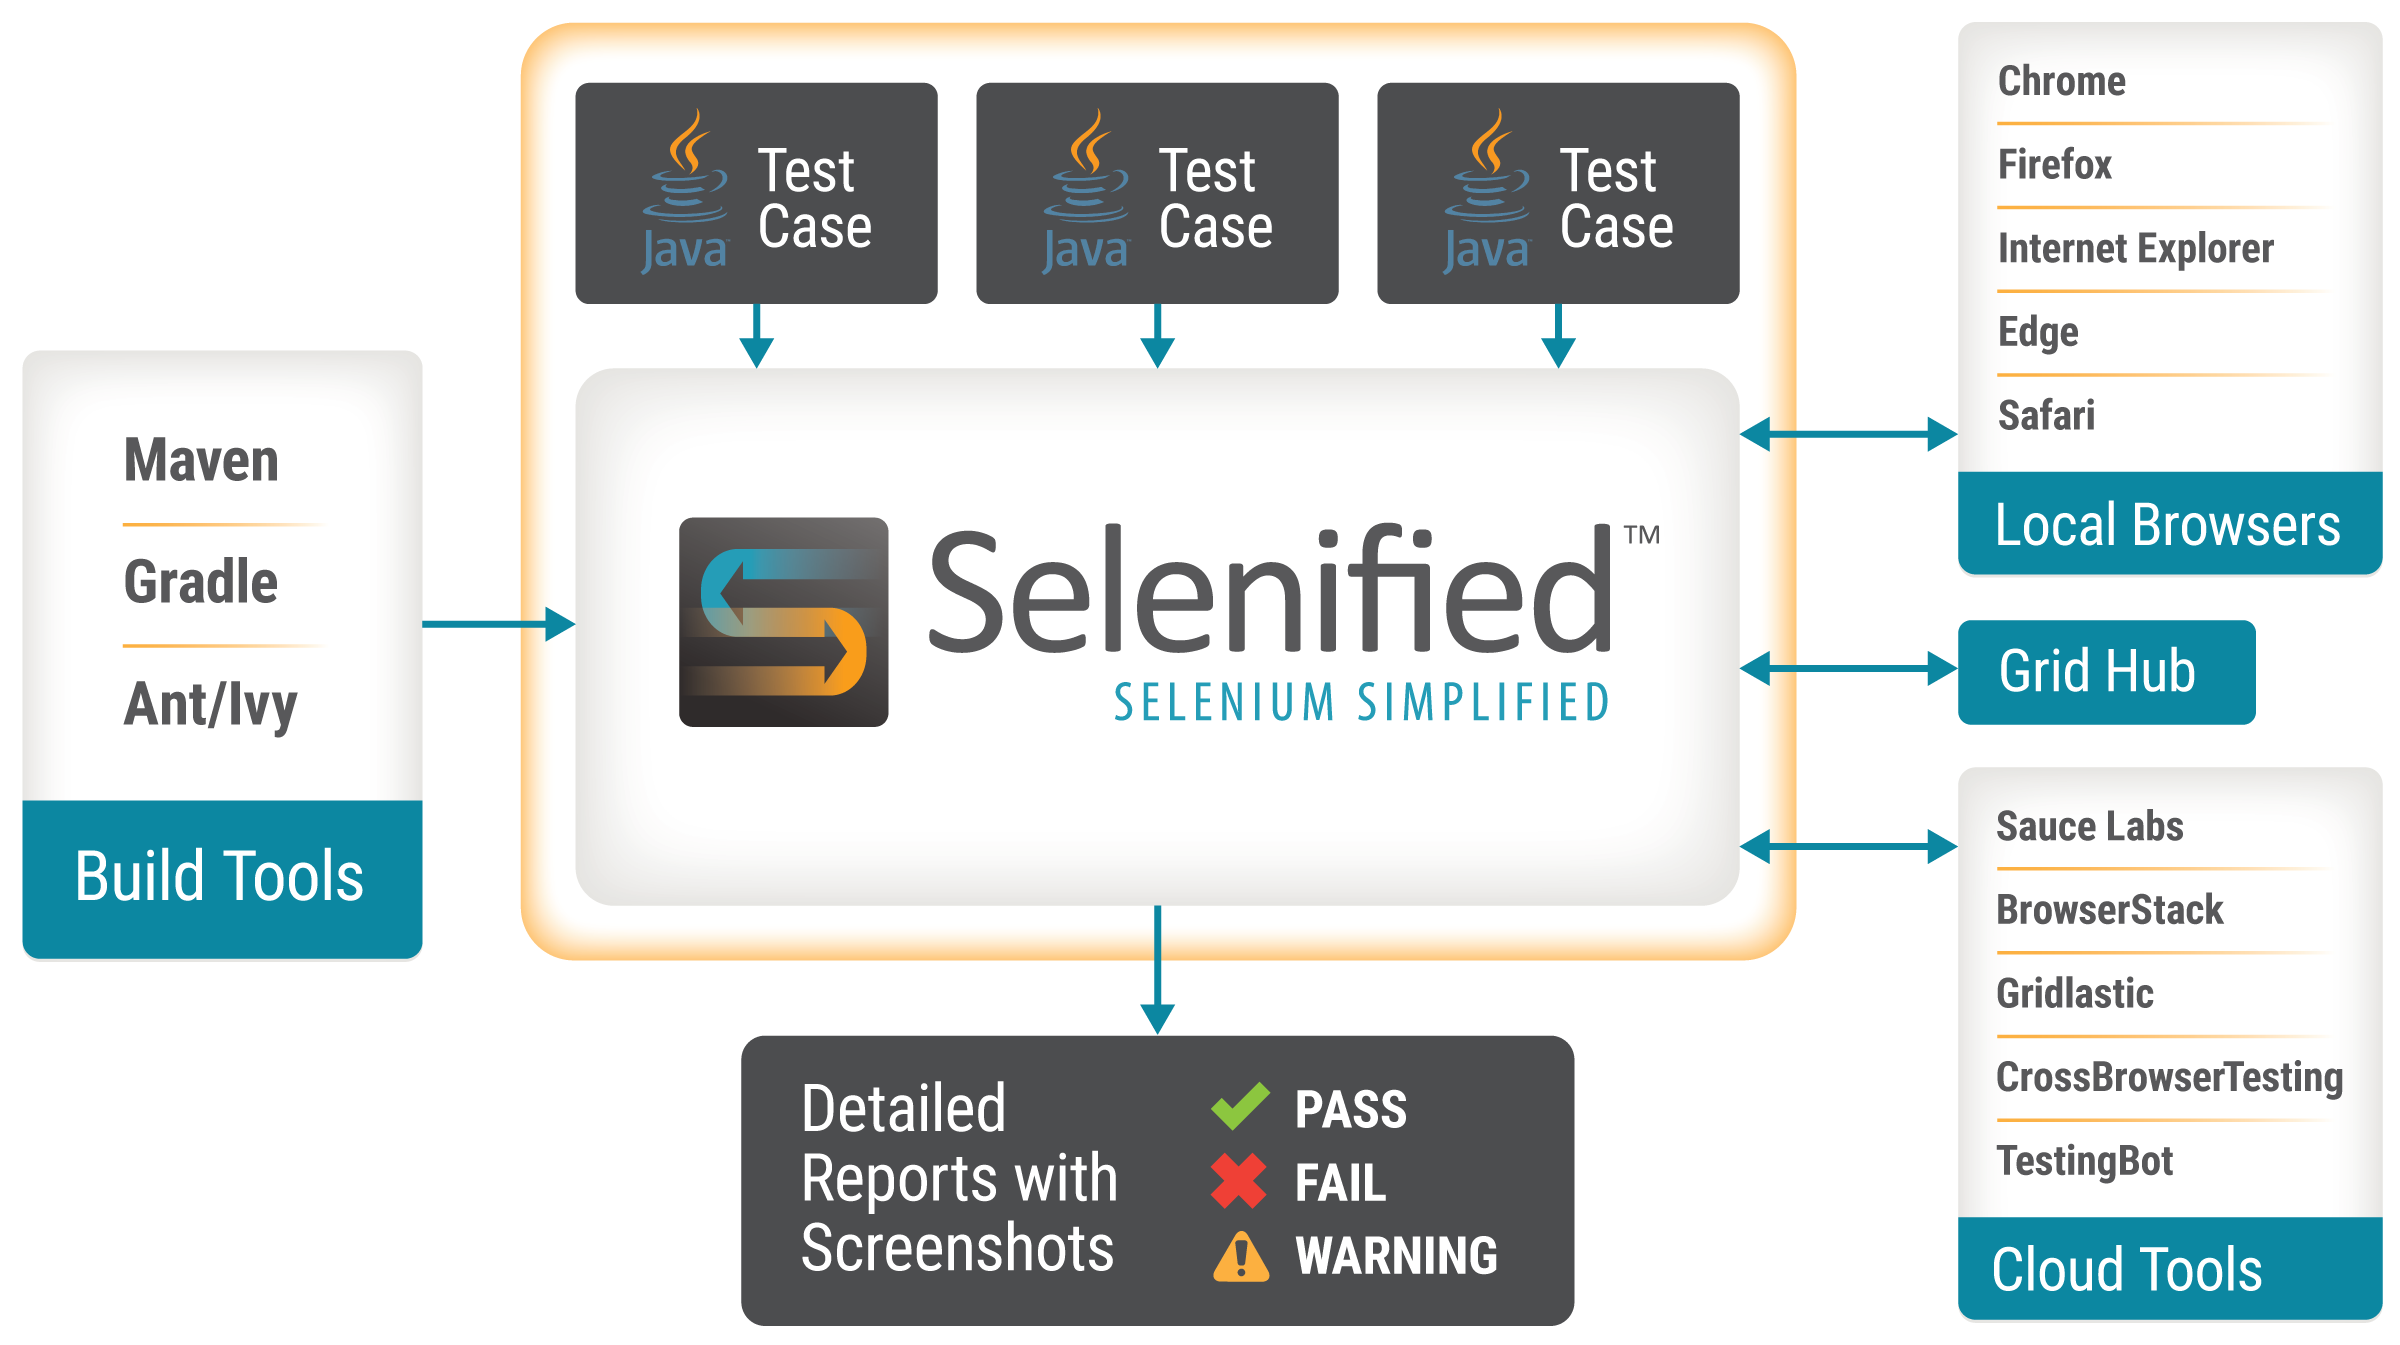
The Selenified Test Framework provides mechanisms for simply testing applications at multiple tiers while easily integrating into DevOps build environments. Selenified provides traceable reporting for both web and API testing, wraps and extends Selenium calls to more appropriately handle testing errors, and supports testing over multiple browsers locally, or in the cloud (Selenium Grid or other Cloud tools) in parallel. It can be a great starting point for building or improving test automation in your organization.
What Makes Selenified Unique
- Provides Java based framework for testing at web and API level
- Produces detailed traceable reporting with screenshots
- Wraps Selenium calls to more appropriately handle missing or slow to load page elements
- Supports simply running multiple tests over different browsers in parallel
- On local browsers
- Through Selenium Grid
- Via SauceLabs connect or LambdaTest
- Other Cloud tooling
- Built on top of TestNG
- Allows running tests through proxy server
- Supported on major build tools
- Maven
- Gradle
- Ant/Ivy
Getting Started
One of Selenified’s goals is to be a framework that is easy to drop in to an existing project. You can easily have Selenified running within minutes using an existing project, or a new one. Just add selenified.jar to your project, and you can start writing your test cases. If you’re using a build tool, simply add the jar as a dependency.
Maven
Update your pom.xml file to include (or add the dependency block to your current dependencies)
<dependencies>
    <dependency>
        <groupId>com.coveros</groupId>
        <artifactId>selenified</artifactId>
        <version>3.3.0</version>
        <scope>test</scope>
    </dependency>
</dependencies>
Ant
Update your ivy.xml file to include (or add the `dependency` block to your current dependencies)
<dependencies>
  <dependency org="com.coveros" name="selenified" rev="3.3.0" />
</dependencies>
Gradle
Update your build.gradle file to include (or add the testCompile line to your current dependencies)
dependencies {
  testCompile group: 'com.coveros', name: 'selenified', version: '3.3.0'
}
Writing Your First Test
It is suggested to setup your functional Selenified tests as integration tests, following typical java structure,
in the src/test/java folder, in packages if desired. A sample file is included below, which will compile and run
if you create the file src/test/java/ReadmeSampleIT.java, and paste in the contents.
import com.coveros.selenified.Locator;
import com.coveros.selenified.Selenified;
import com.coveros.selenified.application.App;
import com.coveros.selenified.element.Element;
import com.coveros.selenified.services.Call;
import com.coveros.selenified.services.Request;
import org.testng.ITestContext;
import org.testng.annotations.BeforeClass;
import org.testng.annotations.DataProvider;
import org.testng.annotations.Test;
import java.util.HashMap;
public class ReadmeSampleIT extends Selenified {
@BeforeClass(alwaysRun = true)
public void beforeClass(ITestContext test) {
// set the base URL for the tests here
setTestSite(this, test, "https://www.coveros.com/");
}
@DataProvider(name = "google search terms", parallel = true)
public Object[][] DataSetOptions() {
return new Object[][]{new Object[]{"python"},
new Object[]{"perl"}, new Object[]{"bash"},};
}
@Test(groups = {"sample"}, description = "A sample selenium test to check a title")
public void sampleTest() {
// use this object to manipulate the app
App app = this.apps.get();
// verify the correct page title
app.azzert().titleEquals("Coveros | Bringing together agile and security to deliver superior software");
// verify no issues
finish();
}
@Test(dataProvider = "google search terms", groups = {"sample"},
description = "A sample selenium test using a data provider to perform a google search")
public void sampleTestWDataProvider(String searchTerm) {
// use this object to manipulate the app
App app = this.apps.get();
// find the search box element and create the object
Element searchBox = app.newElement(Locator.NAME, "s");
//perform the search and submit
searchBox.type(searchTerm);
searchBox.submit();
//wait for the page to return the results
app.newElement(Locator.ID, "recent-posts-4").waitFor().present();
// verify the correct page title
app.azzert().titleEquals("You searched for " + searchTerm + " - Coveros");
// verify no issues
finish();
}
@Test(groups = {"sampleServices"}, description = "A sample web services test to verify the response code")
public void sampleServicesSearchTest() {
HashMap&amp;amp;amp;amp;amp;amp;lt;String, Object&amp;amp;amp;amp;amp;amp;gt; params = new HashMap();
params.put("s", "Max+Saperstone");
// use this object to verify the app looks as expected
Call call = this.calls.get();
// retrieve the zip code and verify the return code
call.get("", new Request().setUrlParams(params)).assertEquals().code(403);
// verify no issues
finish();
}
}That’s all there is to it. You can kick off your tests from your IDE, the commandline, or any way you normally would.
Want to see more details? Check out the README file. You can also checkout the documentation here

