
It has become standard practice for modern software development organizations to integrate open source components into their products, as it enables them to leverage existing solutions and technologies, thereby avoiding the need to reinvent the wheel. In fact, open source repositories like Maven Central are reporting record increases in downloads annually (30 Billion in 2015, up from 15 Billion in 2015).
While this is great for the industry as a whole, it presents a new set of challenges to organizations; how to manage the potential risks associated with open source software. All components are not created equally and every download could potentially expose your application to a licensing risk or worse, a security vulnerability (approximately, 7% of components found in Maven Central have known security vulnerabilities). Therefore, it is prudent to implement a policy and/or tool for managing your organization’s open source consumption; enter Sonatype Lifecycle.
Sonatype Lifecycle (also called IQ Server) helps manage these risks by providing control of the flow of components throughout the organization. It is a fully customizable policy engine which lets you decide what Maven components are acceptable within your application and which ones to filter out. IQ Server integrates with IDEs such as Eclipse, as well as Continuous Integration servers. This empowers both policy makers and individual developers to make intelligent software decisions early in the development cycle by providing in-depth information about individual software components .
Let’s walk through your initial IQ Server setup (including installation and implementing a set of sample policies). Before you get started, please be sure to obtain a license for IQ Server before beginning this tutorial as it is required.
Installing IQ Server as a service
We will be setting up IQ Server as a service on an Ubuntu instance, this ensures the application will always be available when the server reboots.
1. Download Nexus IQ Server here, and a set of sample policies here
2. Create an installation directory in your desired location:
mkdir /opt/nexus-iq-server
3. Navigate to the newly created directory, then download and unarchive the IQ Server jar
cd /opt/nexus-iq-server

sudo wget https://download.sonatype.com/clm/server/nexus-iq-server-1.24.0-02-bundle.tar.gz

sudo tar -xzvf nexus-iq-server-1.24.0-02-bundle.tar.gz.
4. Create and configure a user for the IQ Server:
sudo adduser iqserveruser
5. Change the ownership of the installation folder to the new user
sudo chown -Rv iqserveruser /opt/nexus-iq-server
6. Create a text file named nexus-iq-server, then paste the following code in the file and save. This is script which will start/stop the service as needed.
#!/bin/sh
#
#
NEXUS_IQ_SERVER_HOME=/opt/nexus-iq-server
VERSION=1.22.0-01
RUN_AS_USER=iqserver
javaopts="-XX:MaxPermSize=128m"

do_start(){
cd $NEXUS_IQ_SERVER_HOME
su -m $RUN_AS_USER -c "java  $javaopts -jar -jar nexus-iq-server-$VERSION.jar server config.yml > /dev/null 2<&1 &"
echo "Starting IQ Server as a service"
}

do_stop(){
pid=`ps aux | grep nexus-iq-server | grep -v grep | awk '{print $2}'`
kill $pid &&
echo "Killed nexus-iq-server - PID "
}

do_console()
{
    cd $NEXUS_IQ_SERVER_HOME
    java -jar $JAVA_OPTIONS nexus-iq-server-$VERSION.jar server config.yml
}

do_usage()
{
    echo "Usage: nexus-iq-server [console|start|stop]"
}

case $1 in
console) do_console
;;
start) do_start
;;
stop) do_stop
;;
*) do_usage
;;
esac
7. Next, add this to your system startup scripts by running the following commands:
sudo su
cp nexus-iq-server /etc/init.d/
cd /etc/init.d
update-rc.d nexus-iq-server defaults
8. Your IQ Server should now automatically start when your server boots up/restarts. You can also manually start/stop the service using the commands:
sudo service nexus-iq-server start

sudo service nexus-iq-server stop
9. You can now start the service, then navigate to the login page via your web browser using the at “:8071”.
Note that the default port is 8081, but it can be changed through the IQ Server configuration file.
10. Login in the default username/password combo admin/admin123 and ensure everything is working.
Implementing your First Policies
Now that we have IQ Server up and running, we will dive into policies and walk through implementing a sample set, but first let’s discuss what a policy is in this context. Policy in LifeCycle refers to a set of guidelines for consuming open source software within an organization. These are written rules which specify what components (and versions) can be downloaded and incorporated into your applications. IQ Server will use these rules to identify and prevent risk so it is absolutely critical that these are well thought out and properly socialized to your teams.
A well defined policy will be specific and comprehensive, covering all the major risk areas (Security, Licensing, Architecture). Among other things, it must communicate the severity of the risk and should be actionable, providing acceptable recourse for rectifying violations. In other words, your policy should not only detect a vulnerable component, it should tell you how to mitigate this vulnerability. For example, a policy which blocks a specific version of struts should provide a reason as well as what versions are allowed.
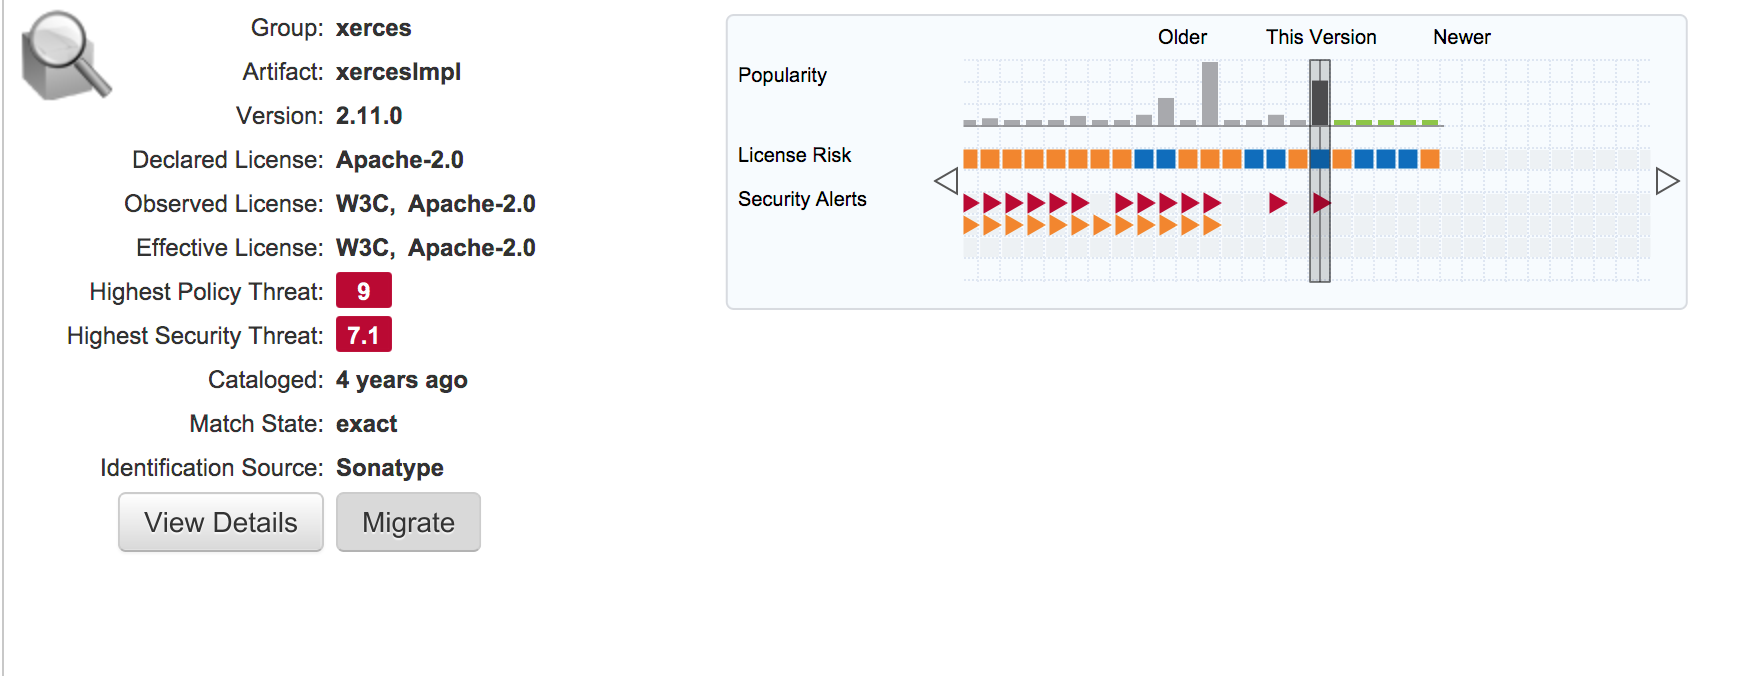
Here is an example of the information provided by IQ Server for a component which poses a severe security risk. As we can see it meets all of the criteria outlined above, providing the developer with the ability to assess and choose from several different versions of the component
Developing and applying effective policies is an essential part of getting the most out of IQ Server and will involve an analysis of your domain, but as mentioned before we will implement a set of sample policies to get you started. If you haven’t already done so, please download them here
It is recommended to take a top-down approach to implementing policies, so you will first want to create a set for your entire organization. These can then be inherited down to various groups and applications they support, where they can be customized. To that end, we will create a “root organization”, then import our sample policy to this organization, we will then create an application within it and apply these policies, thus mimicking the structure we might find in a typical software development shop.
Create a Root Organization
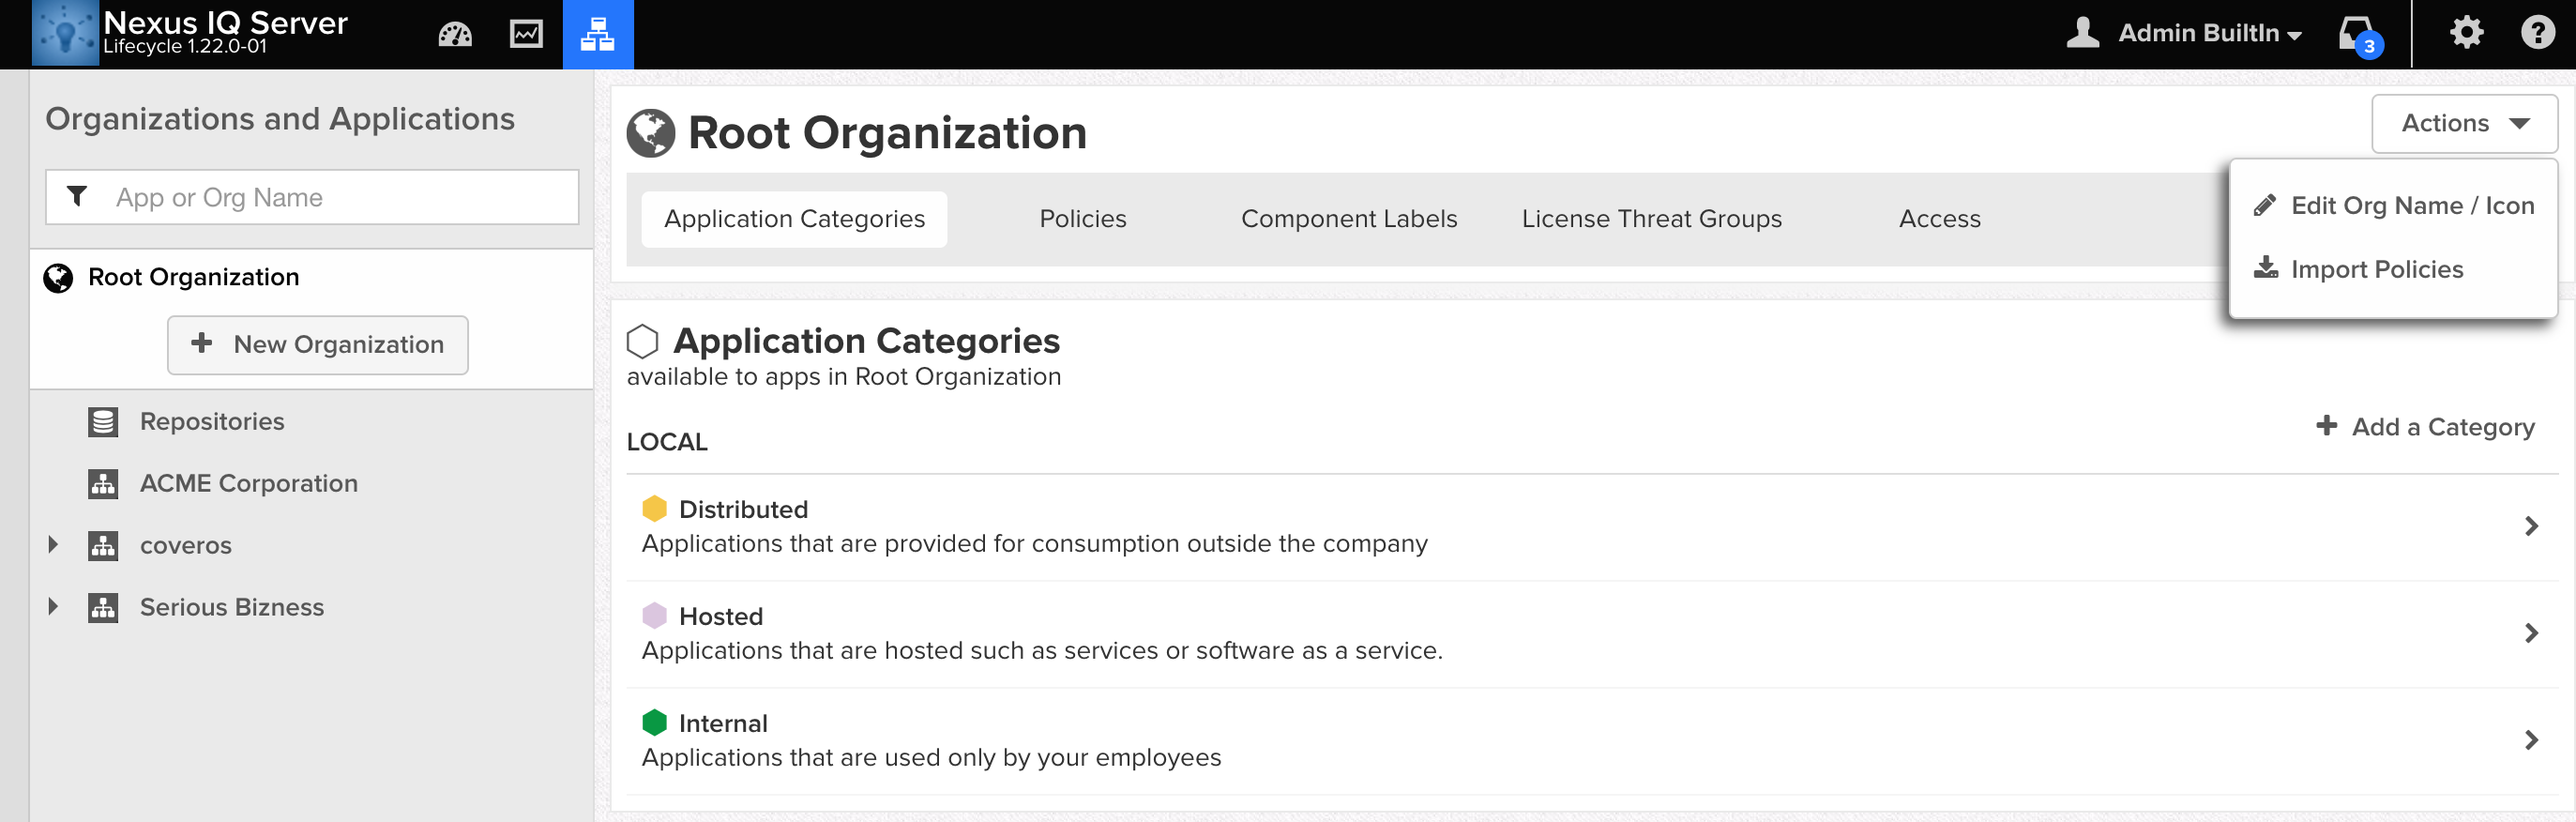
- Click the Organizations and Policies icon on the upper left section on the page.
- Click the New Organization button on the left hand menu, then name your new org and select Create.
- Next we will import our sample policies by clicking Actions->Import Policies and selecting your previously downloaded JSON file. Your policies have now been imported, next we will add an application and perform a scan using these policies.
Add and scan application
- Select your newly created organization and click the New Application button, then name your application and assign an ID
- Select the application and click Actions->Evaluate Binary to upload your application file
- Select Build from the Stage drop down menu and click Upload. IQ Server will then upload the binary file and run a scan of the application.
- Once the scan is complete, click the View Report button, and you should see a customized report showing any vulnerabilities and policy violations in your application. Feel free to review and modify your policies to see how they affect your report.

In the next post, I will show how to integrate IQ Server with your Eclipse IDE and Nexus Repository, in order to enforce these policies across your development teams.


One thought to “Getting Up and Running with Sonatype Lifecycle”
Pingback: Integrating Sonatype LifeCycle with Eclipse