
What is Continuous Integration (CI)?
Continuous Integration is a DevOps software development practice of merging small code changes frequently, rather than merging in a large change at the end of the development cycle. Continuous Integration allows developers to integrate code into a shared repository several times a day. CircleCI is a continuous integration platform that supports your development processes by automatically building and testing code changes, providing immediate feedback on the success of the change.
What is CircleCI?
CircleCI is a cloud-based continuous integration tool which allows you to quickly integrate with GitHub, GitHub Enterprise, or Bitbucket to build and test your application. CircleCI automatically runs each build in a clean virtual machine. This allows developers to test their application at every commit. 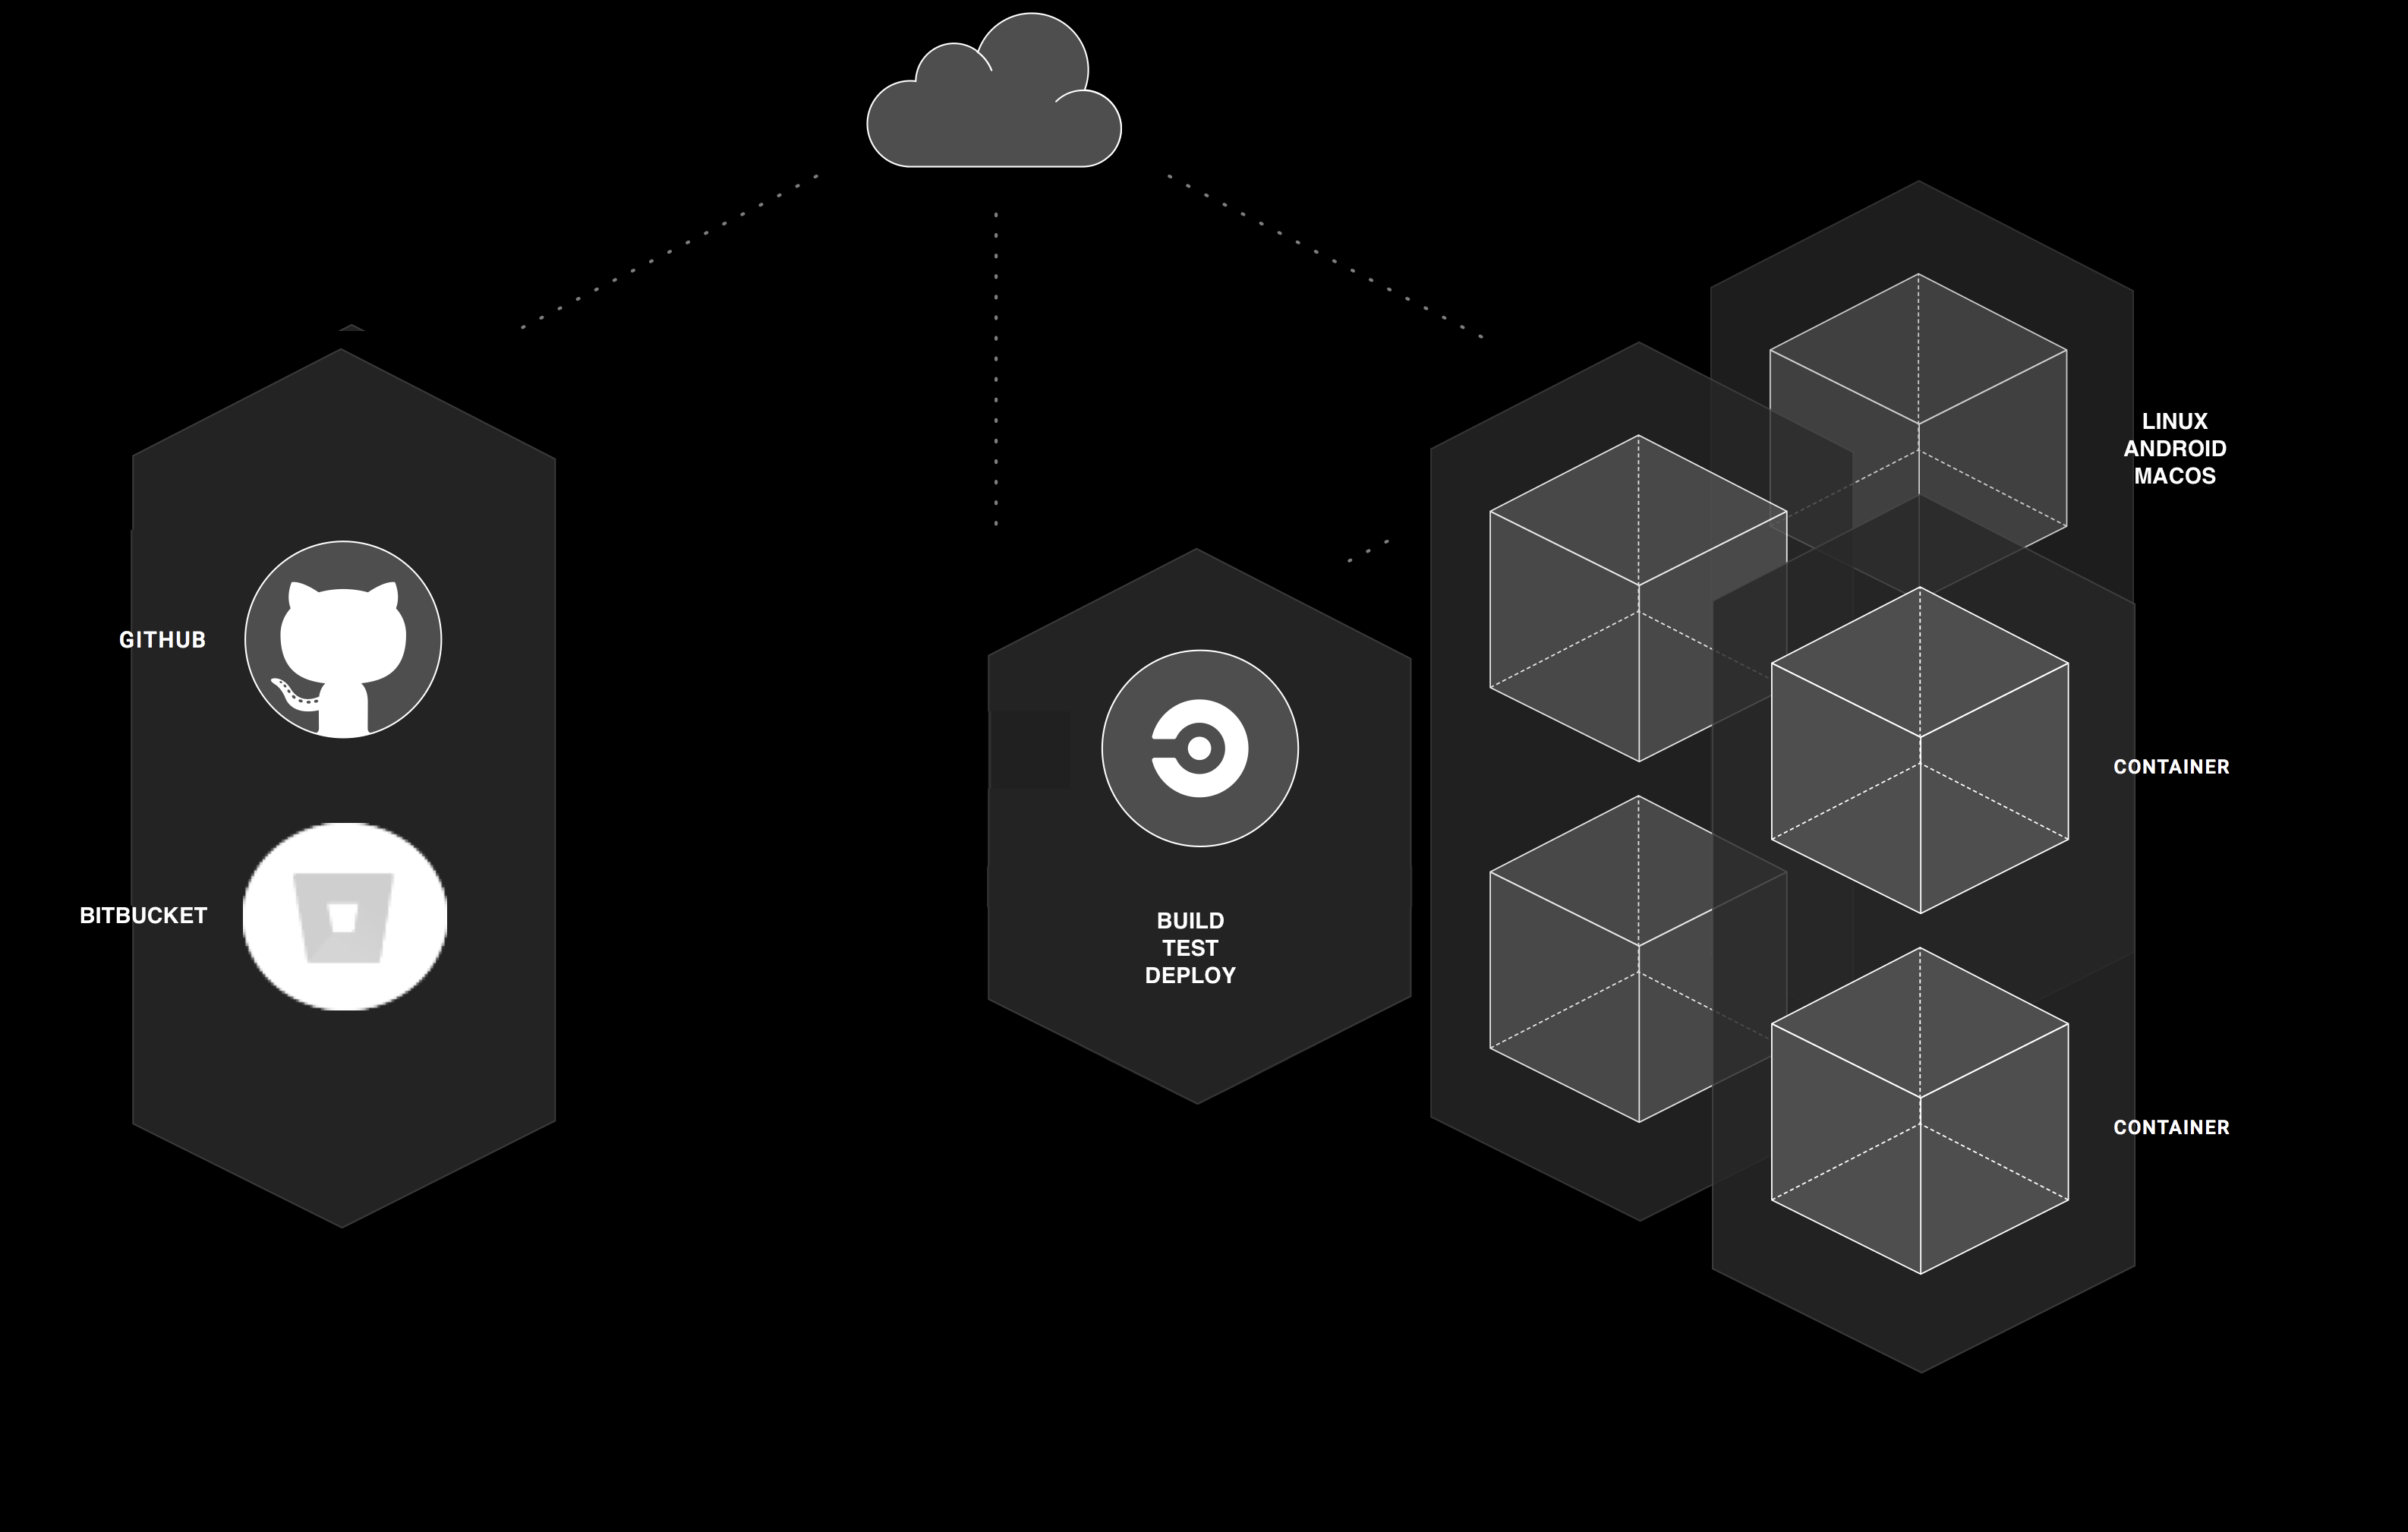
Before jumping into building a CircleCI build, we should first review some important terms.
Common terms to remember when using CircleCI:
- Projects – shares the same name of the associated code repository
- Following a project – enables user to subscribe to email notifications for the project build status
- Orbs – packages of configuration that you either import by name or configure inline to share within and across projects.
- Steps – a collection of executable commands which are run during a job
- Job – a collection of steps, which are all executed in a single virtual machine or container that a user plans on running
- Workflows – enables you to run the jobs in “build steps” or stages
- Workspaces – workspaces can be used to transfer files to downstream jobs as the workflow progresses
Next, we will create a short build that displays some of the different features of CircleCI. In this tutorial, we’ll look at building a pipeline for a sample hello-world application that is hosted in GitHub using CircleCI.
1. Create Repository
First sign into GitHub.com and create a new repository.
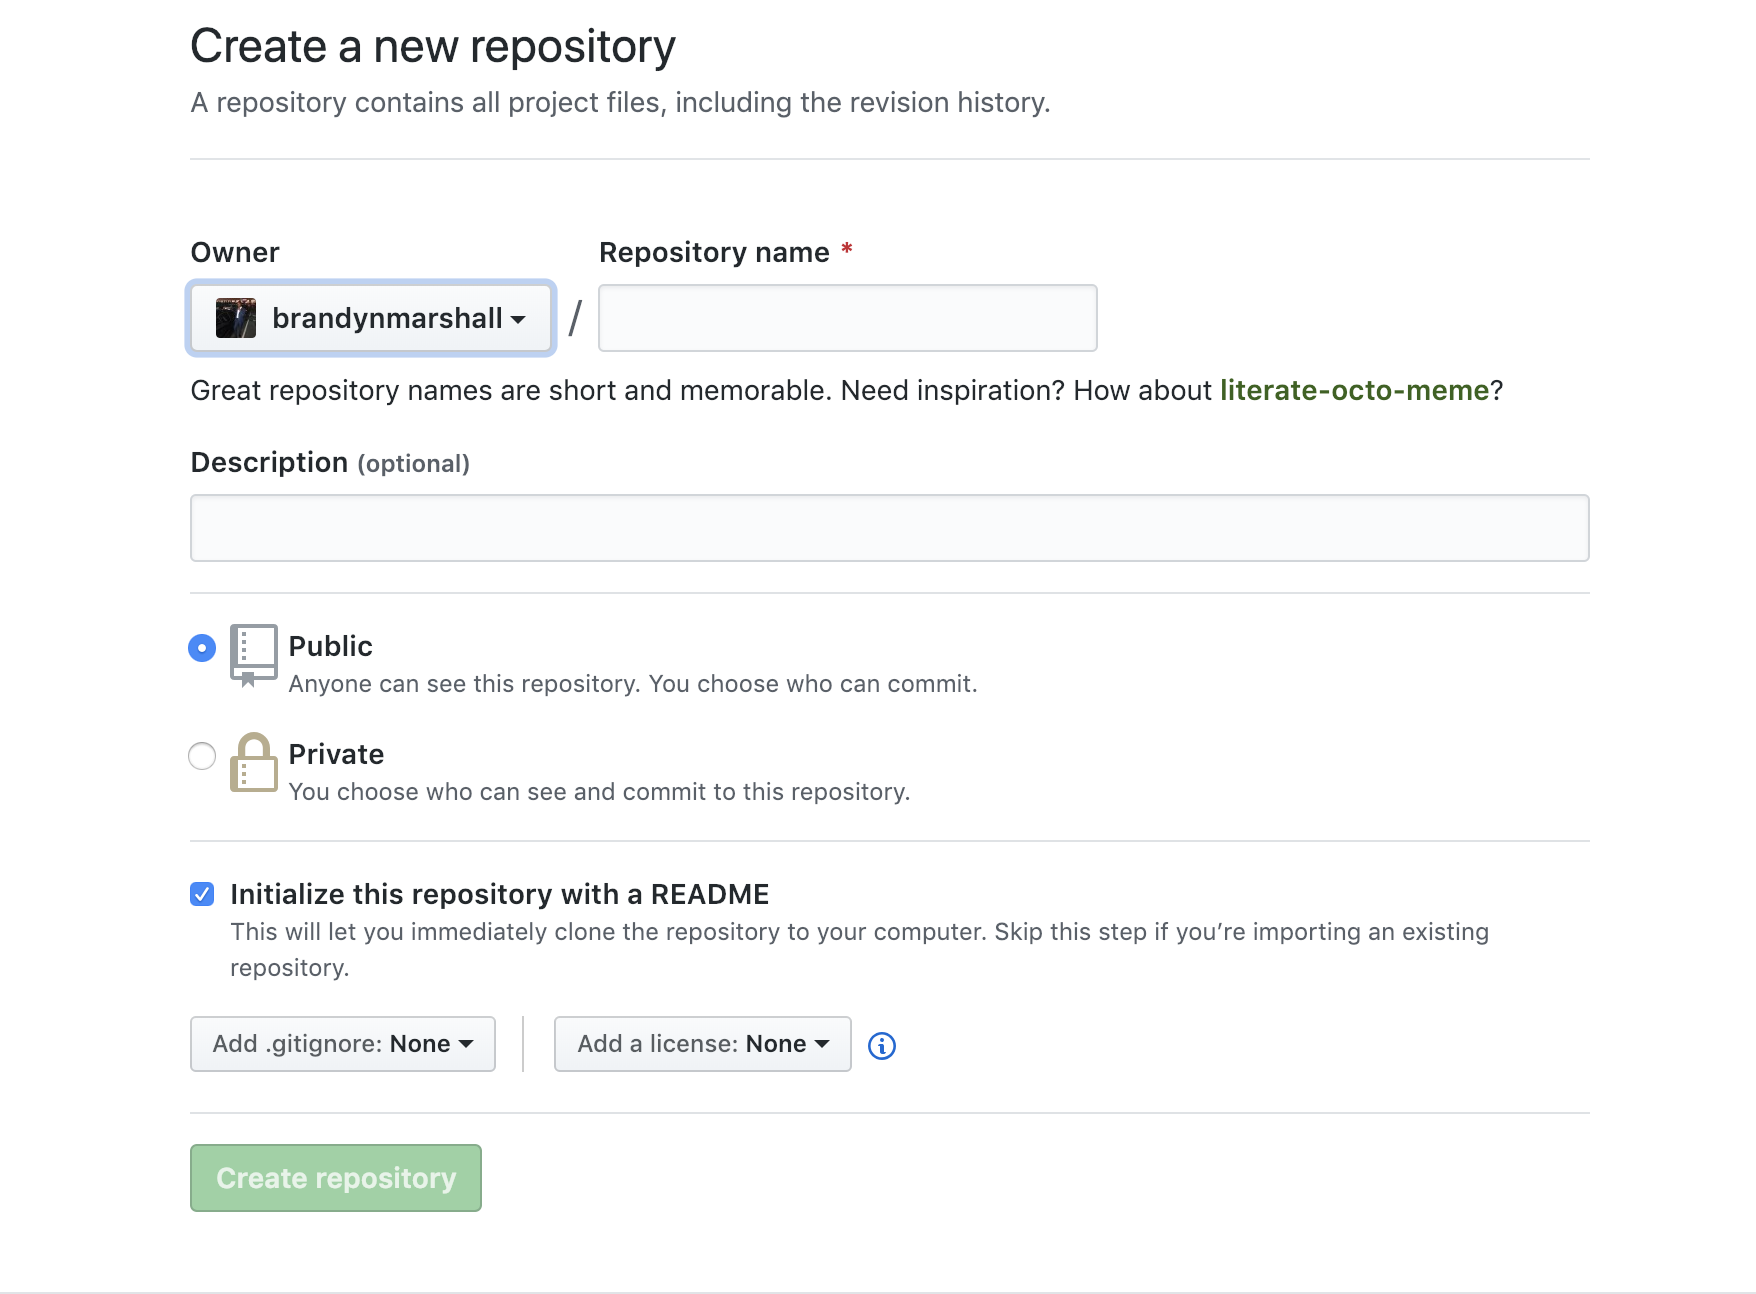
Name the repository anything and make sure you check the box beside “Initialize this repository with a README”.
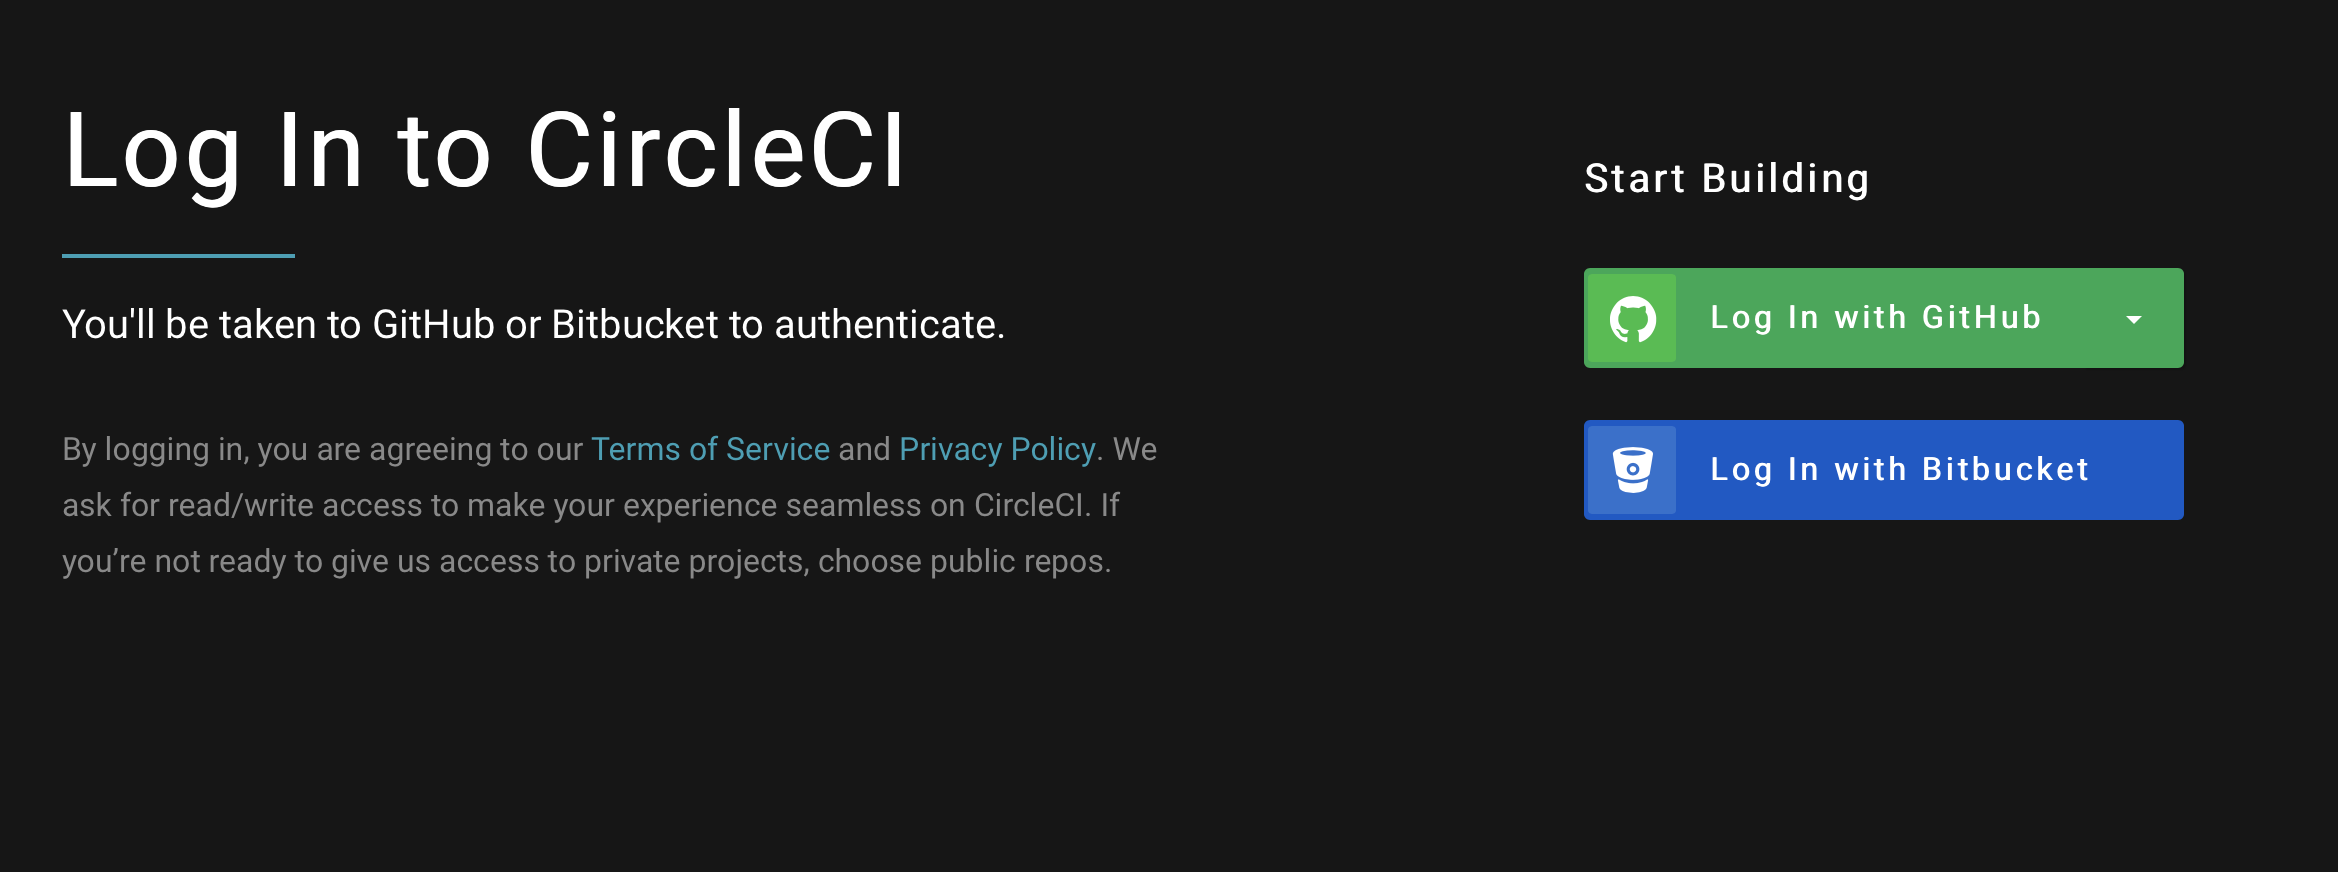
2. Authenticate CircleCI with GitHub Account
Register using your GitHub account.
Access circleci.com and select the green button that says “Log In with GitHub”.
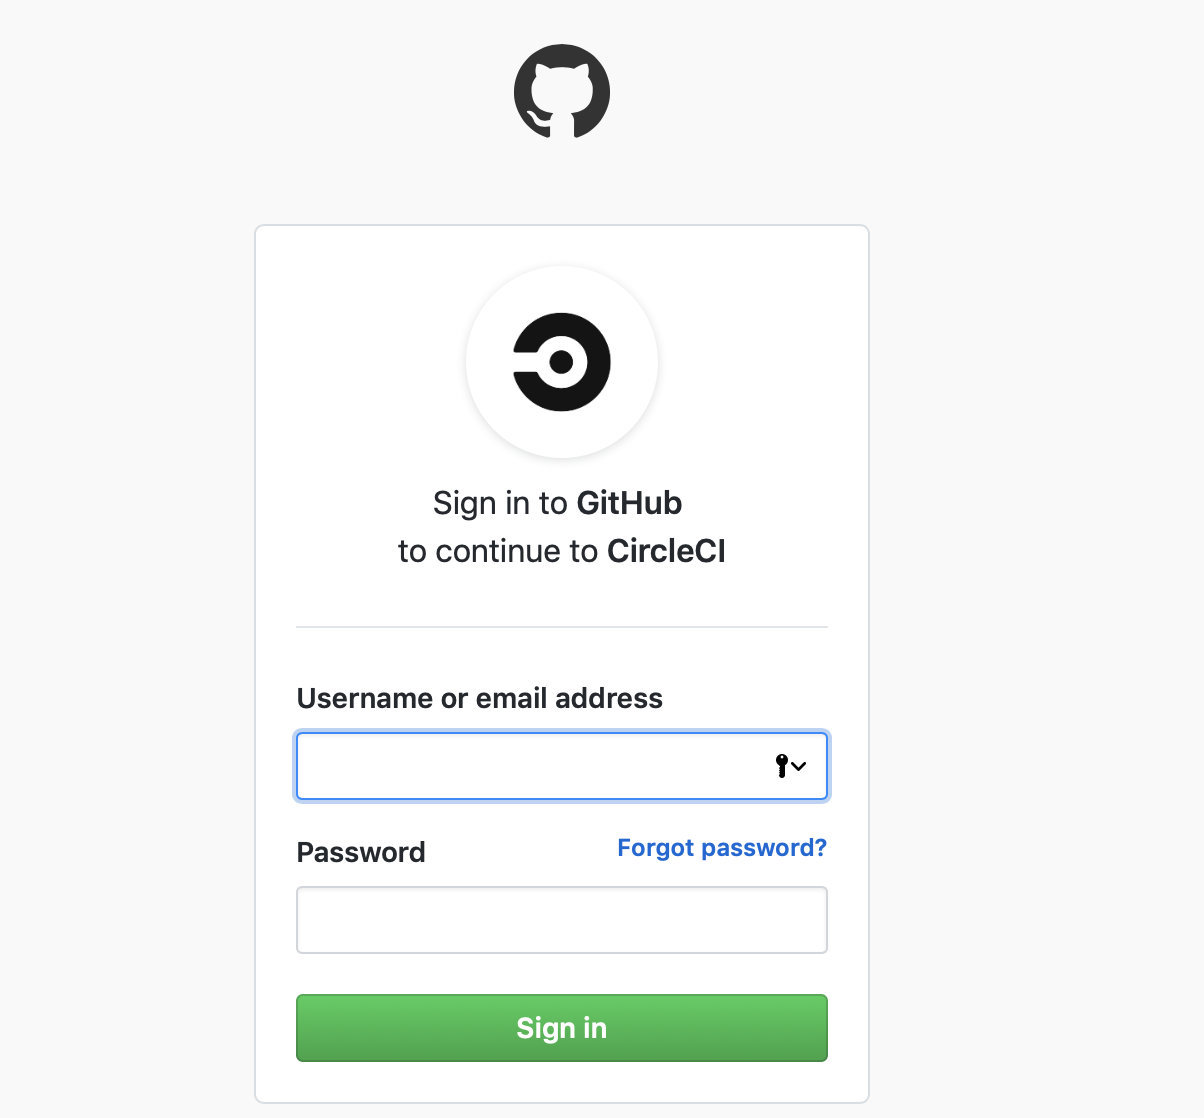
Sign in with your GitHub username and password to authenticate your account.
3. Configuring the Repository
By default, all of the developer’s Github repositories are set to inactive and need to be set up as a CircleCI project to begin building our pipeline. To resolve this, we need to set up a project on the “Add Projects” page.
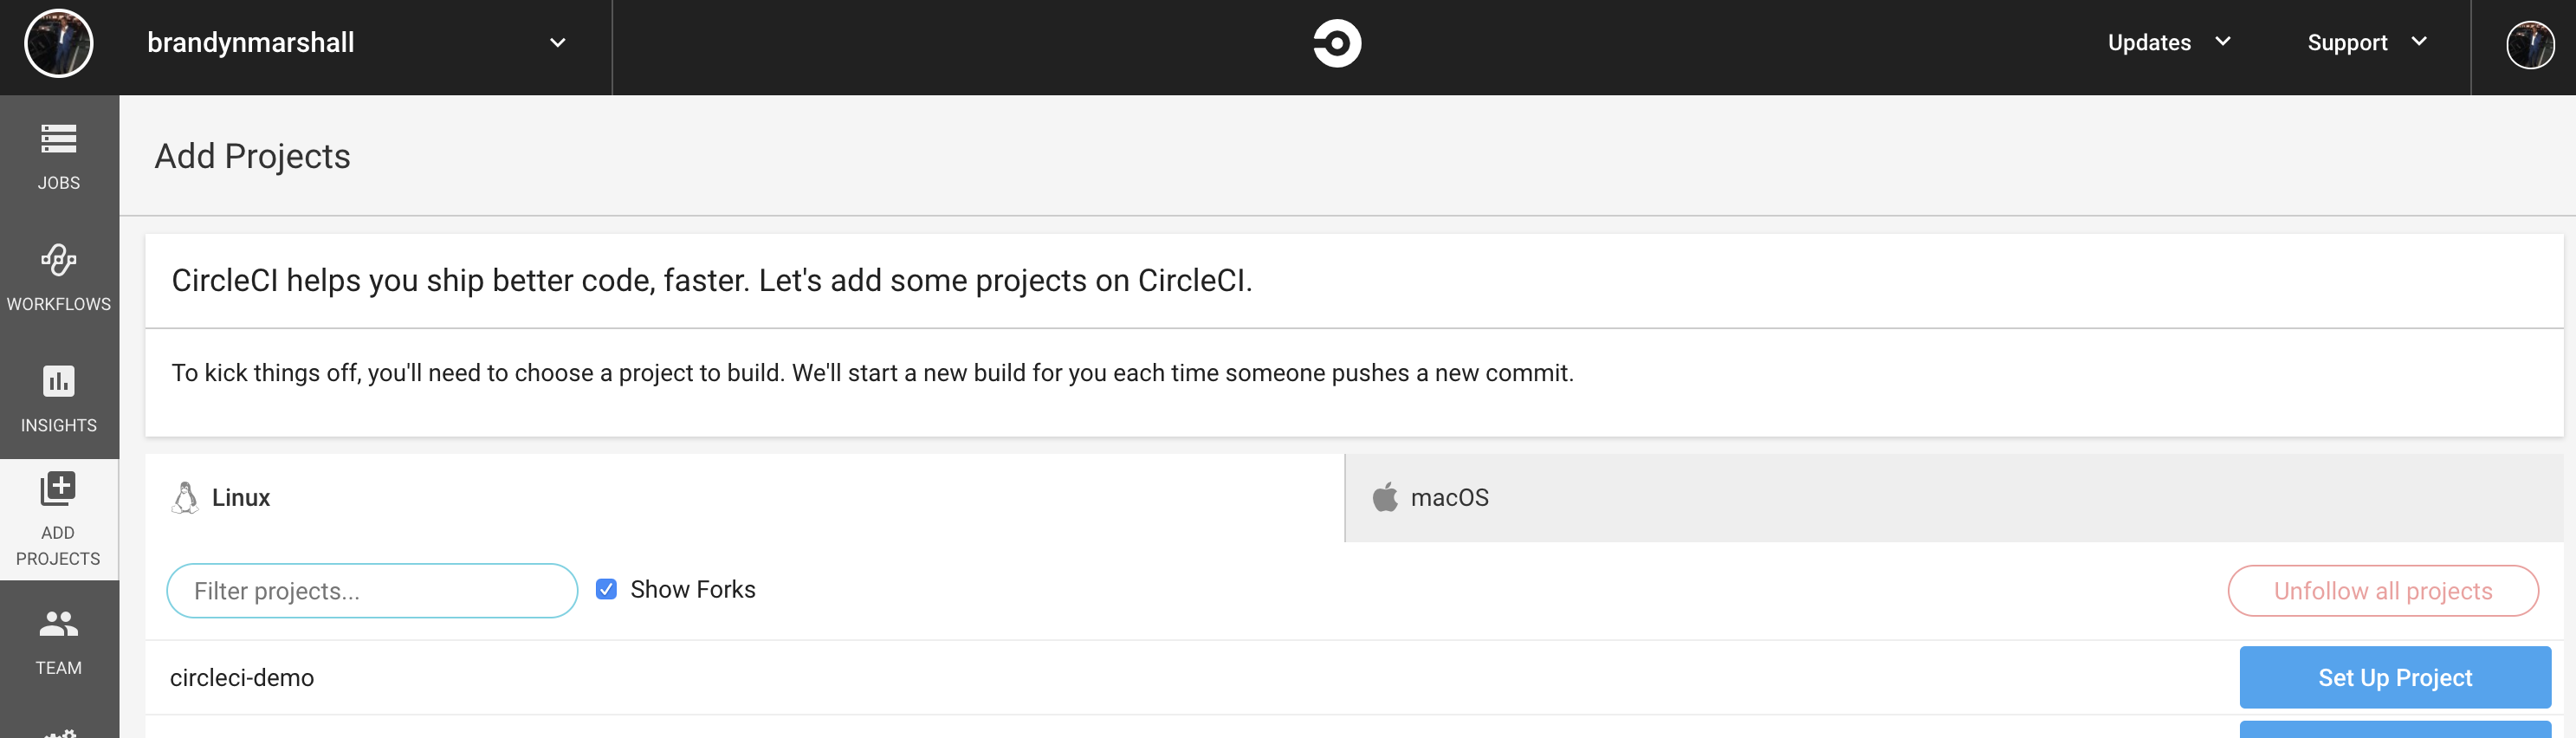
Select the “Set Up Project” button to choose the repository in GitHub that you want to use with CircleCI.
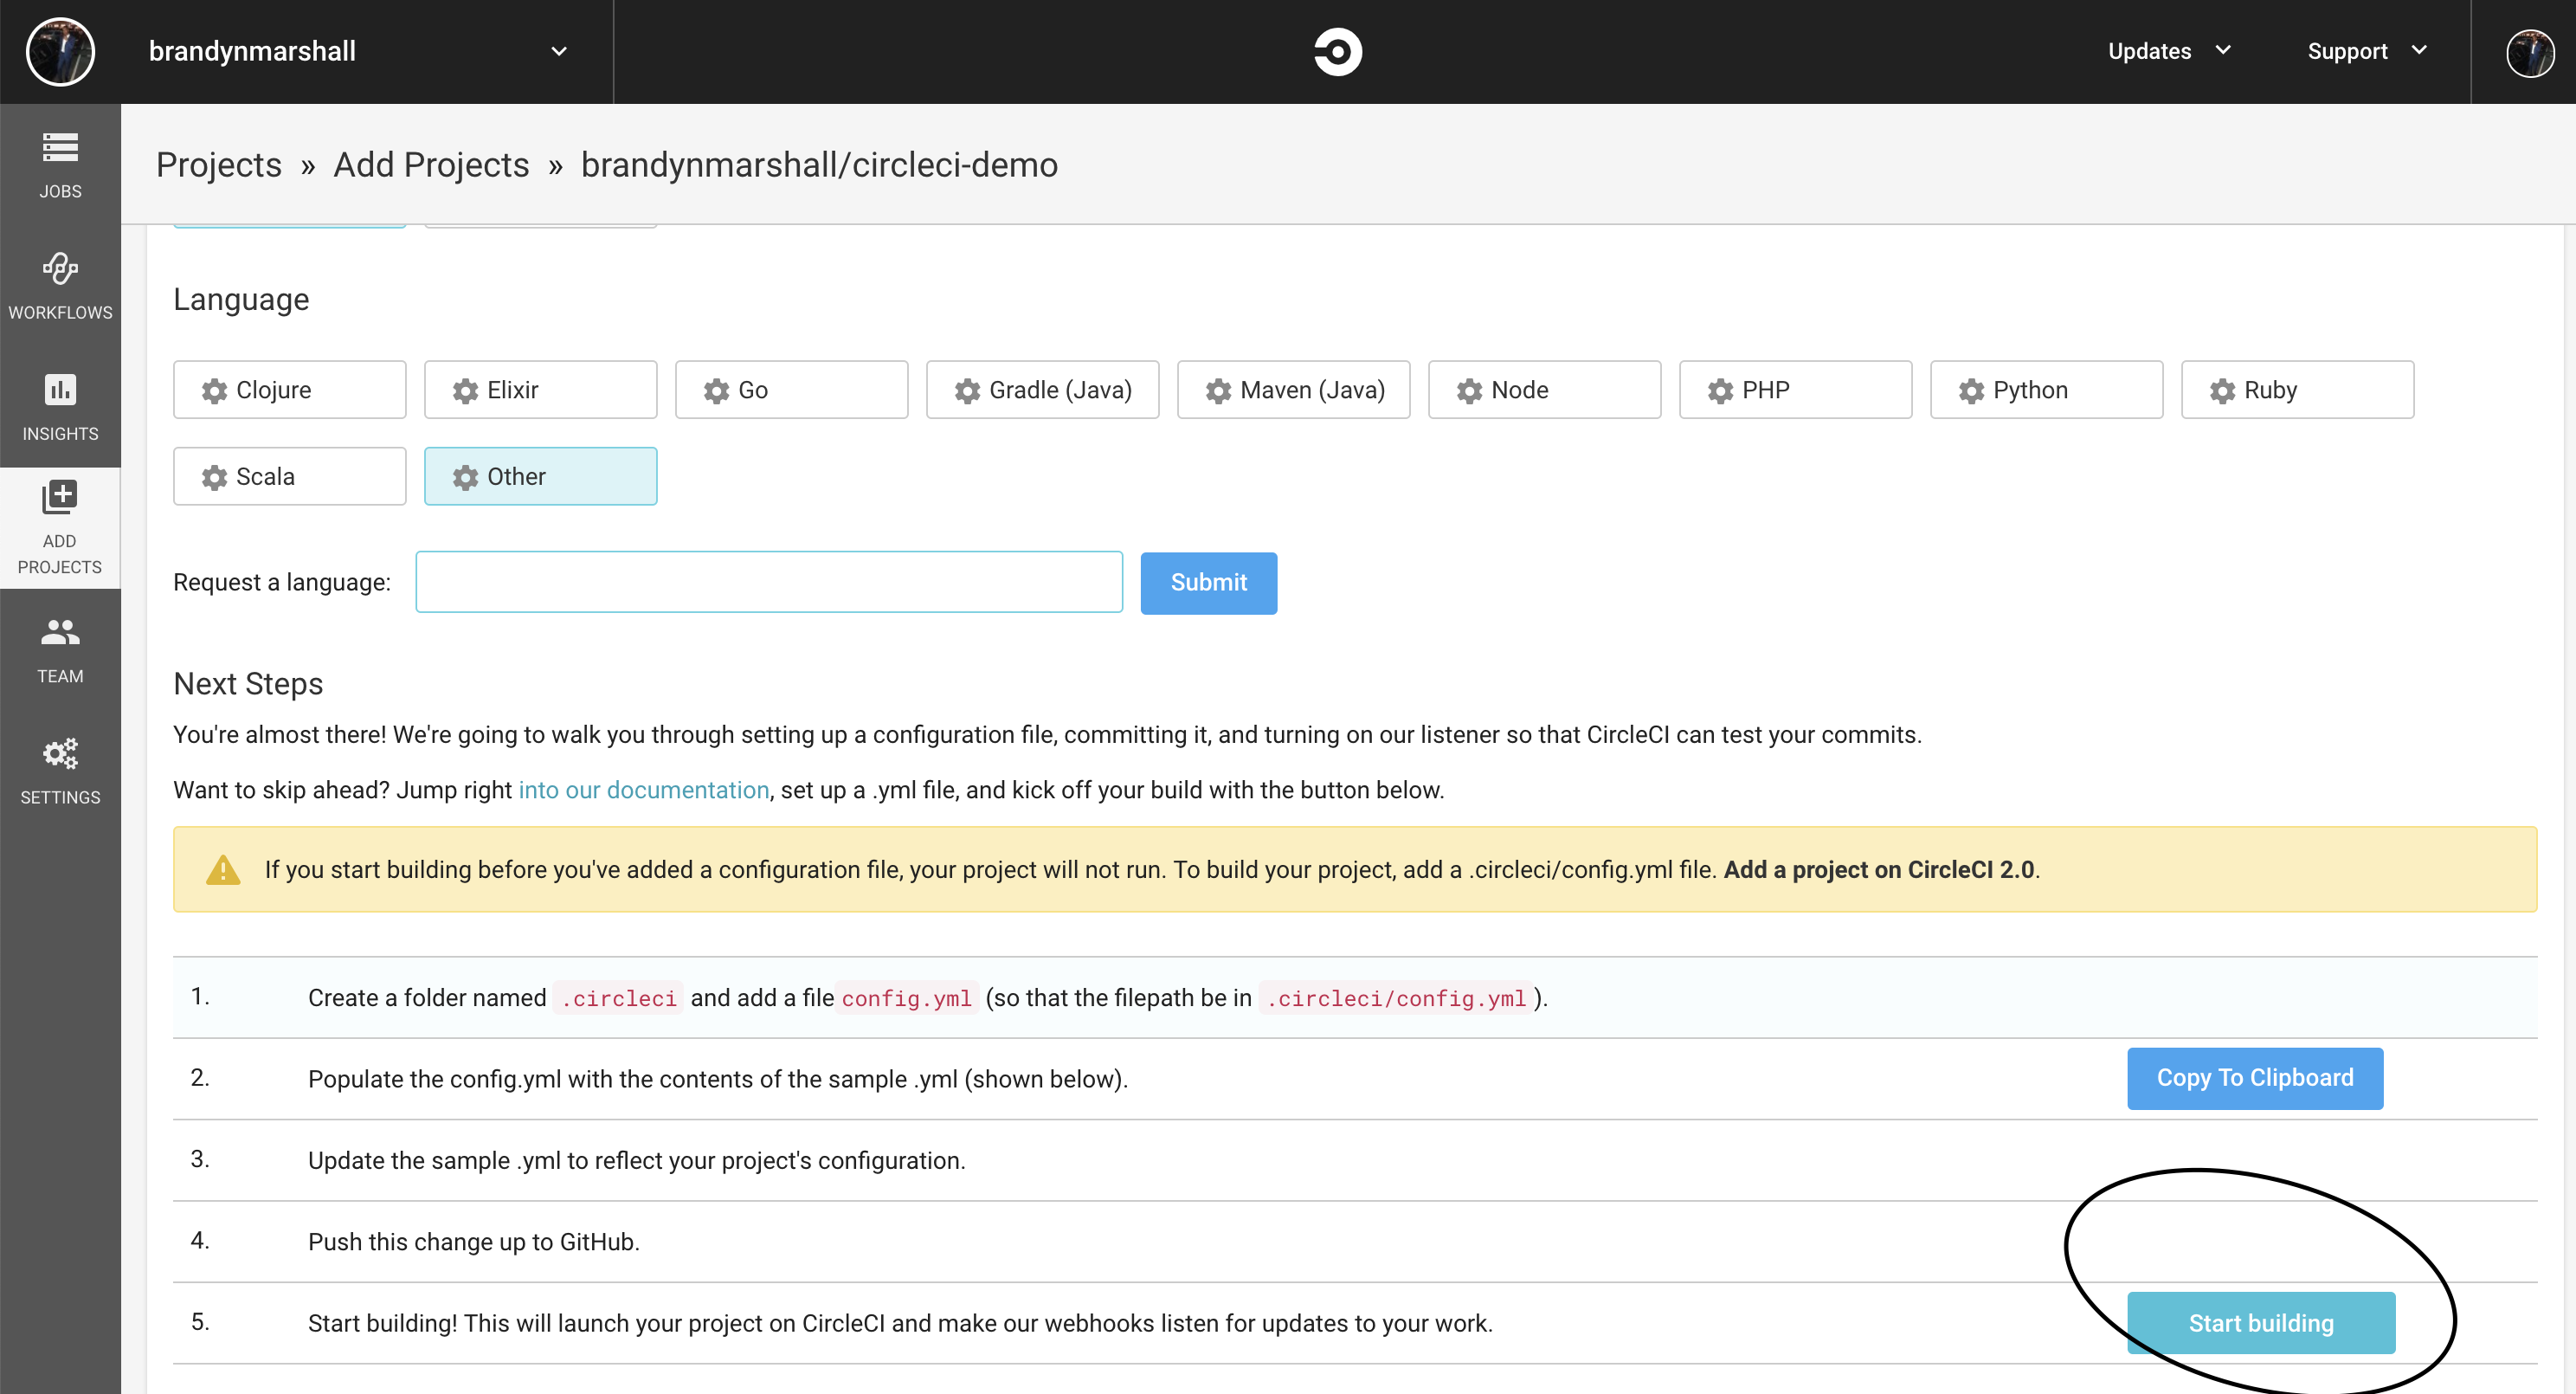
Select the “Start Building” button towards the bottom of the screen.
4. Creating the Configuration
The next step is to create the .circleci directory in the root directory of your project repository.
Go back to GitHub and access your newly-created directory. Here you will create a file called config.yml. This will contain all of the information needed to configure your build. Without this file, the pipeline will not execute.
Select the “Create a new file” button on your repository page. Be sure to add the path to the file correctly.
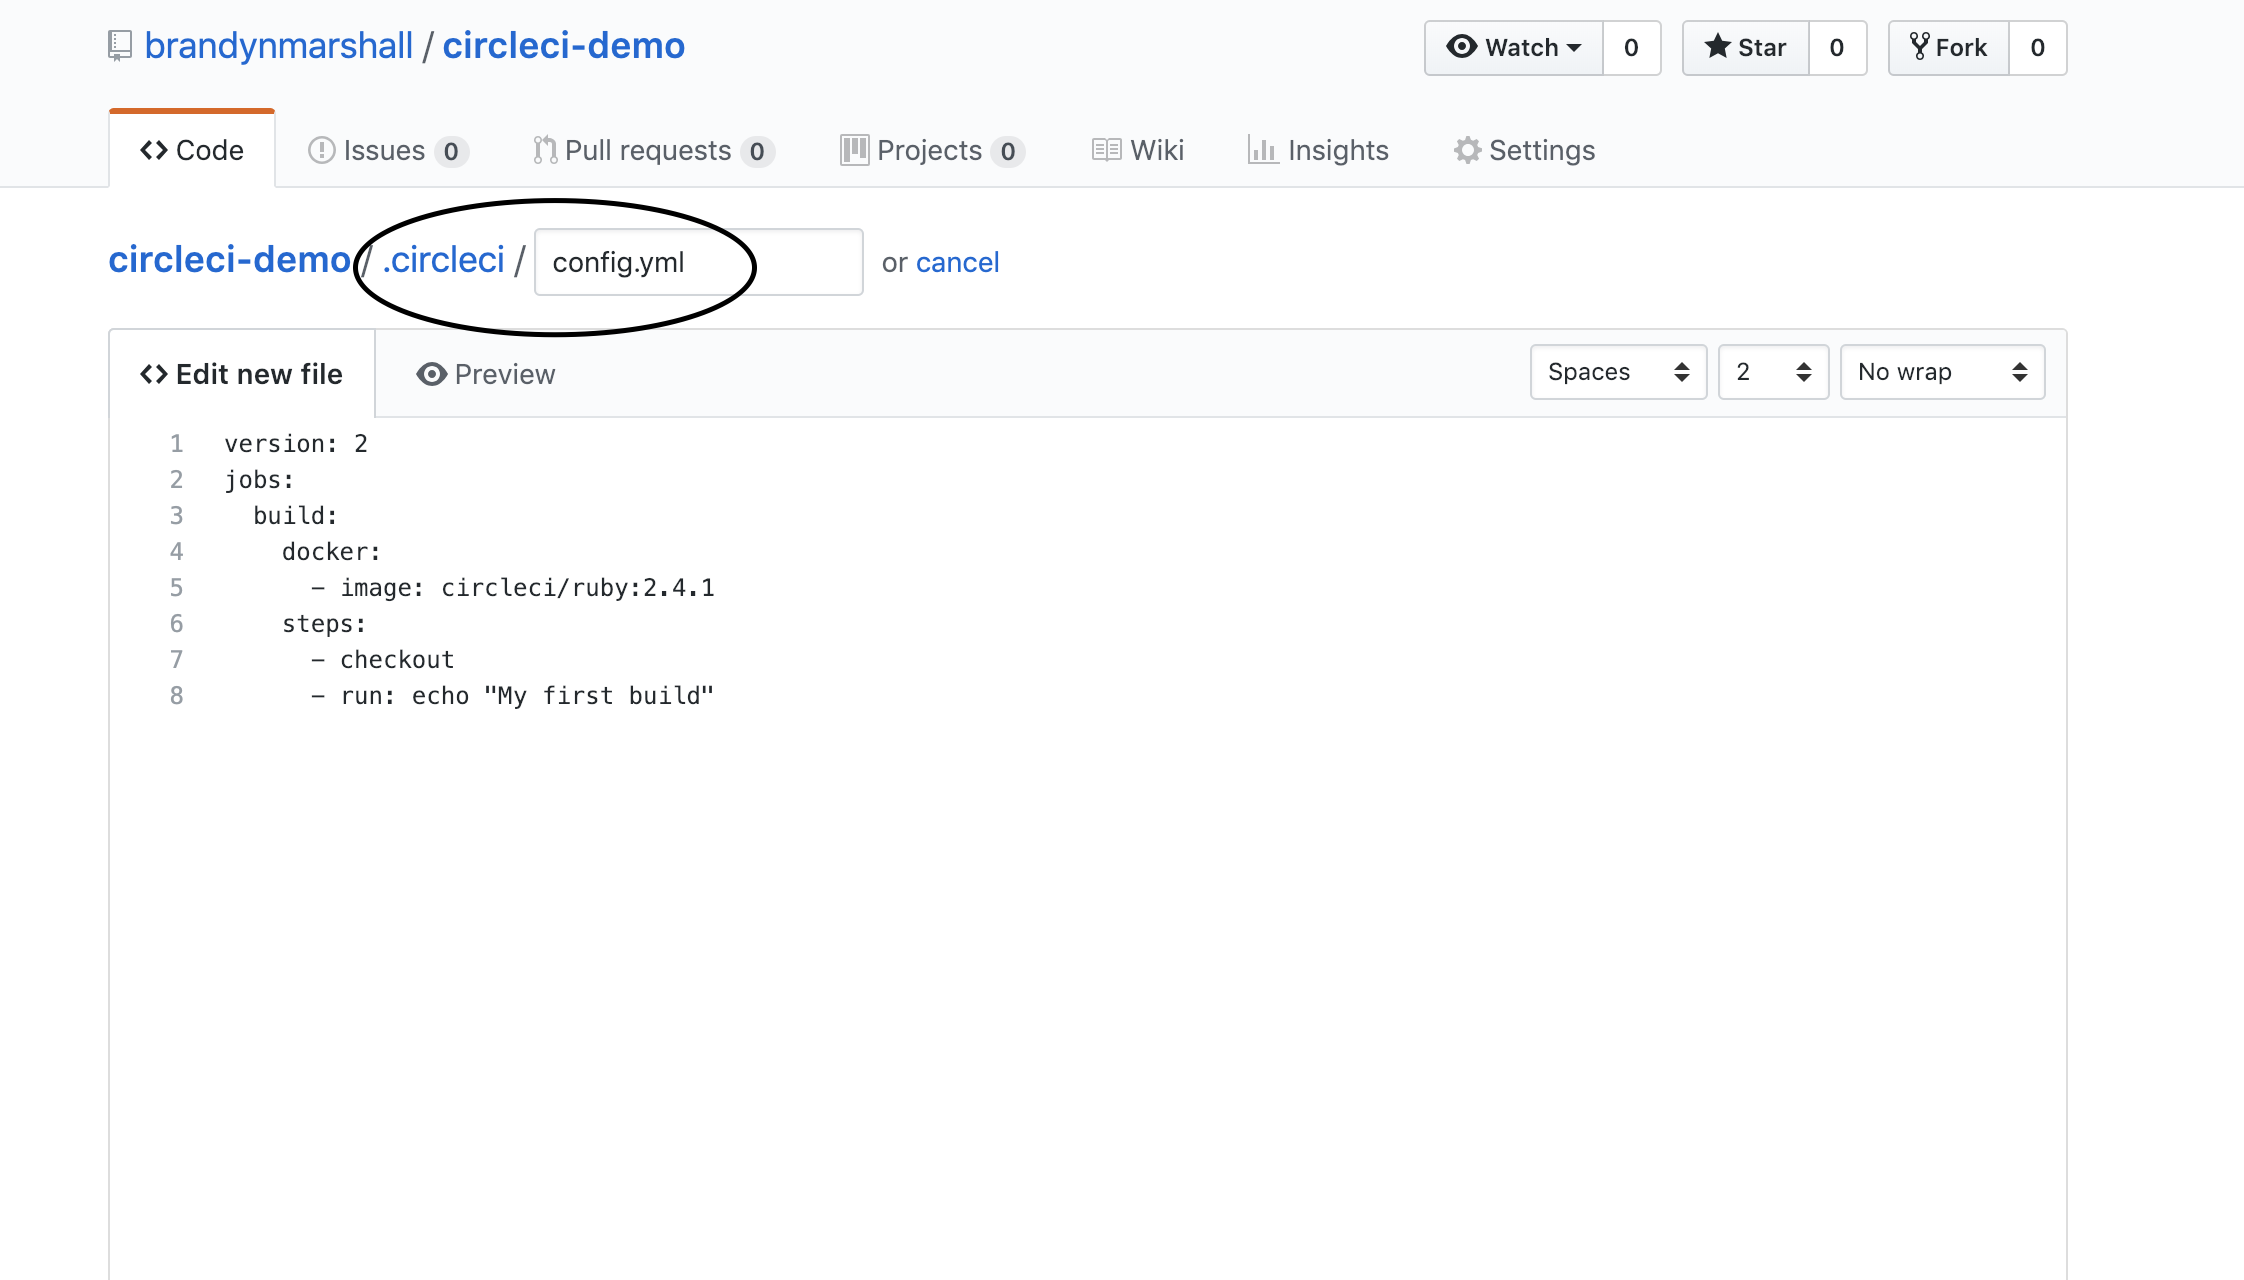
We will always start with this basic configuration below to get started :
| .circleci/config.yml |
version: 2 jobs: build: docker: - image: circleci/ruby:2.4.1 steps: - checkout - run: echo "My first build" |
The – image: circleci/ruby:2.4.1 tells CircleCI which docker image to build for your project. The image will be used to boot up a container where your required project dependencies, tools, and web browsers that are installed. The steps will check out the code from our GitHub repository and run an echo command in our docker container.
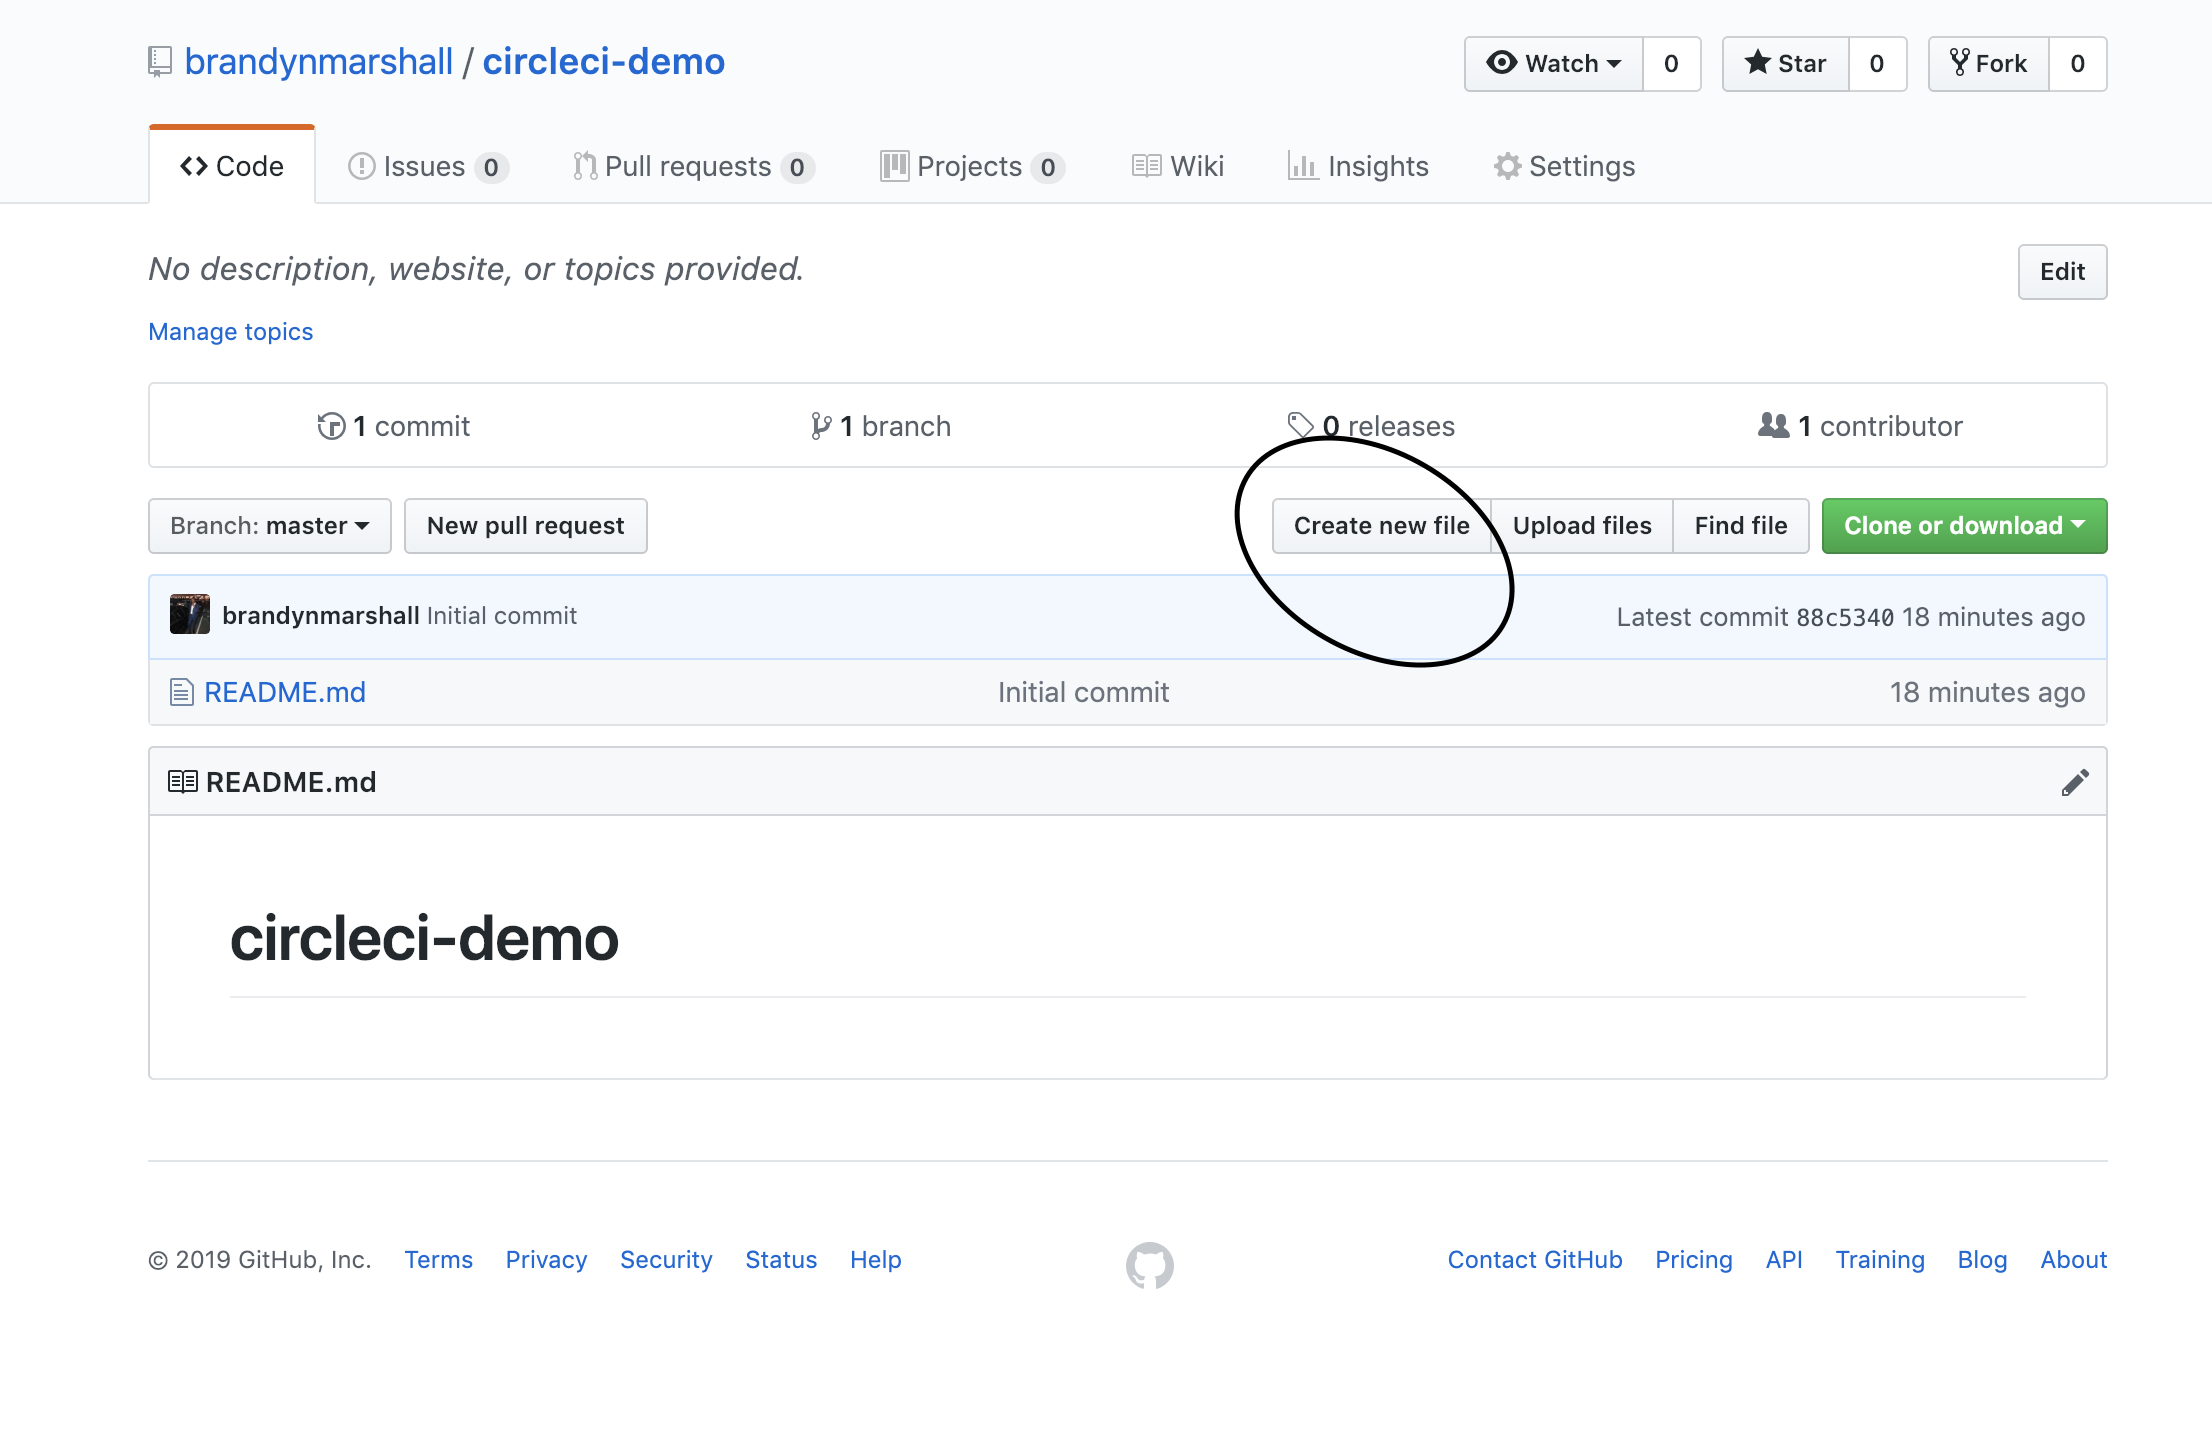
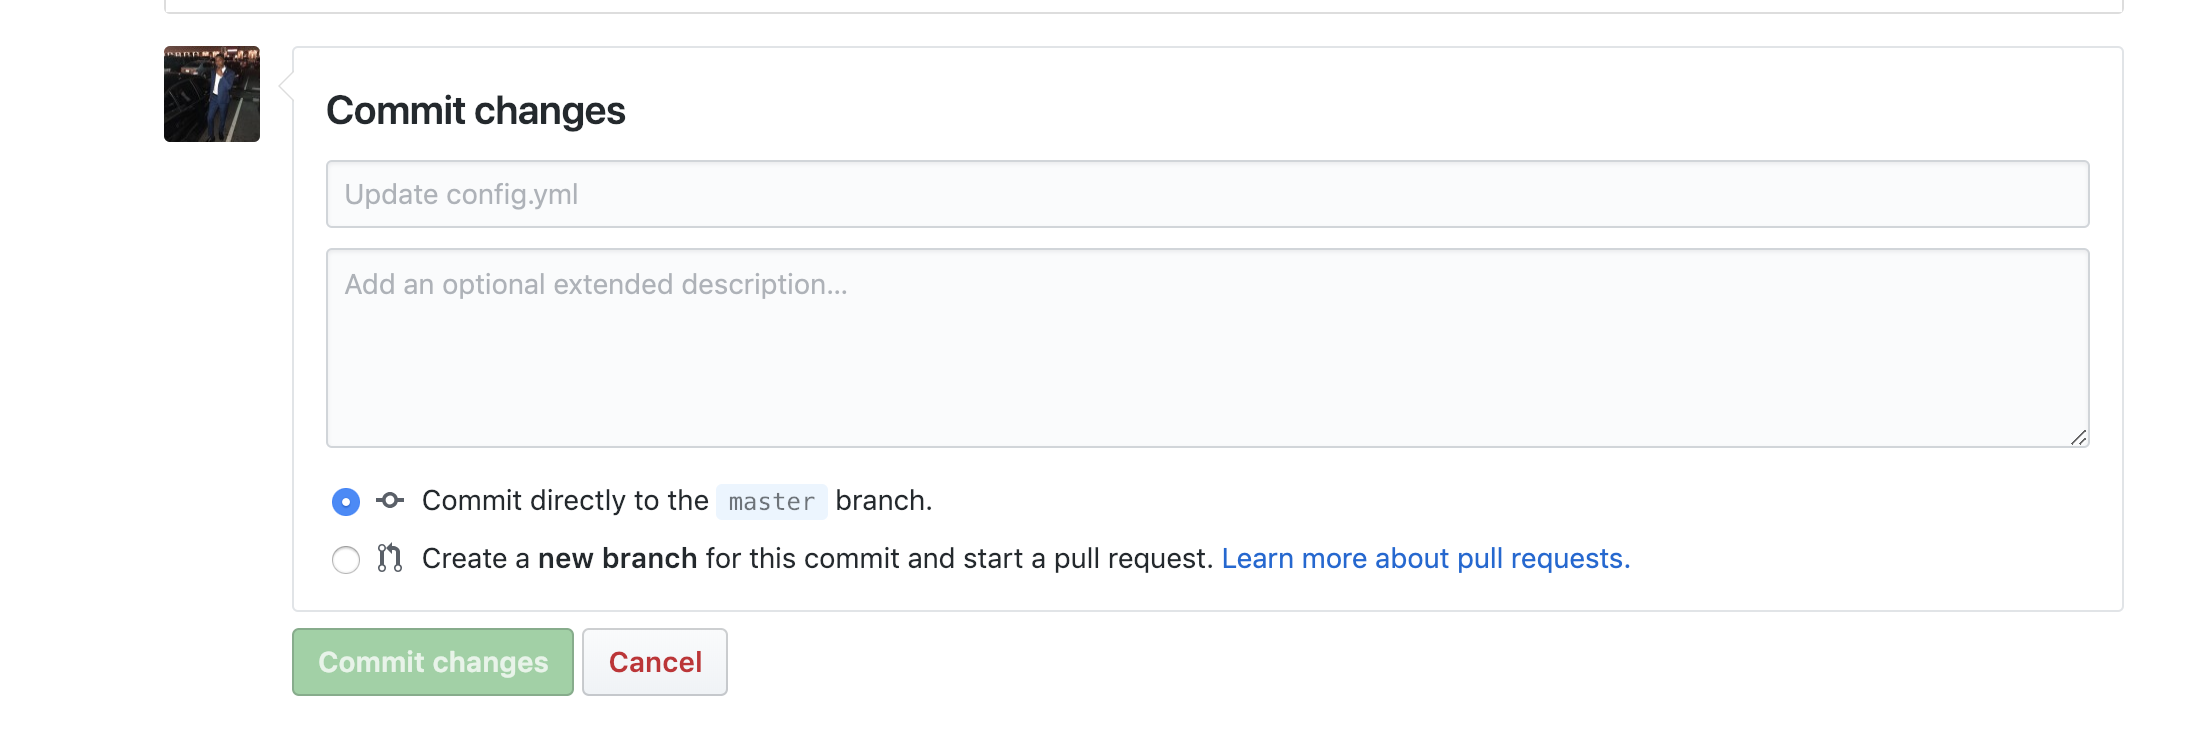
Be sure to add a name to your commit and write “My first build” in the commit section.
Once you select the “Commit Changes” button on the bottom, this will trigger a CircleCI build.
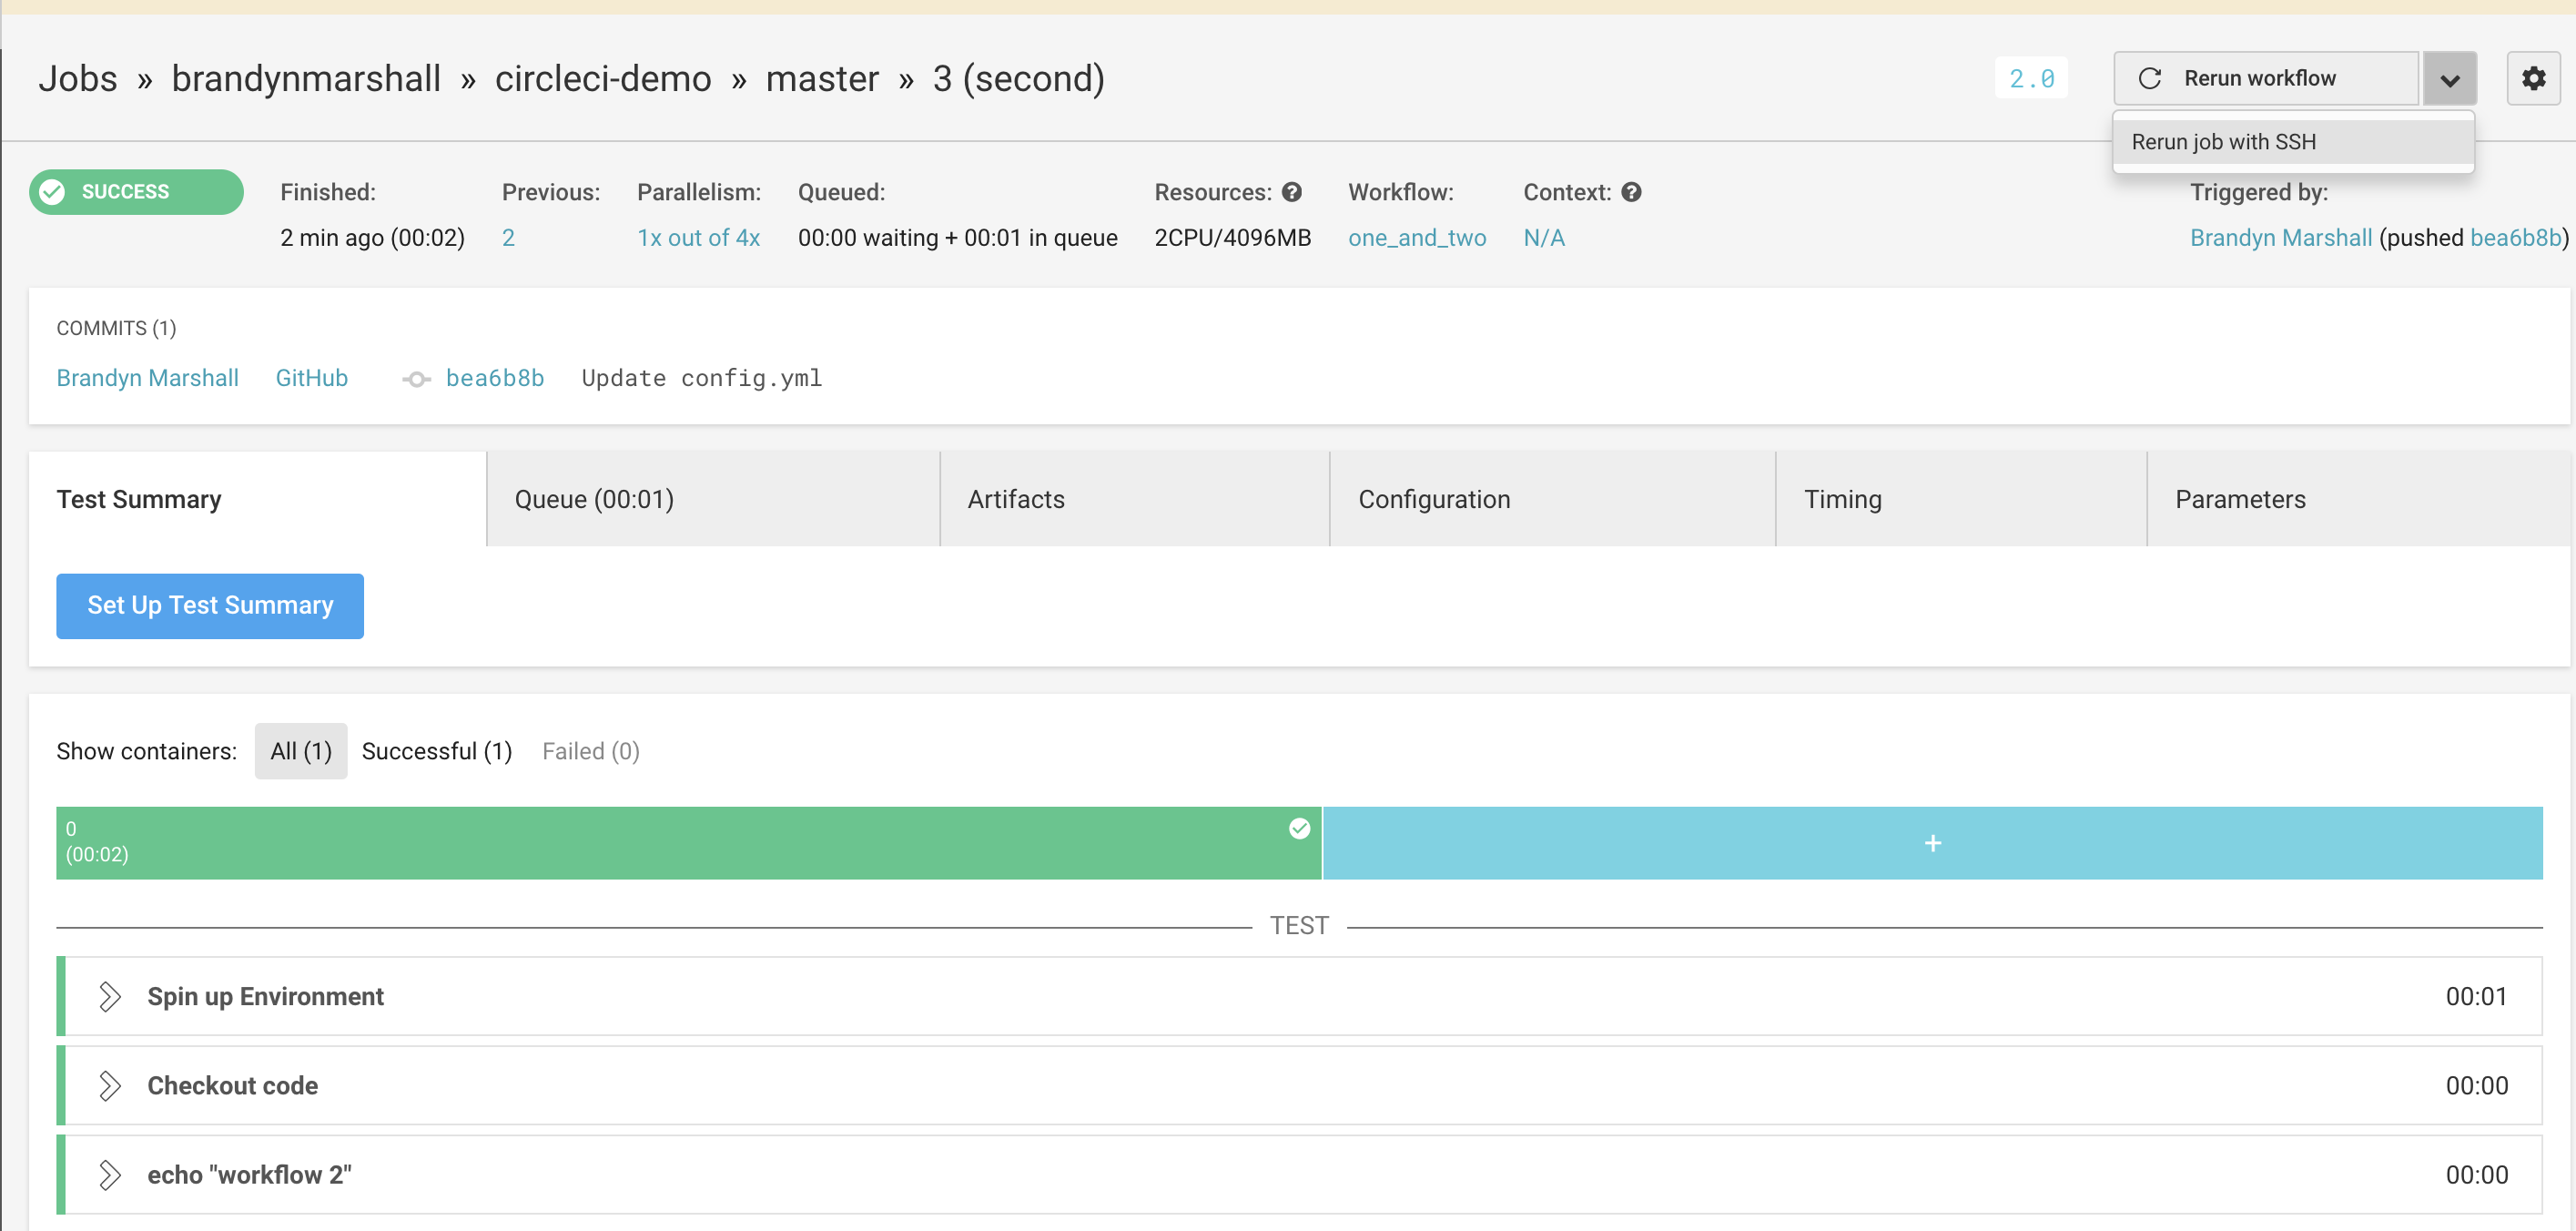
5. See Results
Head back to your CircleCI dashboard and you should see your first successful build.

Refer to the dropdown menus below to see your log trace from your commands.
6. Additional Configuration
Most projects will require more than a single line of configuration for a meaningful build pipeline. Below we will discuss important functionality that will allow developers to be more flexible with their builds.
Using Orbs
Orbs are packages of configurations that be used to quickly start a CircleCI build. Orbs also allow you to share, standardize, and simplify configurations across your projects. Orbs can be created as either development orbs or production orbs.
Development
myorbnamespace/myorb@dev:foo
Production (Semi-automated):
mynamespace/[email protected]
CircleCI also provides a variety of tested and verified orbs. These orbs are treated as part of the platform, and all other orbs are third-party uncertified orbs.
Workflow Functionality
Workflows give developers the ability to separate their jobs and orchestrate them in any order. Every team’s processes for delivering code from development to production varies, which is where workflows can be used to divide up the processes. There are different dynamic ways to use workflow functionality but below is a quick way to split your jobs into workflows. We will use the same configuration we completed above and divide them into two separate jobs.
| .circleci/config.yml |
version: 2 jobs: first: docker: - image: circleci/ruby:2.4.1 steps: - checkout - run: echo "workflow 1" second: docker: - image: circleci/ruby:2.4.1 steps: - checkout - run: echo "workflow 2" workflows: version: 2 one_and_two: jobs: - first - second |
Workspaces Functionality
Workspaces are a feature of workflows in CircleCI that are used to move data from one job in a workflow to subsequent jobs. Workspaces are also useful when the compiled and packaged application is used by test containers. Ultimately, workspaces involve creating tarballs and storing them to a blob store. Here is an example of using workspaces from the CircleCI documentation.
| .circleci/config.yml |
version: 2 jobs: first: docker: - image: circleci/ruby:2.4.1 steps: - checkout - run: echo "My first build" - run: mkdir -p my_workspace - run: echo "Trying out workspaces" > my_workspace/echo-output - persist_to_workspace: # Must be an absolute path, or relative path from working_directory root: my_workspace # Must be relative path from root paths: - echo-output second: docker: - image: circleci/ruby:2.4.1 steps: - checkout - run: echo "A more familiar hi" - attach_workspace: # Must be absolute path or relative path from working_directory at: my_workspace - run: | if [[ $(cat my_workspace/echo-output) == "Trying out workspaces" ]]; then echo "It worked!"; else echo "Nope!"; exit 1 fi workflows: version: 2 one_and_two: jobs: - first - second: requires: - first |
SSH into Build
Troubleshooting through the dashboard may be difficult, and developers would rather be able to directly address their issues from the terminal or command line. CircleCI allows you to directly SSH into your project by re-running your build with the SSH enabled option. You will need to add your SSH keys from your machine to your GitHub account. See https://help.github.com/articles/connecting-to-github-with-ssh/
Copy and paste the SSH public key to your terminal or command line to access the container.
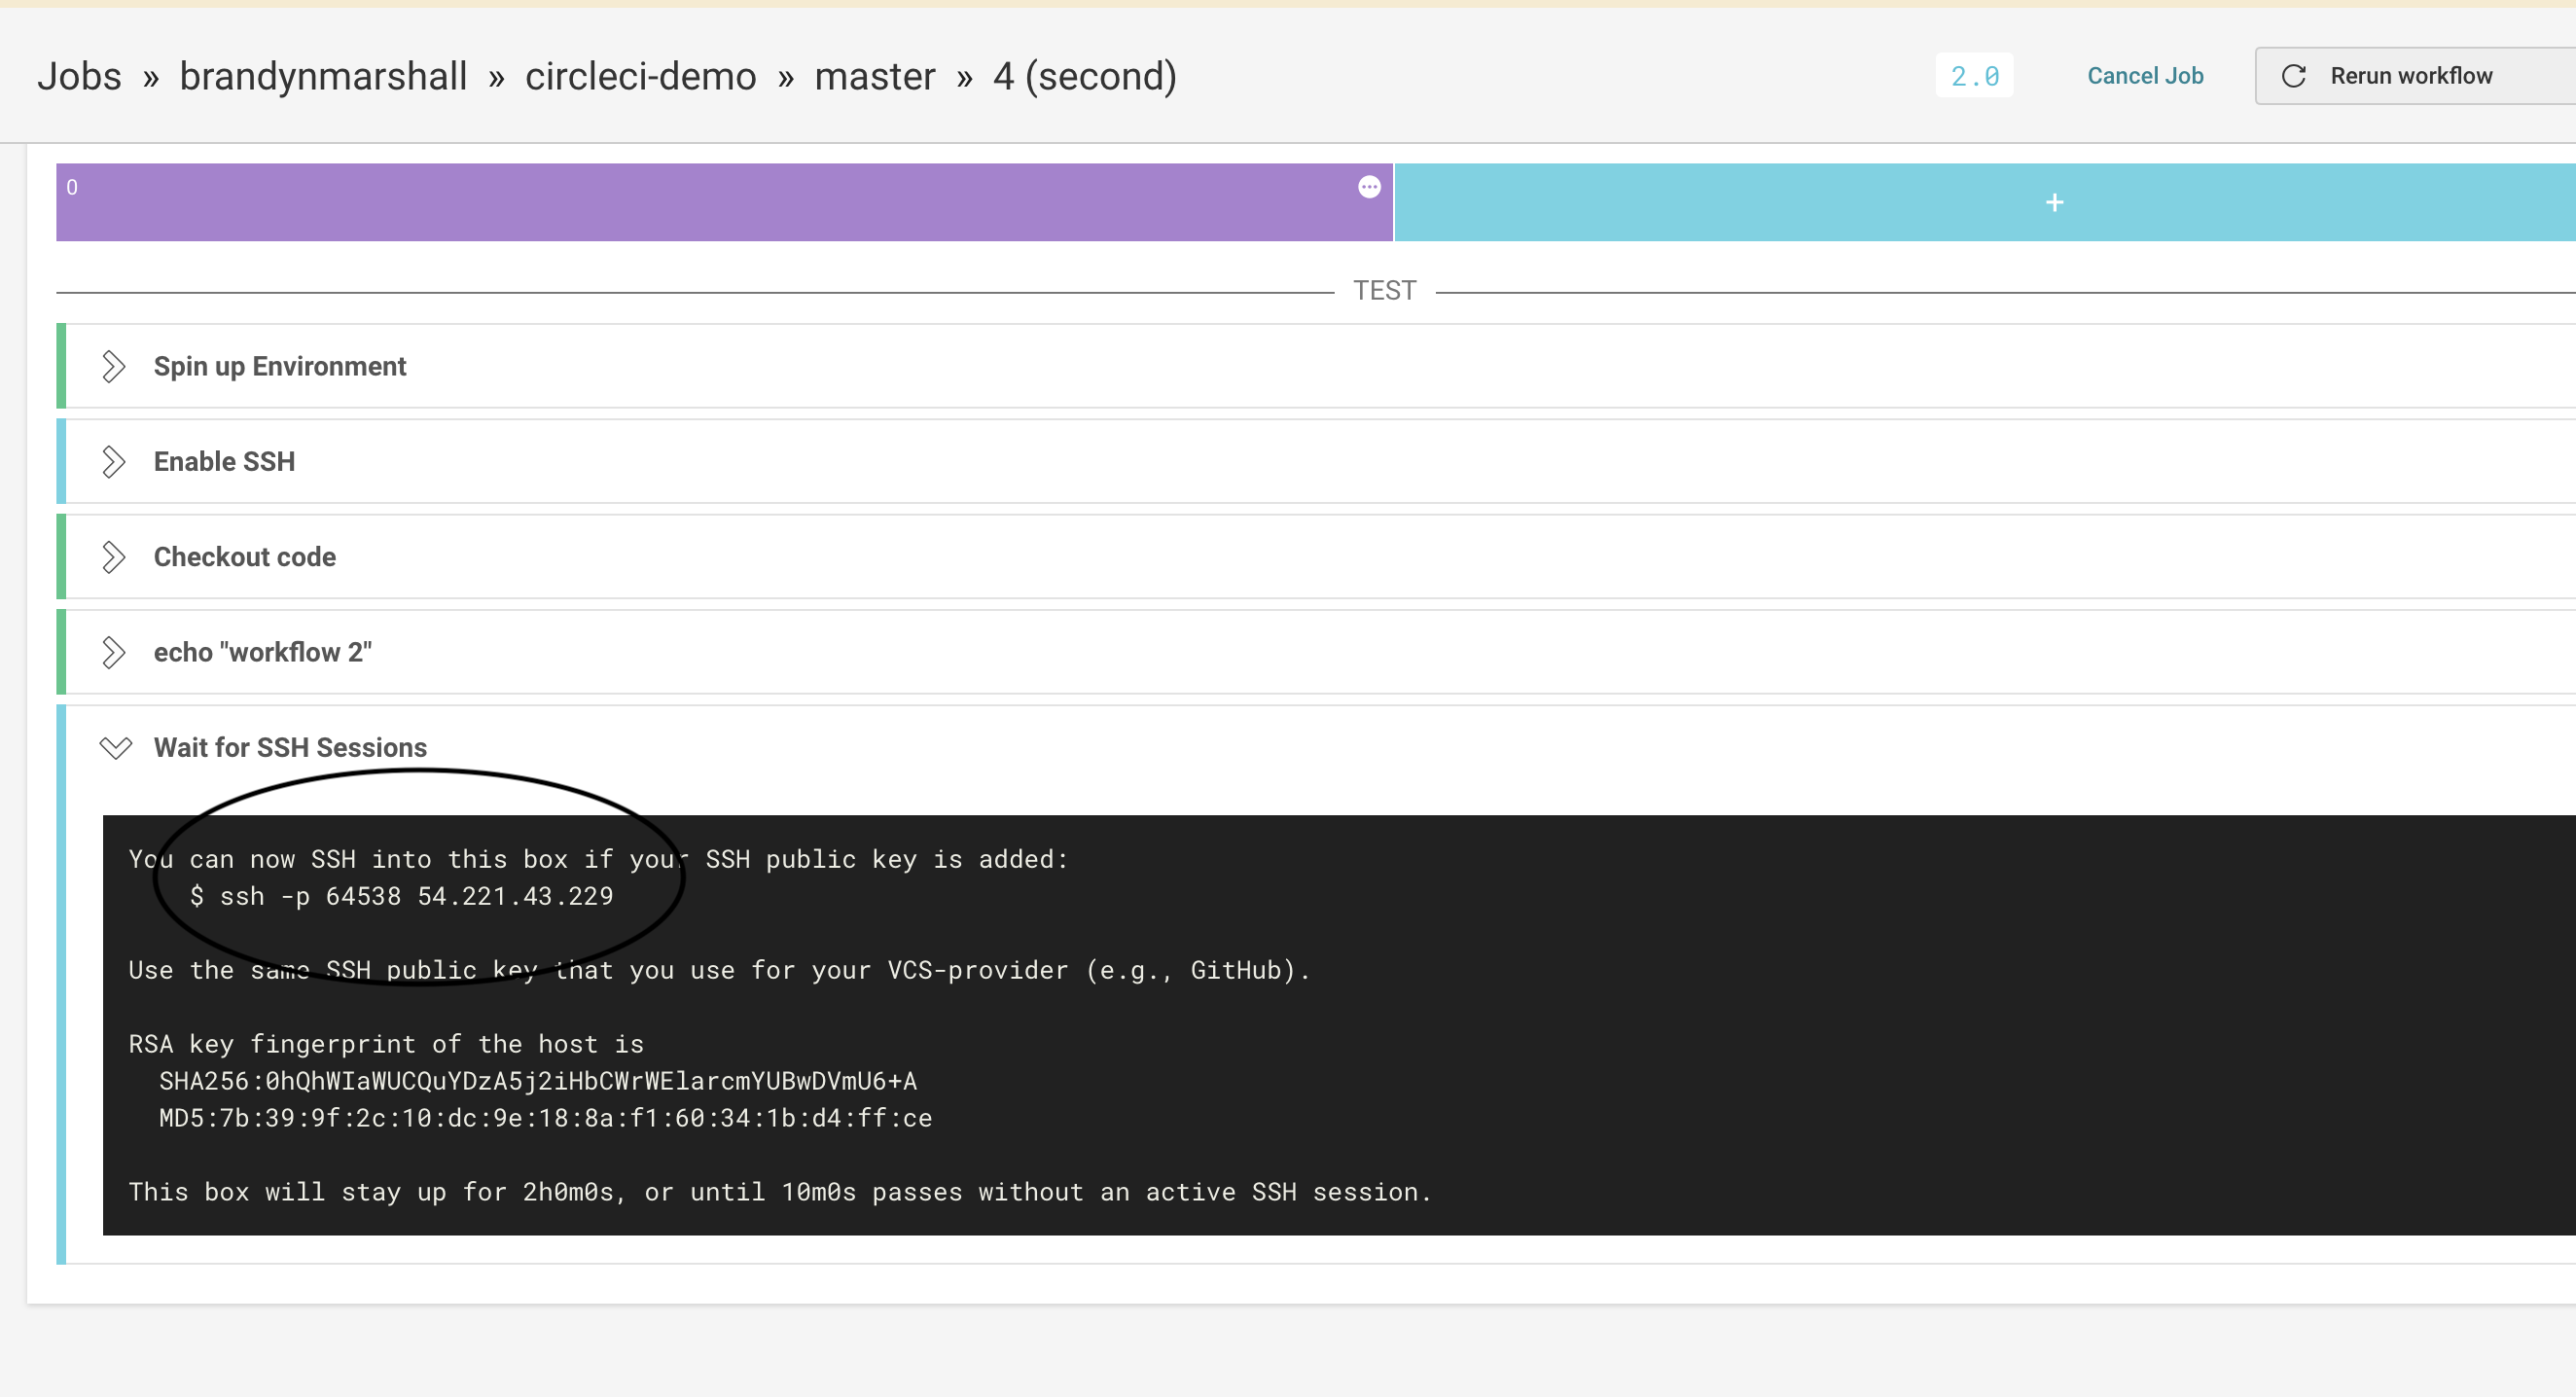
If you run into issues with your build, you can simply SSH directly into the container by using the CircleCI SSH enabled option. Developers can access their image as long as their SSH keys are properly set up.
Please check out the CircleCI documentation page for complete information on how CircleCI works.

