In this blog I would like to demonstrate how to use AWS EC2 container service with AWS Codebuild, which is a very powerful and handy tool to automate your builds, so that it helps you run your architecture in a more efficient and automated way.
In ECS everything starts with a Docker container. If you don’t know what the docker is, see the link below to have a better idea of what it is
https://opensource.com/resources/what-docker
To get more familiar with what ECS is, see the following link
AWS CodeBuild is a fully managed build service which runs a set of commands that you define, e.g. compiles code, runs tests and produces artifacts that are ready to deploy. As part of our container services platform AWS provides EC2 container registry which is a private registry where you can upload your Docker images to and then control what IAM users on your AWS account or what amazon systems such as ECS have permission to download these images. Once you have Docker images built and uploaded into registry such as EC2 container registry, the next step is getting those Docker images running on instances in the cloud. This is where ECS comes in. High level ECS is a service for automating a fleet of instances to deliver and run your containers across them. ECS keeps track of your instances and how much resources they have and what they are running.
AWS Documentation has a perfect explanation of how AWS Codebuild works, so let’s take a look at it to be more familiar with it (taken from the AWS documentation).

https://docs.aws.amazon.com/codebuild/latest/userguide/concepts.html
In our demo we are going to start off by creating a Docker container manually using a command line and then I will show you how to use the CodeBuild to build our Docker image as well. So we are going to take source code from CodeCommit, CodeBuild is going to retrieve that source code and is going to use the instructions in the source code to build out the Docker image.
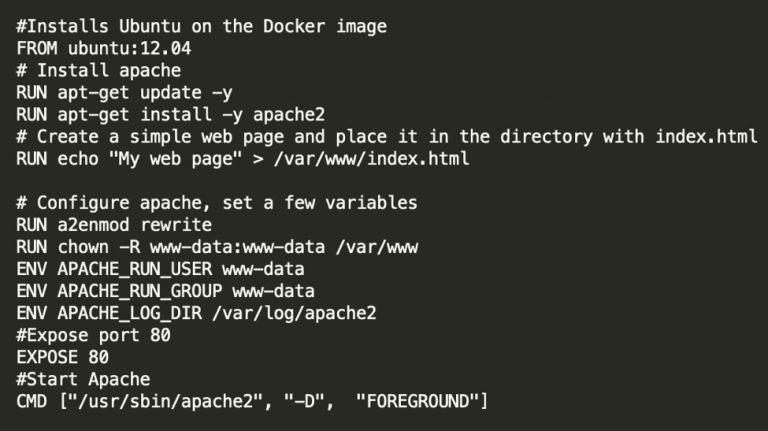
First, let’s create a Docker image, we are going to use the file named “Dockerfile”, that you can find below. We will install Ubuntu on the Docker image, then install Apache and create a simple web page placing it in /var/www/ directory. We will configure apache and set a few variables afterwards. Finally we will expose port 80 and start Apache.
This is all the information you will need in order to create a Docker image. We will need to store our source code somewhere. I am going to use CodeCommit for it. You can find it under developer tools in your AWS console. Click on get started and let’s create a new code repository for our source code. We can call it “mySourceCodeRepo” and click create. In order to connect to an AWS CodeCommit repository, you will have to use a Git client that supports Git version 1.7.9 or later. If you don’t have it installed, you can get it from the following link
The next step will be setting up your connection to AWS CodeCommit repositories using the credential helper included in the AWS CLI. This is the only connection method for AWS CodeCommit repositories that does not require an IAM user, so it is the only method that supports root access, federated access, and temporary credentials.
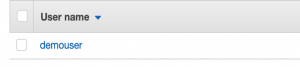
Next, we have to create a user with a programmatic access. It can be done from under the IAM tab in AWS console.
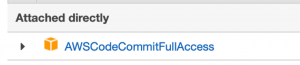
Next, attach an existing policy “CodeCommitFullAccess” directly to a newly created user. The policy grants full access to AWS CodeCommit. You should apply this policy only to administrative-level users to whom you want to grant full control over AWS CodeCommit repositories and related resources in your AWS account, including the ability to delete repositories.
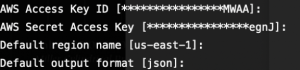
Next, you have to authenticate your user against AWS CLI. Open your terminal window -> “aws configure” -> provide AWS Access Key ID -> provide AWS Secret Access Key -> choose you default region name -> choose default output format
Go back to CodeCommit and clone git repository to your local machine.

The repository is currently empty, you have to add Dockerfile and push it to a remote repository. Next thing we are going to do is create elastic container service cluster and that’s where we are going to be able to run the Docker image. An Amazon ECS cluster is a logical grouping of tasks or services. If you are running tasks or services that use the EC2 launch type, a cluster is also a grouping of container instances. When you first use Amazon ECS, a default cluster is created for you, but you can create multiple clusters in an account to keep your resources separate. Navigate to ECS under Compute -> Clusters -> Create Cluster -> EC2Linux+Networking.
We can name our cluster “myFirstCluster”. Choose On-Demand instance as a provisioning model, you will pay for compute capacity by the hour, with no long-term commitments or upfront payments. Select t2.micro as an instance type, this will be enough for the web page we are setting up. For the number of instances type in “1”, however if you are in production, test, development, you would want to use more than one instance for your cluster. So if one instance went down you could still use your service. Everything else keep as a default. Now it will be running the CloudFormation stack for you. If you access EC2 tab, you can see your instance up and running.
The next thing we need to do is to create a repository to hold our Docker images. ECS -> Repositories -> Create repository.
Let’s name our Docker repository “mydockerrepo”. It also gives you the URI which is the reference or the name you would use anytime you want to refer to this repository programmatically. Once you create your container registry you can view all the commands you need to use when interacting with registry. Click on your Docker repository -> View push commands. Run these commands, as described in a pop up window, in your terminal. If you get AccessDeniedAcception when calling the GetAuthorizationToken, you will need to add AmazonEC2ContainerRegistryPowerUser policy to an existing user. Now we see our Docker image in “mydockerrepo” with the tag “latest”. It means now we can run our Docker container in the ECR. Next we will have to create a task to run our container. A task is the instantiation of a task definition within a cluster. After you have created a task definition for your application within Amazon ECS, you can specify the number of tasks that will run on your cluster. **ECS -> Task Definitions -> Create new Task Definition -> EC2.**Let’s name our Task Definition “myTaskDefinition”. For the Task Size type 512 MB for both Task memory and Task CPU, our application is small enough, so we won’t be using any large volumes. Under Container Definitions -> Add container. Let’s name it “mycontainer”, provide your Docker repo URI in the Image field followed by the tag. Select 80 and 80 in Port mappings to match your port and container host. You can keep the rest as a default. Once the Task definition is created click on Actions -> Create service. Amazon ECS allows you to run and maintain a specified number of instances of a task definition simultaneously in an Amazon ECS cluster. This is called a service. Select EC2 for your launch type, number of tasks is 1, service name is “myNewService”. We will not be using a load balancer or auto scaling in this demo. So you can leave the rest as a default. By creating a service it will automatically start a task for you. A Docker container will be automatically launched. If you click on myNewService, you can see task and it’s status. We are ready to verify if our service is working properly. Copy the IPv4 Public IP of your EC2 instance and navigate to it. If you followed all steps correctly you should see the following page.

We now have a Docker container running in ECS.
CODEBUILD
Let’s see how we can get the CodeBuild build our Docker image for us. The first thing we need to do is get the buildspec file. A buildspec is a collection of build commands and related settings, in YAML format, that AWS CodeBuild uses to run a build. You can include a buildspec as part of the source code or you can define a buildspec when you create a build project. You can specify the location of any artifacts that are going to be produced as part of the build as well. We are going to provide same push commands(under ECR) in the file we were using manually. Buildspec will have few phases: pre_build, where we will provide the token for ECR to allow CodeBuild login into registry programmatically. We will also declare our REPOSITORY_URI and IMAGE_TAG variables here. Build phase, where we will actually build the Docker image and tag it. In a post_build phase we will push the Docker image into our repository.
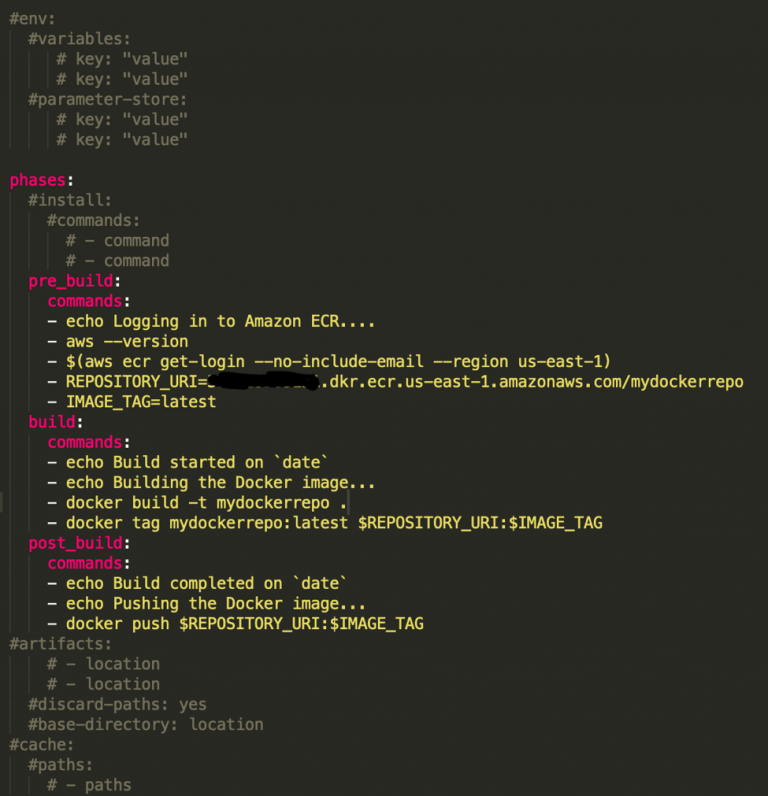
This is a buildspec.yml file that need to be added into mySourceCodeRepo in CodeCommit. Let’s get started with CodeBuild now.
Services -> CodeBuild -> Create build project
Let’s name our project “newDemoProject”. Source provider will be AWS CodeCommit, that’s where we keep our source code. Repository should automatically populate an existing repository “mySourceCodeRepo”. We will be using a managed image as our environmental image running on Ubuntu OS with the Docker runtime, you can use the latest runtime version.
Let’s name our role “newDemoRole”. In a Buildspec section you have 2 options: use a buildspec file, which we are going to use, because we already have this file in our CodeCommit repository. Second option is to insert build commands, you can use it if you don’t have a buildspec file. This option will assist with building your buildspec file in AWS console. You can switch to editor view and insert your commands here. It becomes useful when you want to run a brand new project and don’t want to use prebuilt buildspec file.

Once the project is created, click on Start build -> Verify info -> Start build.
If you got to this point and your build failed, make sure you check your logs, most likely your build has failed due to missing policy for the “newDemoRole”. We need to attach AmazonEC2ContainerRegistryPowerUser policy to it and restart the build afterwards. Now if you check your ECR repository, you should see the Docker build in there with the latest tag. You already know how to use task definitions and how to create services to connect your Docker image with your EC2 instance.
An important reminder: you should probably shut down any of the ECS Tasks and EC2 Instances you created during this demo so you don’t get charged for them. To do that, first, go to the ECS Console, find your ECS Service, and update it to set the number of desired Tasks to 0 by deregistering them. Once all the Tasks are stopped, you can delete the ECS Service and Cluster. After that, go to the EC2 Console, and delete any Auto Scaling Groups, Load Balancers, and terminate any EC2 Instances.
