

DISCLAIMER: Only perform security testing on applications which you have explicit permission to do so.
Also, this post shows features for Burp Suite Professional, as the Macros and scanning features are not available without a license.
In the previous blog post, I detailed configuring Burp Suite for usage in security testing. Please reference the material Part 2: Creating Macros if you are new to using macros within Burp or Part 1: Setup if you are entirely new to Burp.
Using Burp to Scan – Now with macros
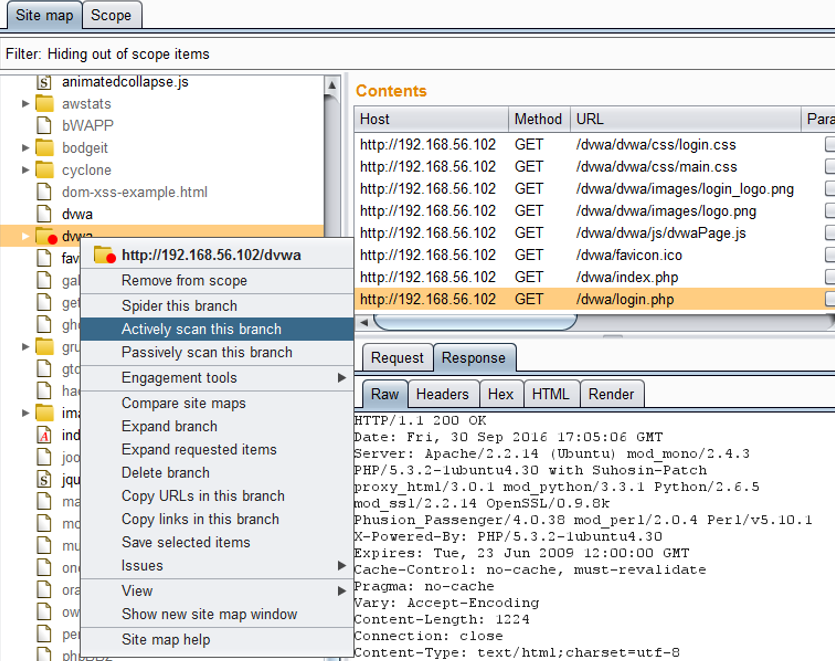
With the macros setup, go to the Target then Site map tabs. Right click on the target of the scan and select the option to Spider this branch or Actively scan this branch. The macros will be applied according to the defined rules. In the screenshot below, I am running a scan on a specific path with the application and not the entire application itself. This can help reduce the time and unnecessary requests used.
Prior to running an active scan, the target should be spidered. This will attempt to identify additional pages which may be unexpected but available. Spidering before actively scanning helps improve the overall results by providing a more encompassing view of the application. As spidering searches a large range, it considerably adds to the overall time required in setting up the scan, depending on the application and number of pages available. Spidering will add pages in the robots.txt file and try random combinations to attempt to find what may be hidden.
Use the Active scanning wizard to explicitly select the targets of the scan. The scan progress can be viewed and controlled via the Scan queue tab under the Scanner tab.
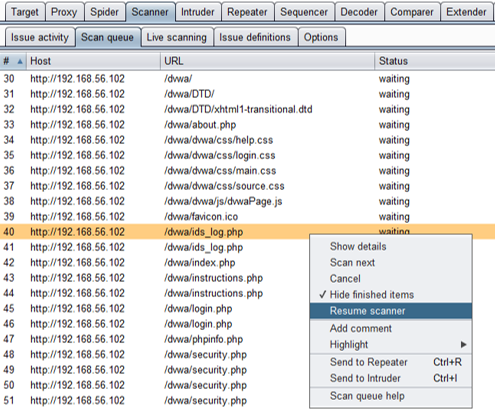
I have found that the scan does not automatically begin after selecting the target in the Sitemap tab. Instead, a list of queued pages is brought up in the Scan queue tab. Right click on the url and choose the Resume scanner option to begin the full scan.
 While the scan is progressing, to change the order, tests can be paused or cancelled. The order of the scan can also be changed by using the Scan next option to move the url to the next spot in the queue.
The results will be displayed in the Scanner -> Issuer Activity tab. Highlight certain results to distinguish new results from old. However, the old results cannot be hidden or removed. This is intended functionality of Burp to correlate historic findings and will not be changed. I prefer to use a new Burp template with each new scan to distinguish between various releases or applications.
Interpreting the results
As with any security tool, Burp has a large number of false positives. In the event that a baseline is not properly created, the comparison may not accurately interpret the results.
One of the most common problems I experienced baseline request responding with a 403 error. This may happen if the account failed to log in properly or if another simultaneous test caused the session to ungracefully shutdown. Any valid response page with a 200 ok status will produce a false positive indication that the vulnerability exists.
To determine whether the scan was successful, review the history and requests, especially authenticated pages. Seeing many 500 or 40X responses may indicate the script failed to login properly. 30X redirect statuses may indicate similar issues as the session gets redirected to the landing or login pages.
Troubleshooting
Firefox has enabled some great new HTTP Strict Transport Security features associated with preventing Man in the Middle (MitM) exploitation or browsing to sites with invalid certificates. Unfortunately, Burp acting as a proxy, is essentially a MitM and uses an unsigned certificate.
There is a multistep process to work around this, but I have not been able to find a permanent solution. While it is possible to disable this feature within Firefox, I strongly advise not disabling security and instead find a way to work with the tool.
Start by selecting the box for Disable java sni extension under the Java SSL Options in the User Options then SSL tabs.
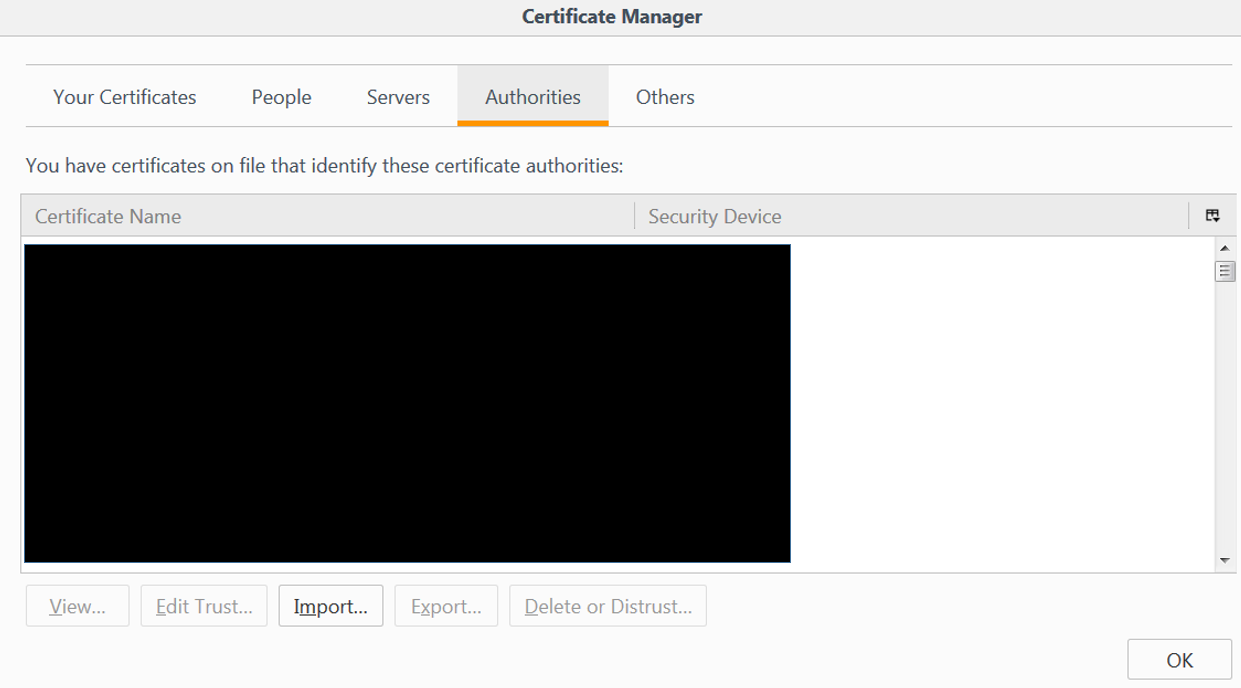
For Firefox, import Burp’s certificate using the Certificate Manager (under the settings at about:preferences#advanced). I have found this step needs to be performed with every Burp update.
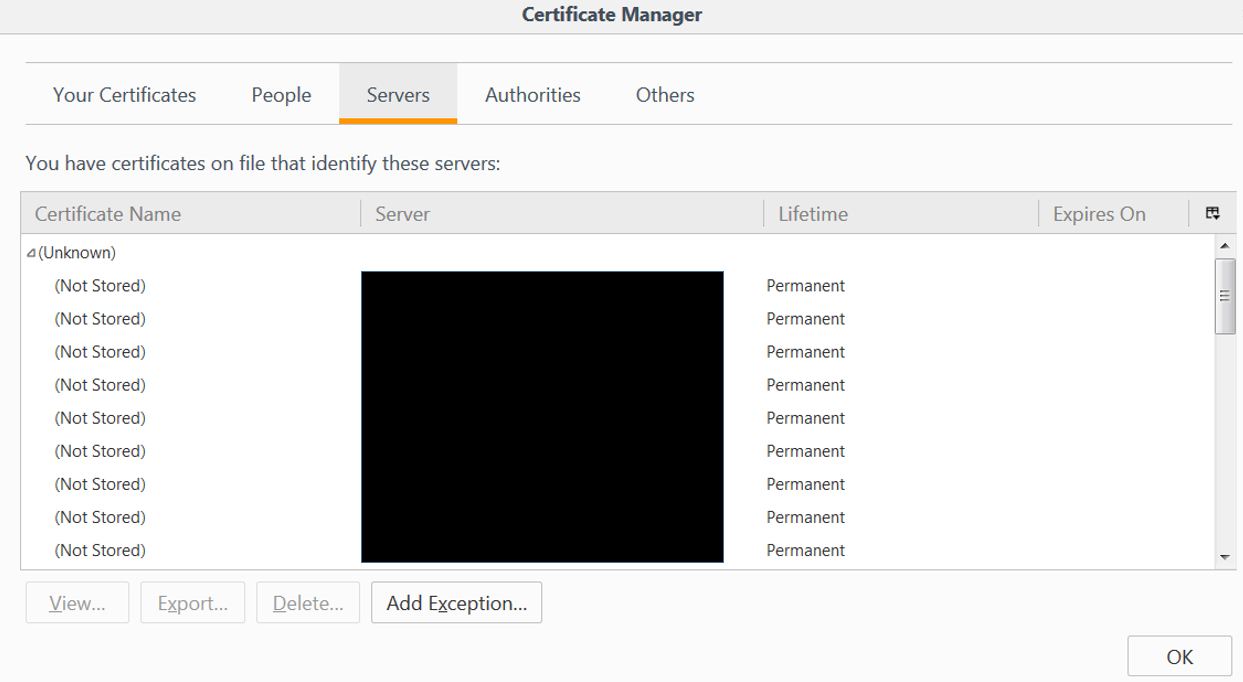
In addition to the Burp certificate, I have needed to create exceptions for every application I am testing, or any domain redirection which may occur. To manually add an exception go to the Servers tab in the Certificate Manager and select the Add Exceptions… button.
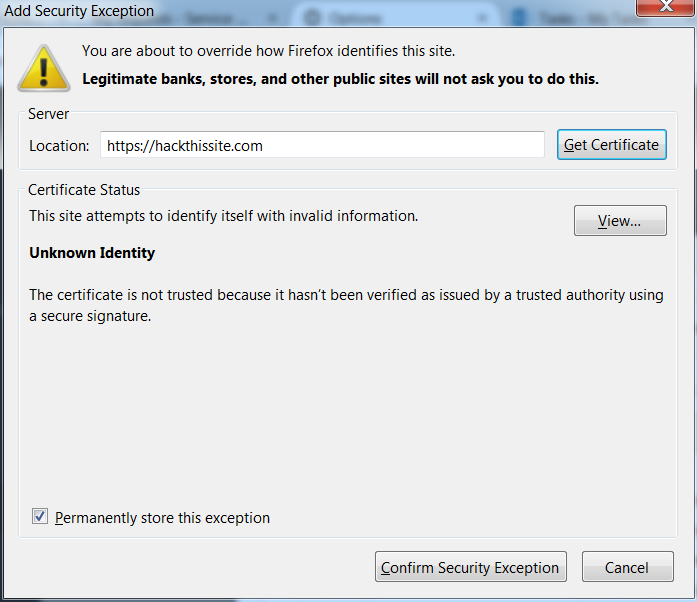
As Burp’s certificate is unsigned, the certificate presented by Burp as it proxies to hackthissite.com will be untrusted (although the certificate of hackthissite.com is perfectly fine). Note that you will be unable to permanently store this exception. Once pressed Confirm Security Exception, restart Firefox for the changes to be applied.
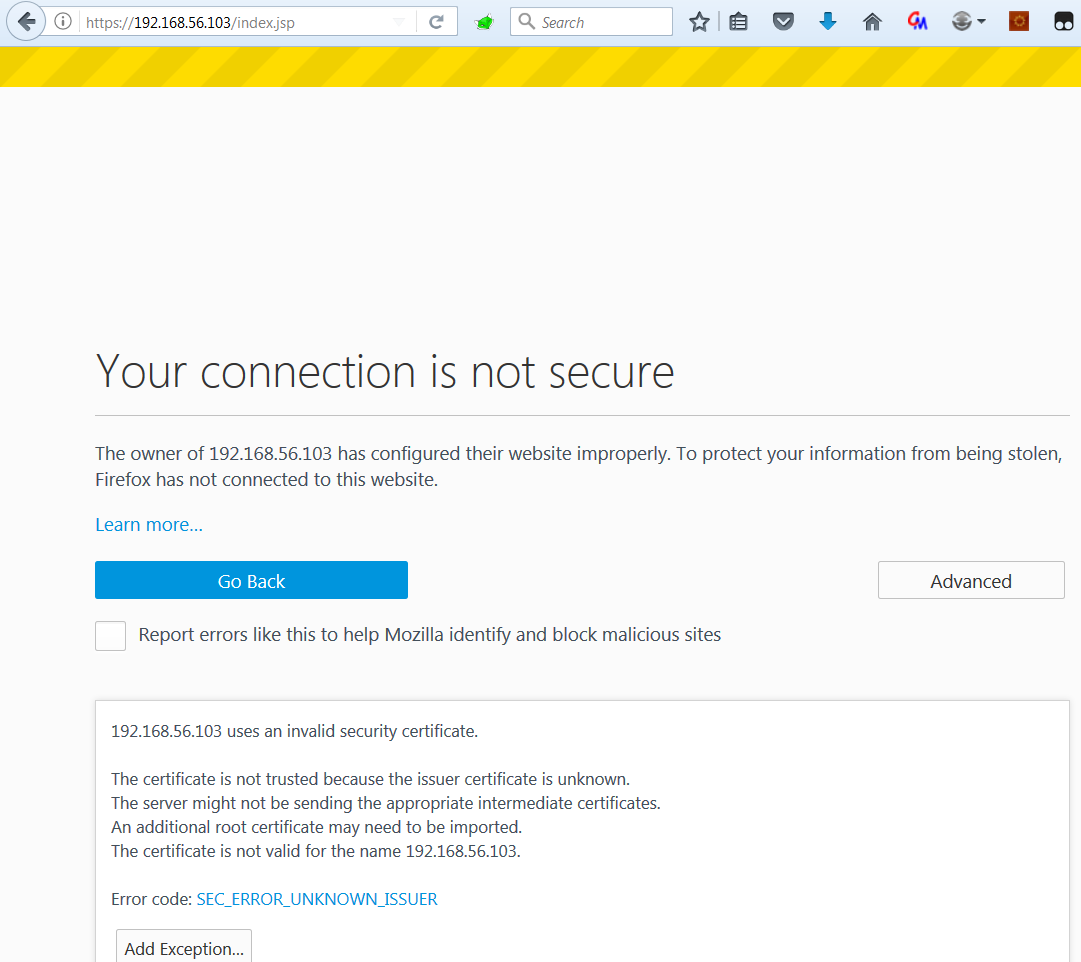
It may also be required to add the site’s exception when attempting to browse to is, as shown below.
These certificate issues did not occur when using Burp in conjunction with Google Chrome. Then, why use Firefox? I have found that Burp’s features provide better results when in conjunction with Firefox.
Permanent solutions, such as using Window’s certificate manager to add Burp’s or the target website’s certificate were also unsuccessful.
This concludes the three-part series on how to scan applications using Burp Suite Professional with macros to control authentication automatically.

