Introduction
As mobile native app testing tools continue to advance at a slow pace, mobile web app testing tools are advancing much quicker. There are several out there, including Sauce Labs and Testing Bot. These tools are great at taking browser based tests, and running them on emulated mobile devices, or even different desktop OS and browsers. Today we’ll go through some steps to record a test or test suite using SeleniumIDE, and have that test actually run on SauceLabs.
Pre-requisites
You’ll need to have maven and a java jdk (NOT just jre) installed on your system.
Setting Up Sauce
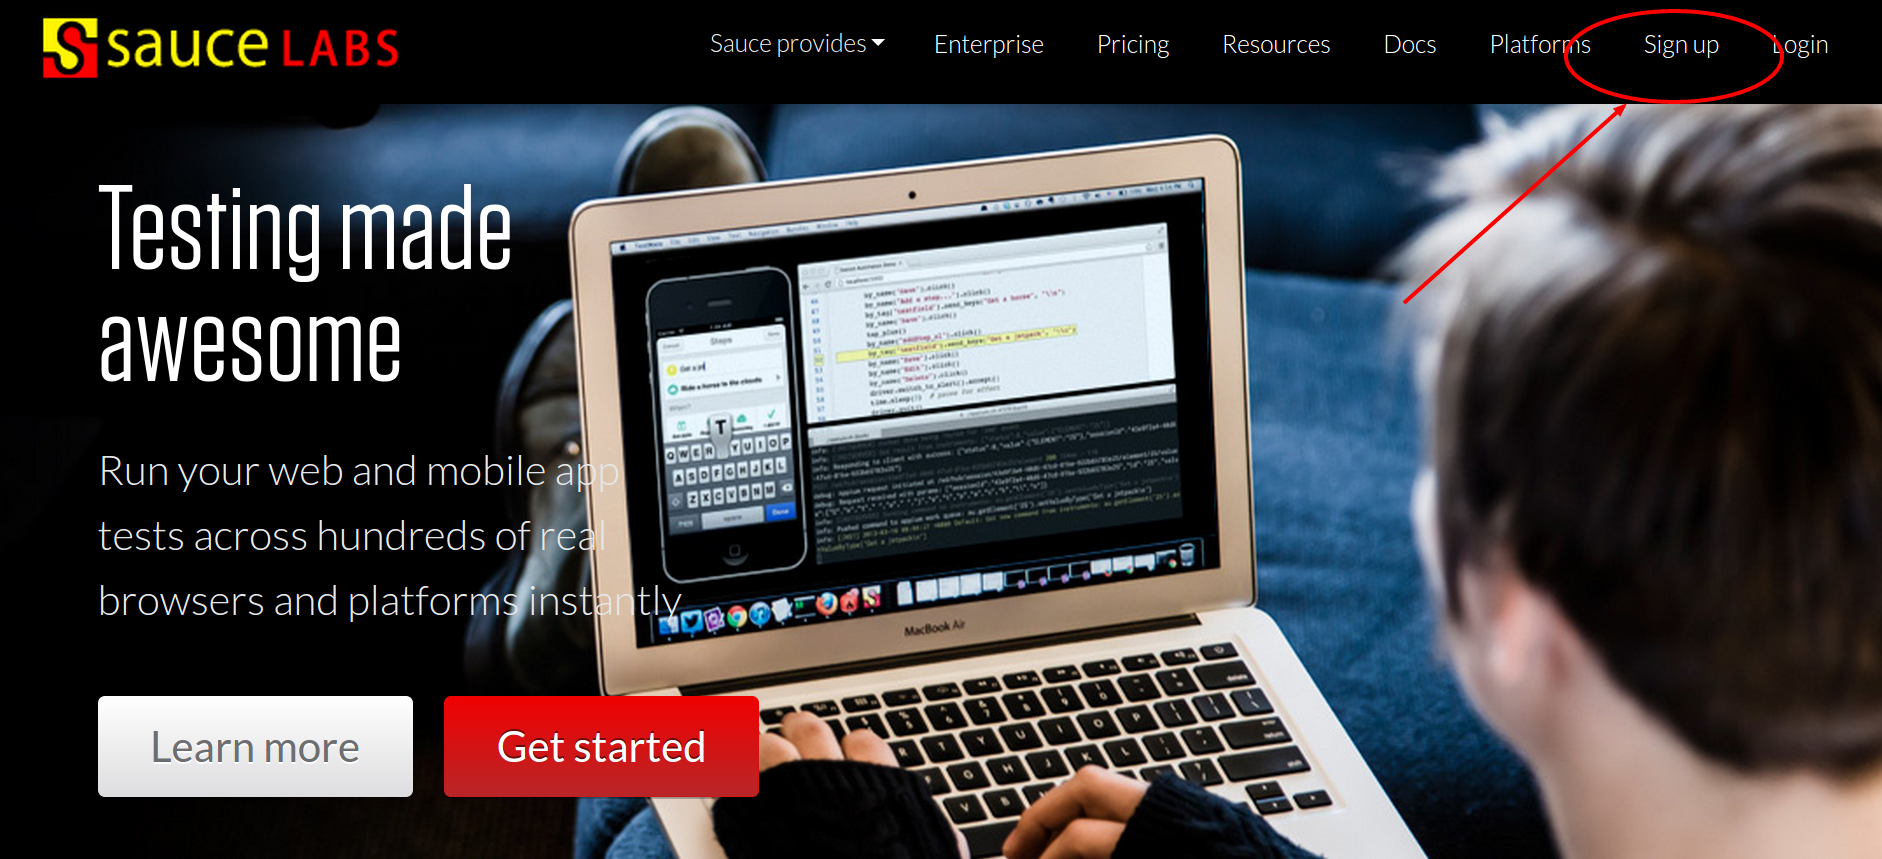
Navigate to https://saucelabs.com and click in the upper right hand corner on Sign Up.
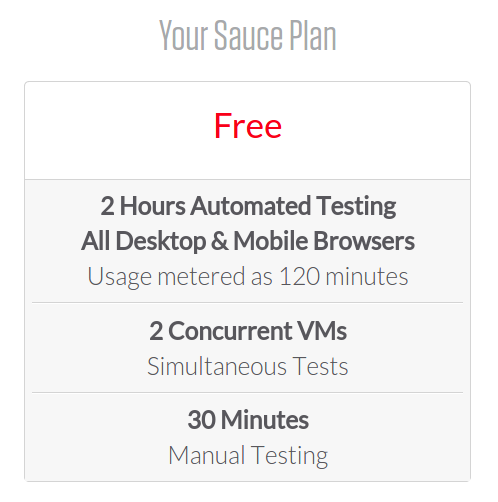
Fill out your information, and then click the ‘Create an Account’ button. This will give you several hours of run time within SauceLabs.
Selenium IDE
We’ll be relatively brief in this section, as the main meat of this section is to get these tests running within Sauce Labs. Launch Mozilla (install if needed), and open up Selenium IDE (Ctrl + Alt + S) (install if needed). Navigate to www.coveros.com or your other site of choice. In Selenium IDE, ensure Record is selected (it should be by default). Navigate to the ‘Solutions -> Application Development’ page. Navigate back to home page. Navigate to ‘Contact Us’ page. Enter in your name, your email, and some message; hit Send. Save the test; File menu -> Save (Ctrl + S). Playback the test; Actions menu -> Play current test (green single arrow).
Now let’s add an assert. Select the first blank line after all text steps. Enter assertText in the ‘Command’ input. Notice how the references tab shows a locator and pattern are needed. Enter css=p.email-sent in the ‘Target’ input. Enter Your email has been sent. in the ‘Value’ input. Re-run the test. This last step may have failed. Try putting in a wait for text present to fix this if needed. Save your test.
Setting up Sauce
Log into Sauce Labs, and click on ‘Getting Started’

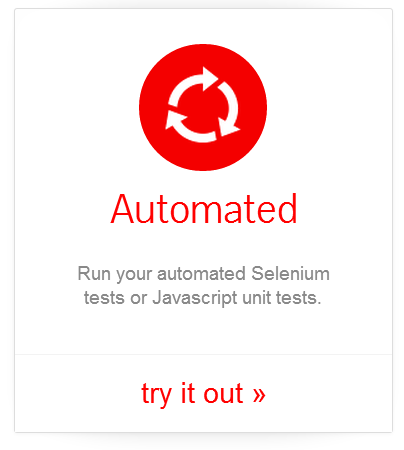
Select Automated Tests
Next we need to select your automated testing structure. Walking through these steps should be very simple, even code illiterate people should be able to muddle their way through it. For this example we will select Java. Copy JUnit Maven code snippet. Open a terminal window and paste in the Maven code. Hit enter to kick it off. You’ll notice lots of files downloading from Sauce. All of this setup is being done for you!
Navigate to the SauceDirectory.
cd sauce-project
If you want the files in a different directory, in the above Maven command change the -DartifactId value. Now we can execute our script. Launch the tests just by entering in the below command
mvn test
This launches Maven and will download the dependencies, compile the source code and run the tests. After a few moments you should see that JUnit has started. Go to the Saucelabs account and watch the selenium tests run. Within Sauce, you can replay the tests, look through the meta data (screenshots, etc) and look at pass failure indicators both locally and in SauceLabs.
Running Our Recorded Tests
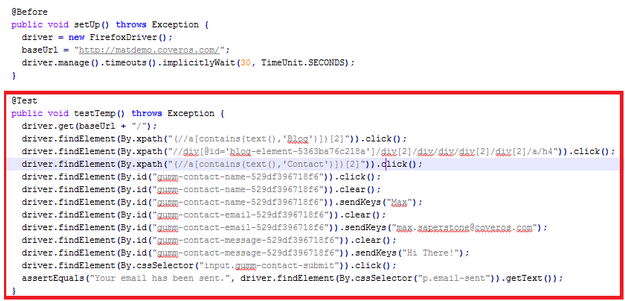
Now the real magic happens. First we need to export our Selenium tests. Click on File -> Export Test Case as -> Java / JUnit / Webdriver. It is important that we choose this option because we earlier chose JUnit within Sauce, and Sauce is using Webdriver.
Let’s update our Sauce Tests. Copy SampleSauceTest.java to MySauceTest.java and open MySauceTest.java. One of the fun things we can do it update/change our browsers used. Go to lines 110 and 111 and add in Chrome on Linux and an Android browser.
browsers.add(new String[]{"Linux", "34", "chrome"});browsers.add(new String[]{"Linux", "4.3", "android"});
We will need to add in our BaseURL. Copy the baseUrl line value from the exported test case and put it into the class MySauceTest around line 54.
String baseUrl = "http://www.coveros.com/";
Then we need to update our test names. Update the test capability name on line ~137.
capabilities.setCapability("name", "Selenium Exported Tests - Multiple Browsers");
Finally, we want to update our tests. Copy the @Test code block from our exported test case and paste it before the other @Test code blocks in MySauceTest.java.
Then we can remove all of our other @Test blocks. Finally, we can re-run our tests. Get back to the command line and run our Maven test command. If you experience issues, you may want to run the command using the clean directive.
mvn clean test
Wrap Up
And that should be it. Once you become comfortable executing these tests, you can start making them more complicated (and hopefully move from record and playback to directly writing tests). One thing that will become apparent the more you expand your cross-browser testing is that each browser will run differently. Sometimes you’ll see errors in some browsers that will run fine in others. This can be due to any number of reasons from server side rendering based on browser, to dynamic websites, to actual bugs within each browser.
In the future I will post similar steps to executing with TestingBot, and I’m curious what issues you are running into. Post some comments below, and I’ll address solving them in a future post.
