

DISCLAIMER: Only perform security testing on applications which you have explicit permission to do so.
Also, this post shows features for Burp Suite Professional, as Macros and scanning are not available without a license.
Identifying the Target
Many web applications are unique and apply complexity which defeats basic security scanning. This can come in the form of banner pages, redirection steps before or after authenticating, or CSRF tokens. Although these methods are often seamless for end users, automated scanners may be unable to progress. What this means is that without customizing a solution, the scanner is only capable of testing the landing page and will return 403 Forbidden (or similar) errors when attempting to spider or scan. This may cause the vulnerability scanner to be defeated by the process of traversing the application or by improperly applying the application’s security measures.
Burp Suite Professional is a proxy tool that can be used to overcome this challenge. It allows testers to create Macros that follow a series of steps to reach desired pages and provide input for various testing scenarios.
Initial Browser Setup – Inefficient or FoxyProxy
The first step in configuring Burp Suite or Burp Suite Pro is setting the browser to use Burp as a proxy. This can be done manually through the browser’s settings or quickly with a plugin. I prefer the FoxyProxy plugin as it allows me to shift between multiple security tools on separate ports conveniently. Depending on your preferences different steps are included below.
Chrome:
Open the Settings menu and select the Show advanced settings… link at the bottom of the page.
Click Change proxy settings…

Click the LAN settings button on the pop-up window and enter the values for Burp Proxy.
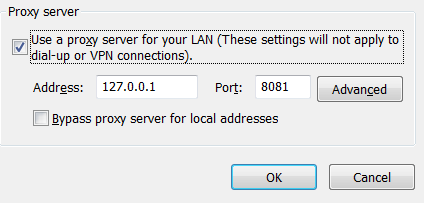
Press the OK button twice and the browser will now send all requests and responses through the Burp proxy.
Firefox:
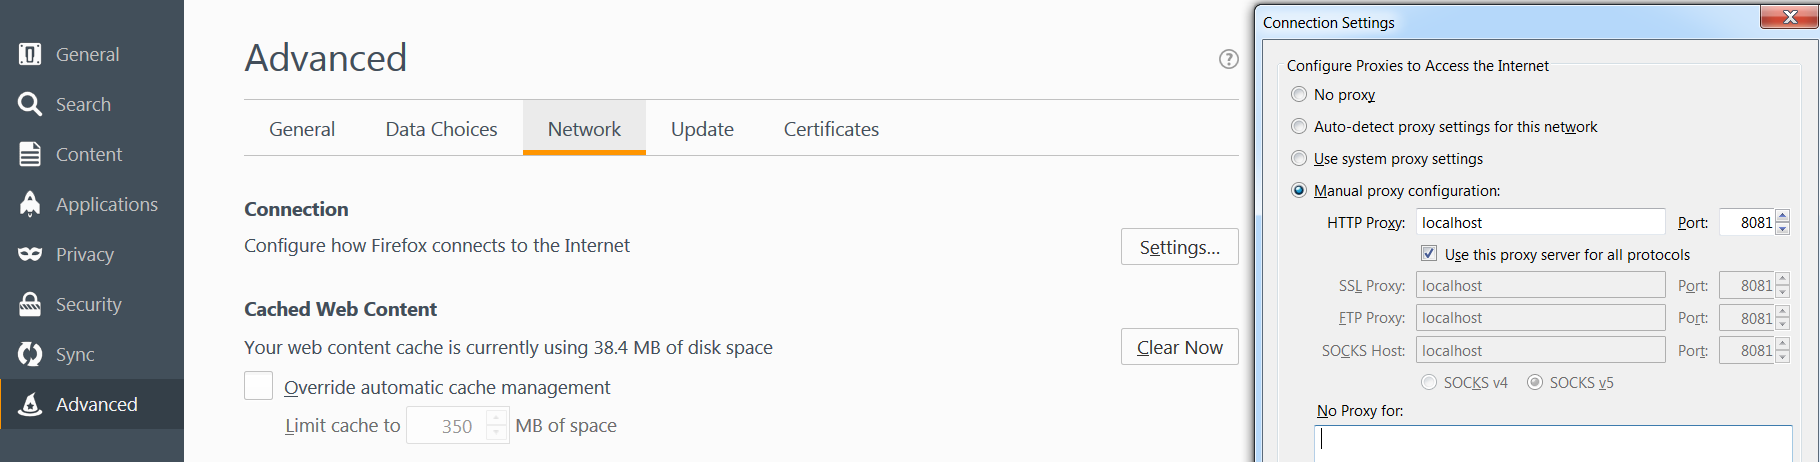
The process to add a proxy is similar for Firefox as it is for Chrome. Go to Tools in the main drop-down menu and select Options. Click the Advanced tab and then the Network tab. Click the Settings… button.
In the pop-up window enter the proxy information such as host and port. The host can either be an IP address or hostname. If the proxy is run locally, I tend to use localhost.
FoxyProxy: (Installed as a Firefox plugin)
Rather than dig in through the settings menus, I prefer to use a plugin available directly from the browser. Enter FoxyProxy.
The FoxyProxy icon (![]() ) is located to the right of the address bar:
) is located to the right of the address bar:
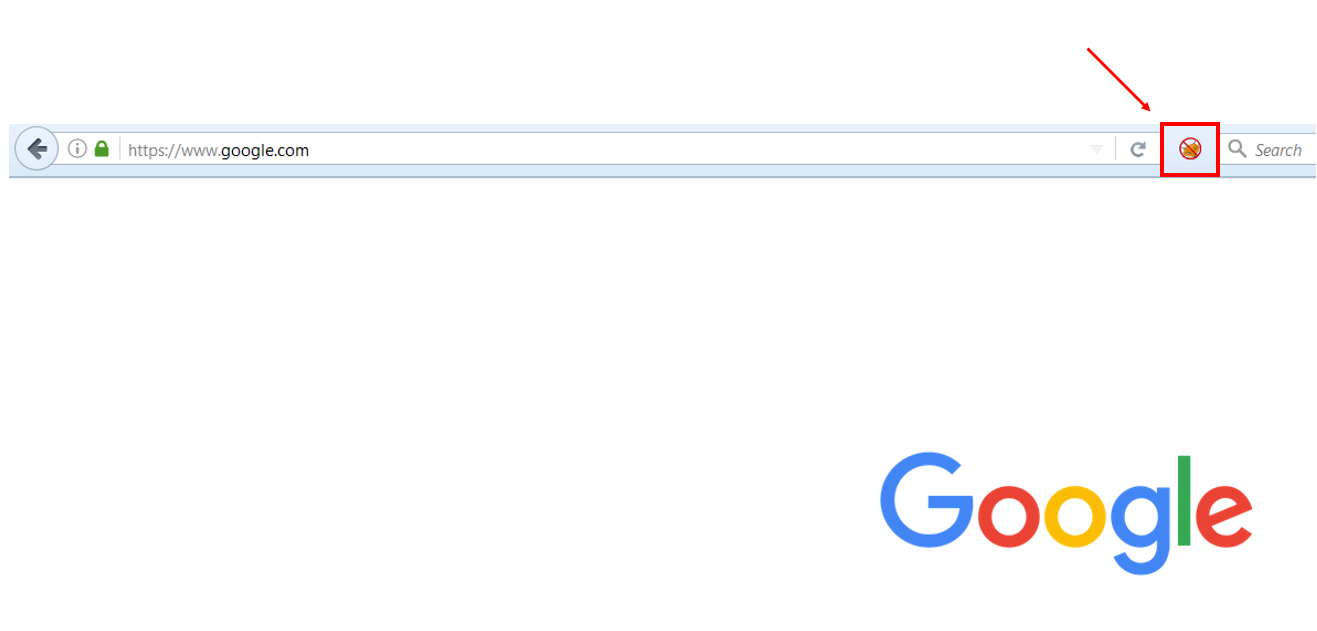
When it has a slash through it, no proxy is active and the browser is behaving normally. Left-click the icon to open a menu. Here, new proxies may be created or existing ones edited.
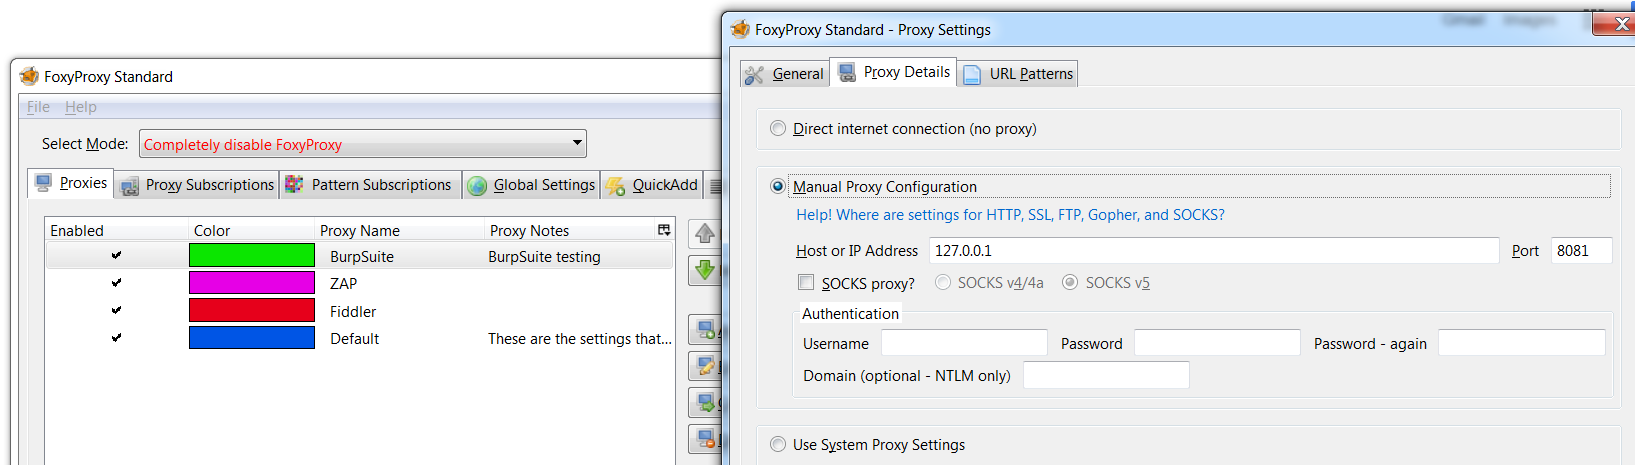
My favorite feature of FoxyProxy is that by clicking the icon with the middle mouse button, it cycles through the various proxies. This is a helpful feature if I am running multiple tests or want to quickly shutdown the proxy. Using different colors for each tool indicates which proxy is currently active.
Configuring Burp
With the browser configured, it’s time to open Burp. If no project currently exists for this effort, create a new project or use a Temporary project and press the Next button. I recommend creating a new one as it will save all of the results, identified web pages, and settings for use in the future. Unfortunately, the ability to save the project and session is only available in the professional version of Burp Suite.
After selecting the project, import any saved properties, if you so choose. I have found importing the properties from a template greatly helps in making the analysis more efficient as scope, ports, Project Options and User Options can be annoying to configure with each new project. Basically, importing the options eliminates the need to perform the steps below.
Press the Start Burp button to be taken to the Main page.
Here, many of Burps features can be directly viewed. Before digging into the tool itself, I recommend configuring it to prevent the data and results from being polluted.
Depending on the project and analysis, it may be best to ensure information is not being sent externally.
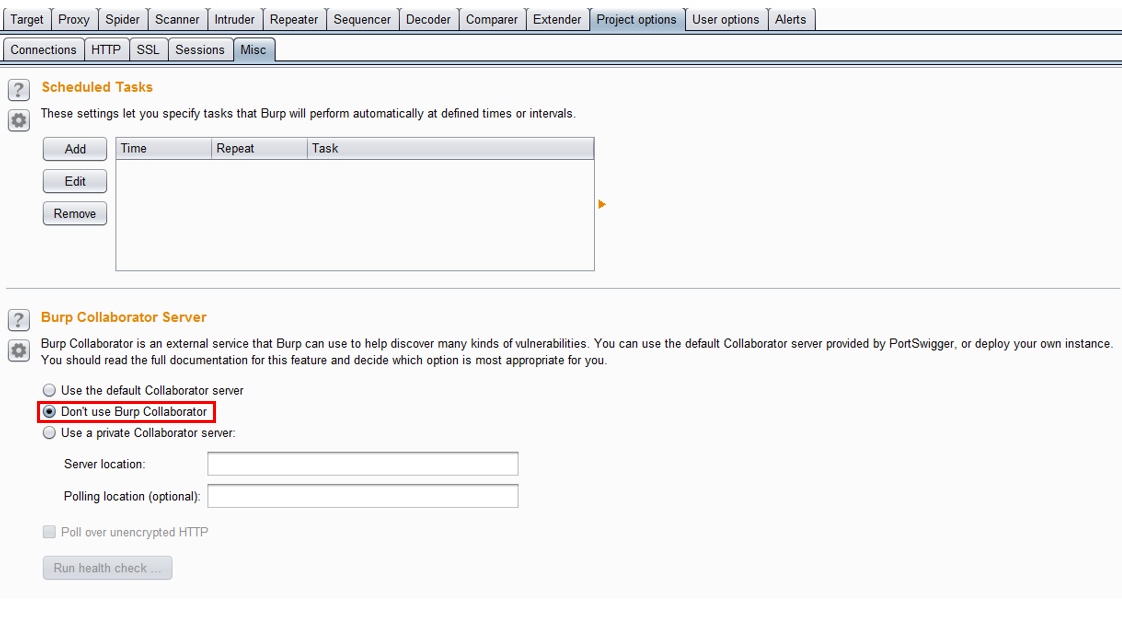
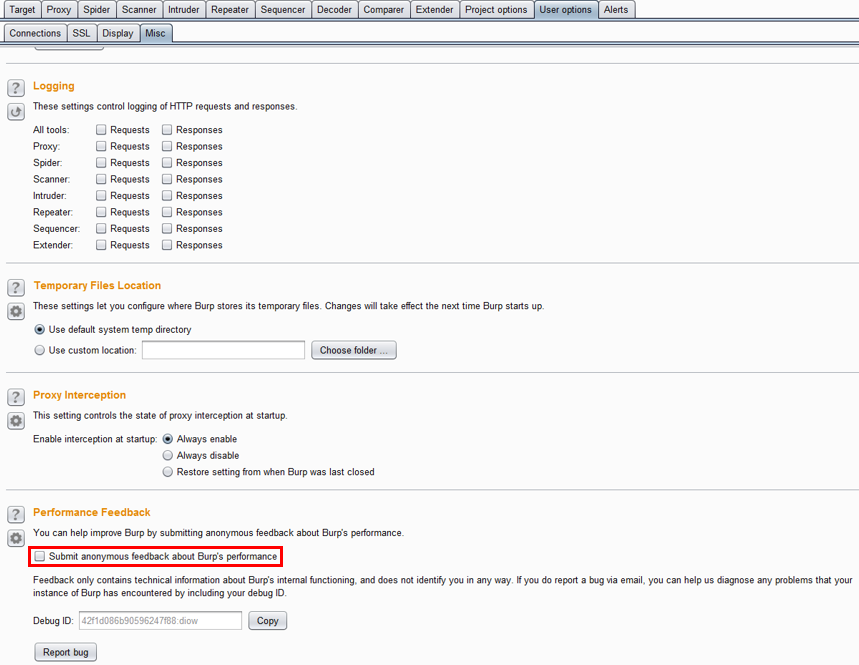
Similarly, to turn off sending anonymous data, go to the User Options tab, then the Misc tab and browse to the Performance Feedback section. Make sure “Submit anonymous feedback about Burp’s performance” is not checked. Although the data captures help improve the overall tool, depending on the client and target of analysis, it may be better to not send feedback.
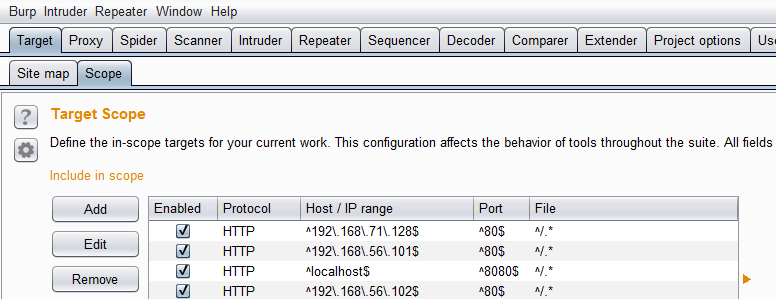
To prepare Burp to act as the proxy, set it to run on the correct port. This must match the values set in the previous step when configuring the browser. Go to the Target tab and then Scope Tab. Add the correct proxy:
Alternatively, the target can be added directly from the Target > Site map tab:
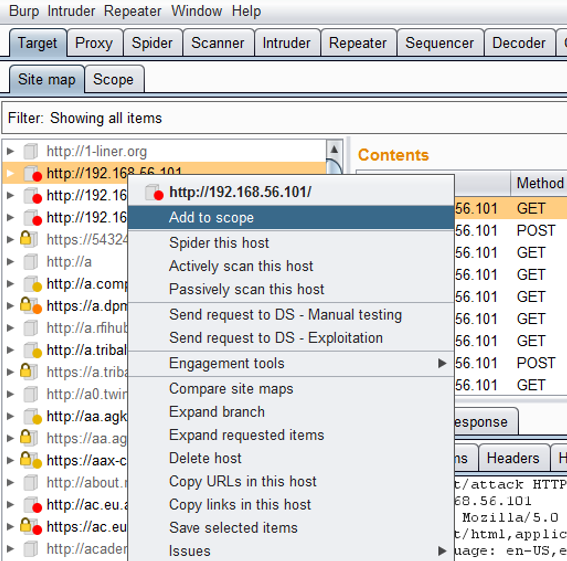
Simply browse to the intended page and allow it to be captured by Burp. When the site appears in the Site map tab, right-click it and select Add to scope.
The number of sites displayed and the requests intercepted can get unruly. I have accidentally used the browser while performing a scan and every page was added to the Site map. If passive vulnerability detection is active, then the findings from the browsed pages are mingled with the intended targets. You will never be more aware of how often websites refresh or send new data than when you are intercepting all traffic.
That is why I prefer to only show in scope sites within the Site map tab and only intercept packets that are within scope. The first option may be set by clicking the Filter under Site map tab.
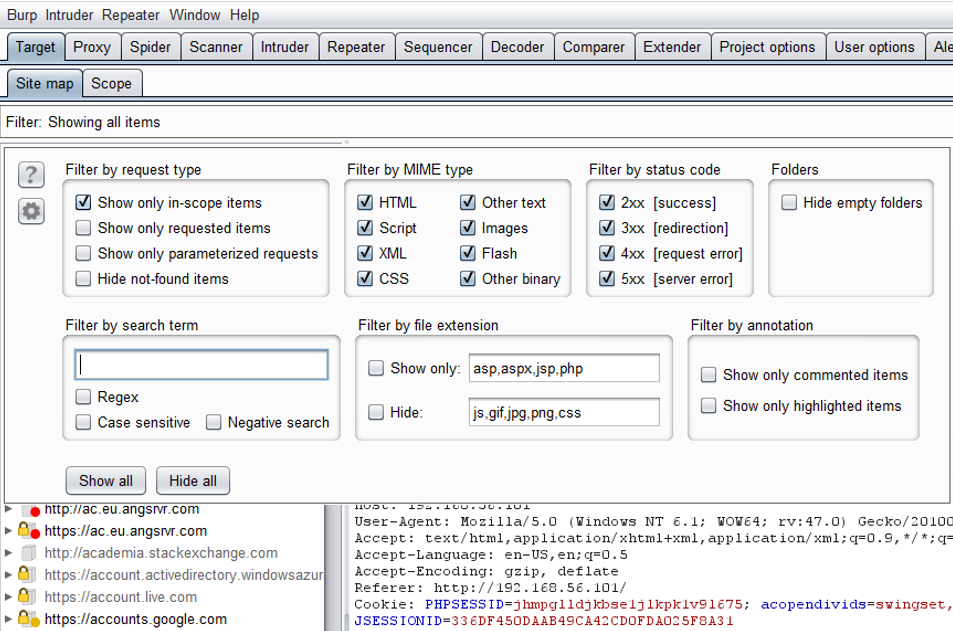
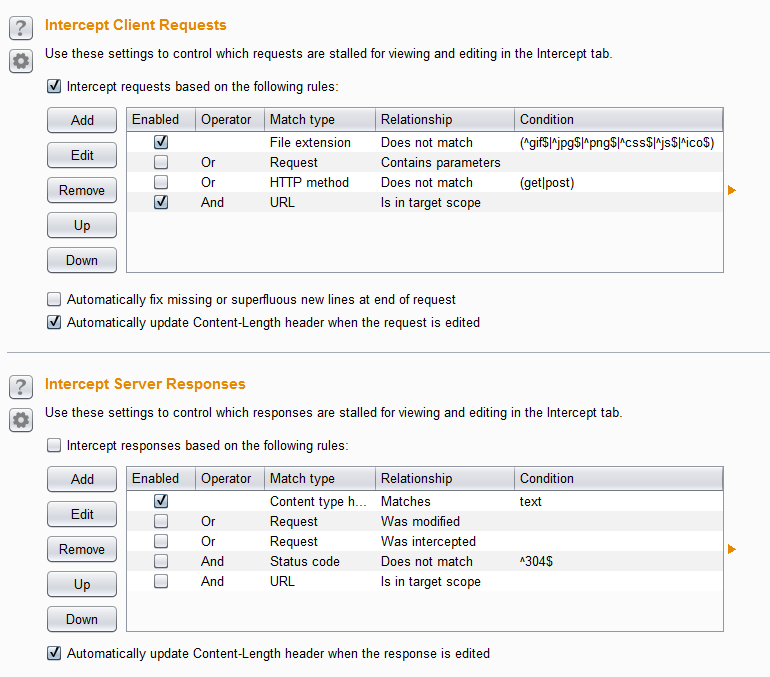
When the Intercept is on button is depressed, every request will be sent through the Burp proxy and will require you to manually press the forward or drop buttons to progress. I like to limit the amount of work needed by setting the proxy to only intercept pages within scope. This can be done from the Proxy > Options tab, as shown below. According to the rules set, any page that is not a picture, JavaScript, or formatting page will be intercepted by Burp, so long as it is within the defined scope.
Using these settings, only requests are being sent to the proxy, but by selecting the Intercept responses based on the following rules option, responses may be analyzed in transit as well.
To confirm Burp has been properly setup, manually move through the application and attempt to intercept and manipulate some of the requests. If the Intercept is on button is selected and no packets are appearing in the Proxy > Intercept tab, ensure both Burp and the browser of choice are set to use the same ports.
Some of the new browser security features may block Burp as it uses a self-signed certificate. To import Burp’s certificate into the browser, use the recommended steps at this link: https://portswigger.net/burp/help/proxy_options_installingCAcert.html
In my case, those steps still did not work, so I used Burp to intercept packets and manually accept Firefox’s popup detailing the self-signed certificate.
With Burp’s overall configuration set, the next steps will be to customize the tool to move through the application. This may include traversing pages in a specific or unique authentication steps. These will be detailed in the next part of the blog series (Hint the tool does most of the work for you).

