

DISCLAIMER: Only perform security testing on applications which you have explicit permission to do so.
Also, this post shows features for Burp Suite Professional. Specifically, the macros and scanning are not available without a license.
In the previous blog post, I detailed configuring Burp Suite for usage in security testing. Please reference the material in part 1 of my blog series if you are new to using Burp.
Using the steps included in this post, Burp will make extensive requests and repeatedly attack the application. This will trigger alerts for most monitoring tools. Depending on how Burp is connecting to the application, performing a scan may appear as an external attack. I cannot stress this point enough: prior to running an active scan, communicate with the proper channels and have it explicitly written what is within scope of any security effort. Do not test outside those boundaries.
Configuring the Session
Applications often have core functionality residing behind an authentication step. In more complex applications, the authentication mechanism may be handled by an entirely different domain. In these cases, attempting to browse to a target, redirects the user’s session to another site for login, then redirects to the intended application upon successful authentication. I have found several other security scanners unable to handle this complex logic, while Burp has succeeded.
Burp must be taught how to authenticate using the proper steps. This may include accepting responses on a banner page, allowing redirection outside the target domain, or extracting tokens from various sources (hidden variables, POST parameters, cookies…).
No matter the customized process, I prefer to write a minimum of 2 macros when performing security testing with Burp. The first macro includes all of the steps needed to authenticate. The second macro attempts to browse to an authenticated page, usually the landing page for authenticated users or a “My Profile” page. This allows Burp to periodically check whether it is still authenticated. In the event Burp cannot reach this page for authenticated users, the tool assumes the session has been logged out and attempts to use the first macro to log in.
Various other macros can be created to test specific features within the application or progress through the application using an explicitly defined path.
Setting up the login and verification macros
The first step to using Burp is to configure it to act as the proxy for your browser, such that traffic to the application gets recorded in the HTTP History tab under the Proxy tab. Please refer to part 1 of this blog series for a step-by-step walkthrough on setting Burp as a proxy.
Before recording the login steps, I find it helps to clear any legacy information. Within the HTTP History tab, right click in the URL list and select “Clear history.”
Within the browser, go to the application’s login page and progress through any redirects, banner pages, or prompt screens as expected. These should all be recorded in the HTTP History tab.
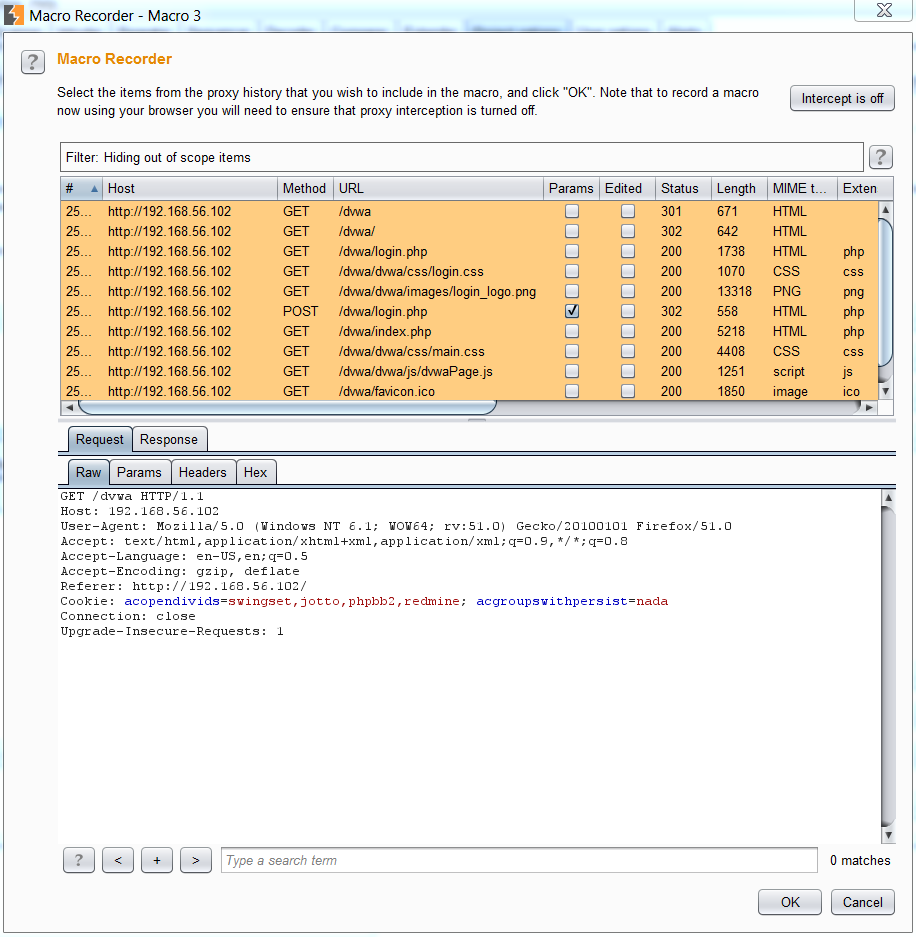
In Burp, go to the Project options, then Sessions tabs. Under the Macros section at the bottom of the page, click Add. This will bring up the popup menu for the Macro Recorder. Highlight all of the requests to be included in the login script. Each of these requests will be made when the macro is run. Some may be excessive, so I have found my scans run smoother when I exclude unnecessary requests, such as css, calls not associated with login, or personal data about the user.
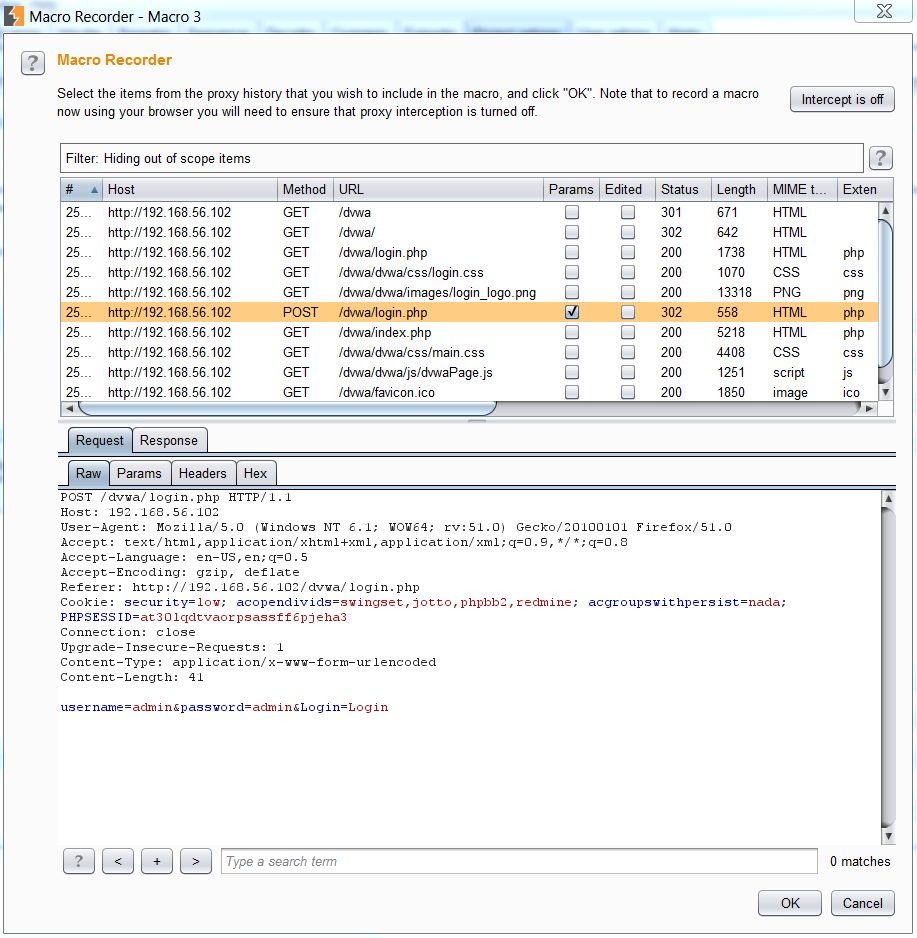
 The hardcoded password in the POST body will be stored in cleartext in the macro script and sent with every login request. Separate accounts should be used when performing security testing. These accounts should not have any pii associated with them.
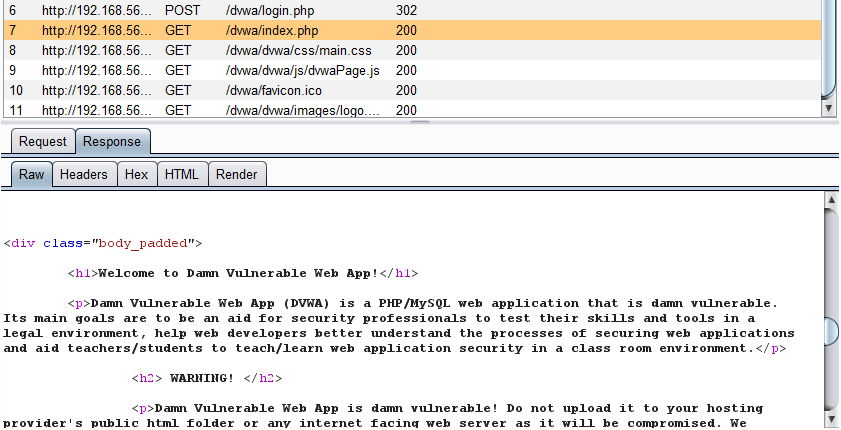
 When satisfied with the highlighted section, press the OK button to go to the Macro Editor page. To ensure the macro is running correctly, press the Test macro button and check the HTTP status codes (ex: 200 OK) and responses. For the redirection pages, it may be expected to receive a 30X status.
For example, the macro I recorded redirected me once credentials were provided (/dvwa/login.php) and sent the session to the authenticated user’s page (/dvwa/index.php). The Welcome page is only included in the response for authenticated users. When satisfied with the macro, click the OK button.
 As mentioned, I also create a macro to check that the current session is logged in by making a single request to the authenticated page.
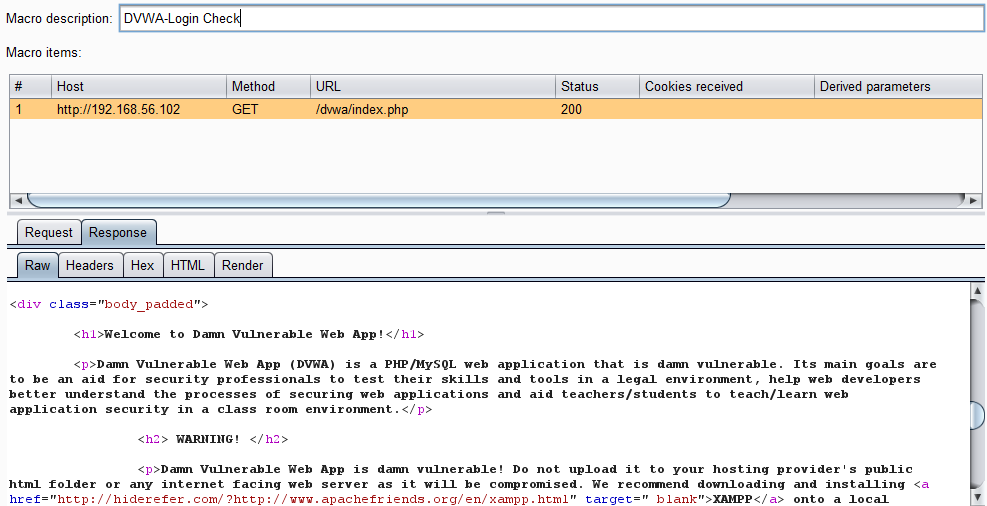 If the page is returned and the session is not redirected to another page, such as the login page, then it can be assumed the session is still valid. This is an annoyingly common problem with security scanners as extensive automated requests may invalidate or lock out the user’s session. This can make a completed scan’s results useless as tests are performed as an unauthenticated user and the security exploit attempts fail without interacting properly with the application.
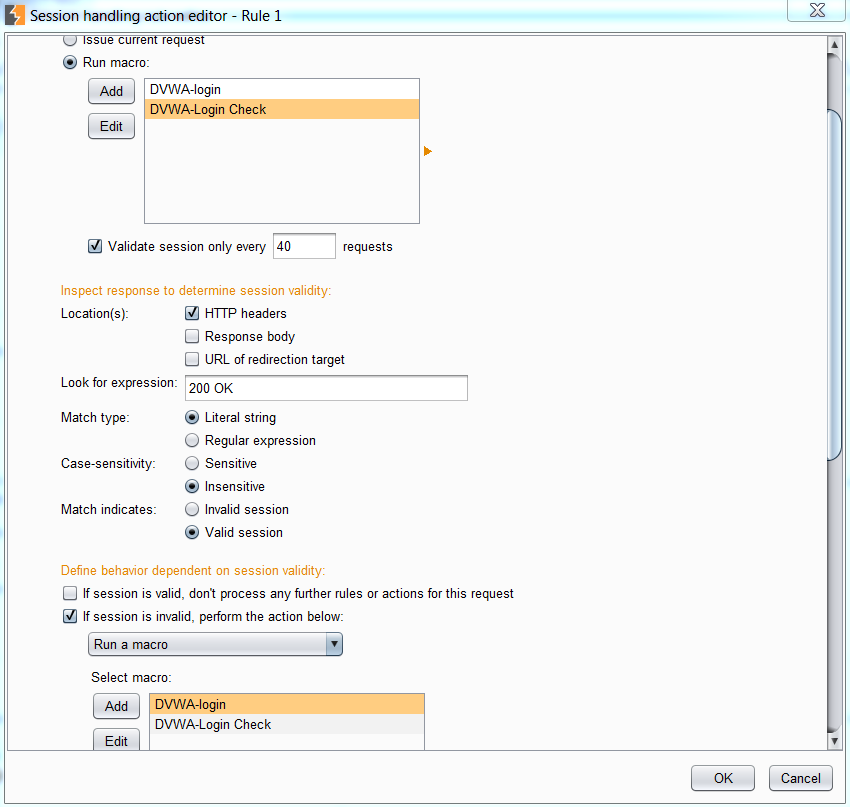
To combine and apply these macros, click the Add button under the Session Handling Rules and then the Add button under Rule Actions in the Session handling rule editor popup screen. Select “check session is valid” from the dropdown menu that appears.
Select the Run macro radio button and choose the recorded macro for checking the user’s session is authenticated. In my case, this was the DVWA-Login Check macro.
I find that checking a session is valid every 10 requests to be wasteful so I increase this number to 40.
In testing the application, I know that the login check macro should return a 200 OK HTTP header. If any other value is returned, I can assume the session is invalid and the account has been logged out. Burp should then run the login macro as shown in the settings below:
 When satisfied with the settings, press OK to return to the Session handling rule editor. I recommend going to the Scope tab and selecting the Use suite scope [defined in Target tab] option. Then press OK to create apply the macros.
Updating the macro
In the event the application changes or the macro needs to be updated, browse to Project Options tab then the Sessions Tab and review the macros at the bottom of the tab. Select the macro to be updated and click the “Edit” button.
This brings up the Macro Editor window. Here the requests in the macro are defined. To update these, select the “Re-record macro” button. This will overwrite the current macro, so it may be a good idea to duplicate a working macro to ensure no critical functions are lost.
Select the desired request in the Macro Recorder window. You may be able to add to the list of available requests by triggering the “Intercept is on” button and browsing to the desired sites.
Troubleshooting macros
For advanced troubleshooting use the “Open sessions tracer” button under the Section Handling rules in the Projection options and Sessions tab. This will show the request series during a spider or scan to verify that requests are within valid sessions.
Join me next month with the concluding blog post to learn how to scan the application and general troubleshooting for Burp.


One thought to “Security Scanning in Non-Standard Applications: Creating Macros”
Pingback: Security Scanning in Non-Standard Applications with Burp Macros: Performing the Scan